Plan Design > Quota
You can use the Quotas area to set up attainment goals by months, quarters, and years. Creating quotas is the first step in plan design. Quota values can be assigned at the plan (default), title, or position levels. Quota values are used in commission rules and the quota name and value per period appear on user reports.
important: The period fields shown are defined in Setup > Calendar, for the selected
year.
note: Business group administrators can only search, view, create, modify, upload, download, audit, and delete quotas (connected to a position) that are associated with business groups to which the administrators themselves are assigned. However, any administrator can edit Plan and Title assignments and their associated values.
Screen
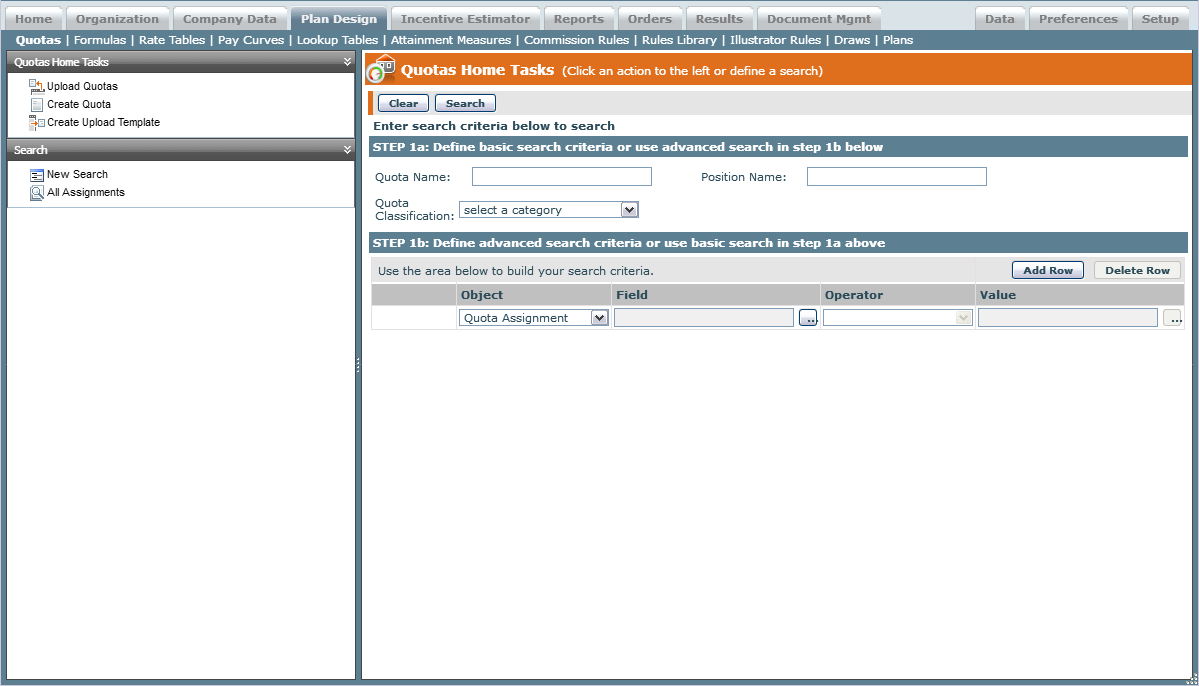 Quotas Screen
All Fields
The following table describes the information you can specify when managing quotas:
| Field | Description |
|---|---|
| Name | The name for the quota. The maximum length is 64 characters. Quota names need to be unique within a calendar year. |
| Quota Period | The incentive year during which the quota is valid. |
| Quota Value | The yearly quota value of the quota that is to be attained for the Quota Period. When a value is entered, the quota value per period is automatically calculated and displayed in each period field. |
| Quota Classification | The category of the quota. |
| Quota Value UnitType | This is the unit type in which the quota is measured (for example, in currency or quantity). |
| Description | The description of the quota. |
| Tags | The tags associated with the quota (as defined in the Setup > Tags area). |
How to…
This section describes how to manage quotas.
Search Quotas
1. Click the Plan Design tab, then click Quotas in the secondary menu. The Quotas Home screen appears.
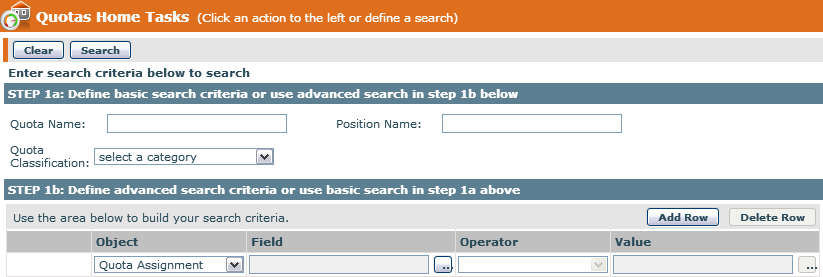
Quotas Home Screen
From the Quotas Search Results or Quotas Create & Edit screens, you can start a new search by clicking the New Search button.
Step 1a: Define basic search criteria
2. Type or select values in the Quota Name, Quota Classification or Position Name fields.
Step 2b: (Optional) Define advanced search criteria
3. Click the ![]() button next to the Field text box, select a field for the search criteria, and click OK.
button next to the Field text box, select a field for the search criteria, and click OK.
4. Choose an Operator from the drop-down list.
5. Type or choose a value in the Value field.
6. Click Add Row to add to the search criteria; click Delete Row to remove the last row in the search criteria list.
7. Click Search. Alternatively, click Clear to clear the search form.
note: The search matches substrings and is not case sensitive. This means that searching for “ar” using the Quota Name field matches Hardware Quota 2016 and Software Quota 2016, for example.
8. (Optional) Click the All Assignments button. All quota assignments appear in the Quotas Search Results area.
note: Refer to the Xactly Concepts Guide for examples of how to perform advanced searches.
Create a Quota
1. Click the Create Quota button. The Quotas Create & Edit screen appears.
2. In the Name* field, type a name for the quota.
3. Select a Quota Period* from the drop-down list. The quota period is the incentive year during which the quota is valid.
The period headers are dependent on the selected period. For example, if YEAR- 2016 is selected, the period headers lower on the screen show YEAR-2016, QTR-1- 2016, and so on.
4. Enter a value in the Quota Value* field. This is the yearly quota value of the quota that is to be attained for the Quota Period.
When you enter a value, the quota value per period is automatically calculated and displayed in each period field. You can modify these values if you need a different quota distribution.
5. In the Quota Classification* field, choose the classification of the quota using the drop-down list.
You can choose from among the following options:
| Category | Classification | Description |
|---|---|---|
| Contracts and Bookings | Annual Contract Value | Measures the total dollar value of a contract for one year of a contract’s total term. |
| Average Contract Value | Measures the total dollar value of a contract divided by the contract term. | |
| Bookings | Measures the total dollar value of all new sales made and may include on the first year of a multi-year agreement. | |
| Hardware | Measures the total dollar value of hardware sold. | |
| Licenses | Measures the total number of software licenses sold. | |
| Multi-year Contract | Measures the total dollar value of a multi-year contract. | |
| Software | Measures the total dollar value of software sold. | |
| Total Contract Value | Measures the total dollar value of a contract for the duration of the contract term. | |
| Customers and Products | Customer Mix | Measures a specific goal related to the mix of customers in a particular sales portfolio. |
| Product Mix | Measures a specific goal related to the mix of products sold to customers. | |
| Retention/Churn | Measures a specific goal related to retain customers or prevent customer churn. | |
| Up-sell/ Cross-sell | Measures a specific goal for selling up to a particular set of products or services, or selling across particular product lines or services. | |
| Miscellaneous | MBO | A measure defined by a Management by Objectives (MBO) construct or approach. |
| Other | Allows you to specify a custom quota classification using a text box that appears. | |
| Revenue, Billings, and Profitability | Billings/Invoice | Measures the total dollar amount that has been billed or invoiced to a customer. |
| Growth/ Add-on | Measures a specific goal (usually in percentage form) of revenue or sales growth performance. Examples include Revenue Growth, Sales Growth, and Add-on Sales. | |
| New Business/New Customer | Measures the total dollar value of bookings attributed to new contracts and/or new customers. | |
| Profit/Margin | Measures a specific goal for profit or margin performance. Examples include Margin, Gross Margin, Net Margin, Profit, and EBITDA. | |
| Renewal/Existing Business | Measures the total dollar value of bookings attributed to existing contracts and/or existing customers. | |
| Revenue | Measures the total dollar value that can be recognized according to a company’s accounting policy. Examples include Sales, Revenue, Annual Recurring Revenue (ARR), and Monthly Recurring Revenue (MRR). | |
| Services | Measures the total dollar value of services provided to a customer and could include training, support, maintenance, or professional services. | |
| Sales Process | Deals Closed | Measures the amount of sales deals closed as defined by sales management and/or sales operations. |
| Leads/Opportunities | Measures the amount of sales leads or opportunities achieved as defined by sales management and/or sales operations. |
6. Select a quota value UnitType* from the drop-down list.
This is the unit type that was created in Setup > Type Codes, and in which the quota is measured (for example, in currency or quantity).
7. (Optional) Enter a description of the quota in the Description field.
8. (Optional) In the Tags field, add or remove the tags associated with the quota.
Do the following:
• To add or remove tags, click the Select button. The Select General Tags dialog appears.
Select the tags you want to associate with the quota and click the Apply Selected Tags to Quota button. You can also find specific tags (using the Find Tags search box), or create and upload new tags, as required.
note: You can associate up to 50 tags with a quota.
For more information about managing tags, see “Tags” on page 101.
• To remove all tags associated with the quota, click the Remove All button. Exercise caution when removing all associated tags because this action does not ask for confirmation.
9. In Step 2, modify the default values that appear under the year, quarters, and months. The fields cannot be left blank; at minimum, a zero (0) must be entered in the field.
10. In Step 3, enter any custom field information, if available.
11. Click the Save > Save button to save the new quota, or click the Save > Save and create quota button to save the quota and display the form to add a new quota.
note: Any quota value (month, quarter, or year) can be used on a commission rule or in formulas. Not all Quota values entered must be used to calculate commissions.
Alternatively, you can save the Quota and add a Title or a Position.
To save the Quota and add a Title:
a. (Optional) Click the Save > Save and add title button to save the quota and select a title.
The Select a Title screen appears. The screen contains a list of Titles that were created in Organization >Titles.
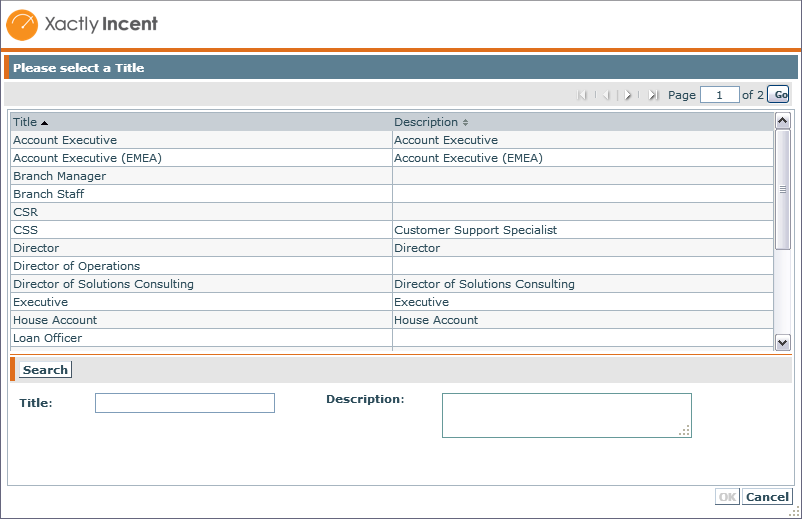 Select a Title Screen
b. Select a title and click the OK button.
This assigns a single quota amount to all people with a particular title. Note that the Type field of quota changes to Title and the Name field assumes the name of the title.
c. Click the Save > Save button to save the title assignment.
d. (Optional) Click All Assignments to display the list of quota assignments, including the newly-created quota.
To save the Quota and add a Position:
a. (Optional) Click the Save > Save and add position button to save the quota and select a position.
The Select a Position screen appears. The screen contains a list of Positions that were created in Organization > Hierarchy.
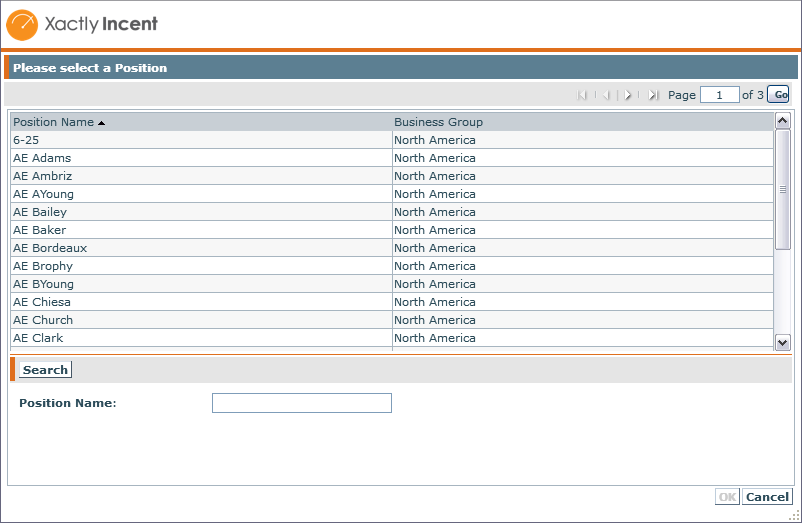 Select a Position Screen
b. Select a position and click the OK button.
This assigns a specific quota amount to an individual associated with a specific position. Note that the Type field of quota changes to Position and the Name, Person Name, and Unit Type fields assume the corresponding values of the
position.
c. Click the Save > Save button to save the position assignment.
d. (Optional) Click All Assignments to display the list of quota assignments, including the newly-created quota.
note: By Default (Plan)—If the person’s Title or Position does not exist on a quota, the rule uses the default value.
By Title—If the person’s Position does not exist on a quota, the rule uses the Title value and overrides the default value.
By Position—If a person’s Position is on the quota, the rule uses the Position value and overrides the Title and default values.
To save the Quota and add a version:
a. (Optional) Click the Save > Save and add version button to save the Quota and add a version.
The Select an effective start period for the new version screen appears.
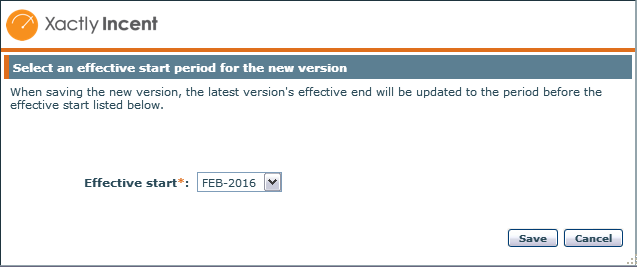 Select an Effective Start Period for the New Version Screen
b. Choose an effective start period from the drop-down list and click the Save button.
c. Click the Save > Save button to save the new version.
d. (Optional) Click All Assignments to display the list of quota assignments, including the newly-created Quota.
Manage Quotas
You can edit Quotas, add or delete Titles and Positions, determine where a Quota is being used, display the audit trail for a Quota, and delete Quotas and assignments.
Edit an Assignment
note: After saving, you cannot change the Name, Quota Period, or Unit Type.
1. Select a Quota from the list in the Quotas Search Results area.
2. Click the Edit Assignment button.
Alternatively, you can double-click a Quota in the Quotas Search Results area.
3. Edit the fields that require changes.
note: You can add additional Titles and Positions.
4. Click the Save > Save button. Click All Assignments to display the list of quotas, including the edited quota.
Add a Title
1. Double-click a Quota in the Quotas Search Results area.
2. Click the Add Title button.
The Select a Title screen appears. The screen contains a list of Titles that were created in Organization > Titles.
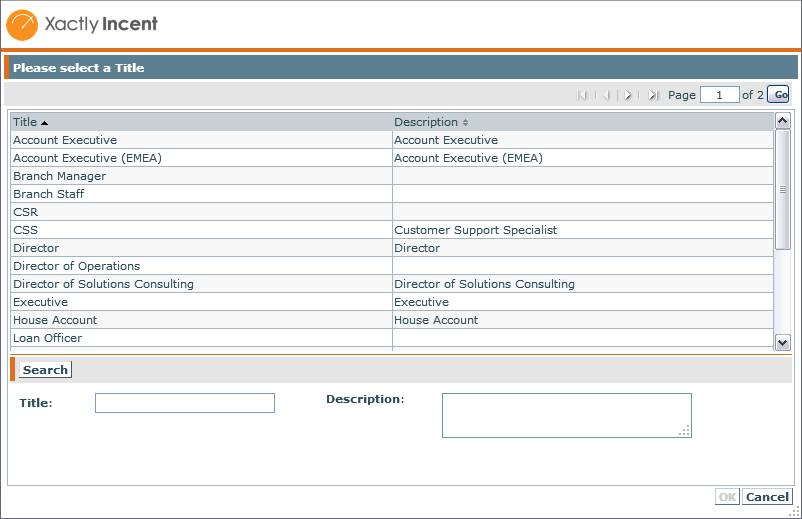 Select a Title Screen
3. Select a title and click the OK button.
This assigns a single quota amount to all people with a particular title. Note that the Type field of quota changes to Title and the Name field assumes the name of the title.
4. (Optional) If the Quota Classification field is not set, choose a classification using the drop-down list.
After setting the quota classification, you can only change the setting for the plan (you cannot change the setting in title or position assignments).
5. Click the Save > Save button to save the title assignment.
Add a Position
1. Double-click a Quota from the list in the Quotas Search Results area.
2. Click the Add Position button.
The Select a Position screen appears. The screen contains a list of Positions that were created in Organization > Hierarchy.
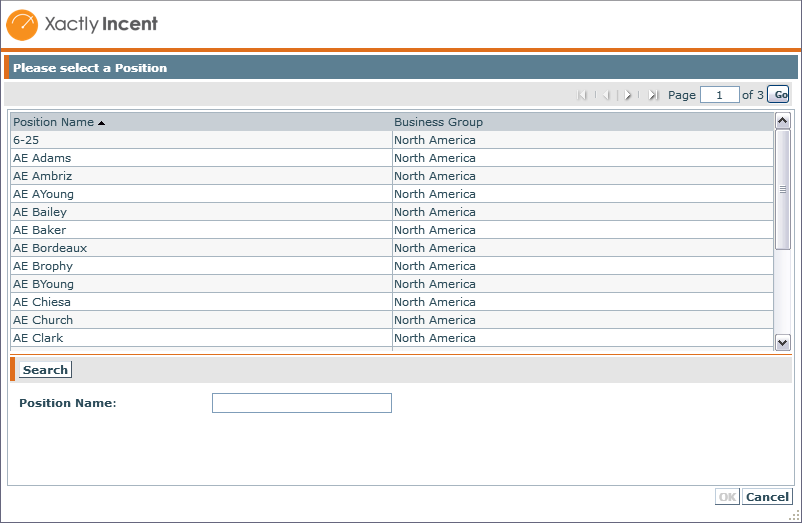 Select a Position Screen
3. Select a position and click the OK button.
This assigns a specific quota amount to an individual associated with a specific position. Note that the Type field of quota changes to Position and the Name, Person Name, and Unit Type fields assume the corresponding values of the position.
4. (Optional) If the Quota Classification field is not set, choose a classification using the drop-down list.
After setting the quota classification, you can only change the setting for the plan (you cannot change the setting in title or position assignments).
5. Click the Save > Save button to save the position assignment.
note: The Unit Type assigned to a Quota is associated with all Quota assignments.
Delete a Quota
You can delete an entire Quota table (Type: Plan). Note that when you delete a Quota, all associated assignments are also deleted.
1. Select a Quota (Type: Plan) from the list in the Quotas Search Results area.
2. Click the Delete Quota button.
The following alert appears: “Warning: Quota ‘QuotaName’ and all associated assignments will be deleted.”
3. Click the OK button to confirm the deletion, or click the Cancel button to cancel the action.
A dialog appears enabling you to add a comment describing the reason.
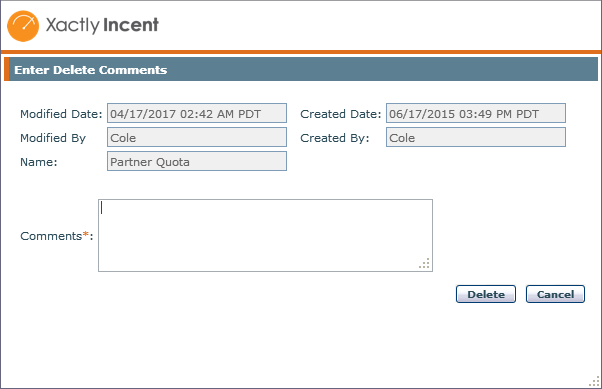 Enter Delete Comments Dialog
4. Enter a comment and click the Delete button.
note: Quotas assigned to Rules or Formulas cannot be deleted until the assignment is removed.
Delete an Assignment
You can delete a Quota assignment (Type: Position or Title).
1. Select a Quota (Type: Title or Position) from the list in the Quotas Search Results area.
2. Click the Delete Assignment button.
A dialog appears enabling you to add a comment describing the reason.
3. Enter a comment and click the Delete button.
Determine Where a Quota is Used
You can show information about where the Quota is used in formulas and rule results.
1. Select a Quota from the list in the Quotas Search Results area.
2. Click the Where Used button. A pop-up window appears that shows the related objects to which the Quota belongs.
3. Click Download to save the information to a text file. A dialog appears enabling you to save the file to disk. Click OK, choose a location, and click Save. The information is downloaded to the selected file.
4. Click the Close button.
Audit a Quota
Two types of audits are available: a Plan assignment audit (similar to the current Quota audit) and a Position/Title assignment audit. When viewing a Quota of type Plan, the Plan assignment information is shown.
The audited fields are Quota Value, Unit Type, and Description. When viewing a Quota of type Title or Position, the assignment information is shown. Original and new Quota values (by period) are tracked.
1. Select a Quota from the list in the Quotas Search Results area.
2. Click the Audit Quota button. A dialog appears displaying the audit trail for the quota.
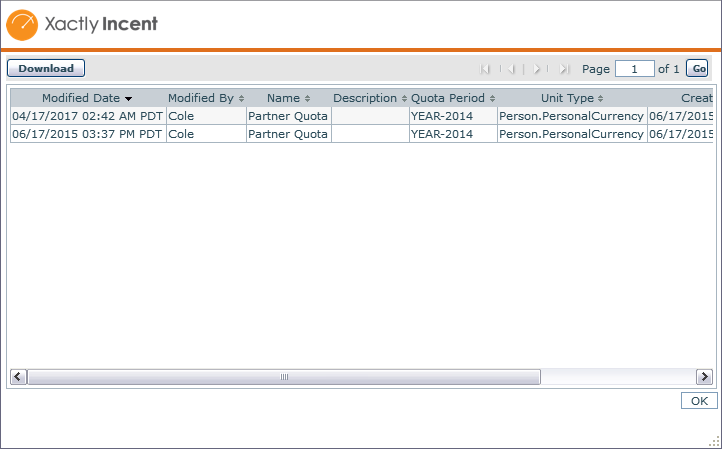 Audit Trail
3. Click Download to save the audit to a text file. A dialog appears enabling you to save the file to disk. Click OK, choose a location, and click Save. The audit is downloaded to the selected file.
4. Click the OK button to dismiss the audit dialog.
Manage Versions
You can add, modify, and delete versions, as well as display the audit trail for versions. Add a Version
1. Select an assignment from the list in the Quotas Search Results area.
2. Click the Edit Assignment button.
3. Click the Add Version button.
A dialog appears enabling you to select the effective start date. Note that the effective start must be after the effective start date of the latest existing version of the rate table.
4. Choose the effective start date and click Save. Incent copies the information from the latest version and saves it using the new effective start.
Modify a Version
1. Select an assignment from the list in the Quotas Search Results area.
2. Click the Edit Assignment button.
3. Select a version in the list.
4. In STEP 1: Effective dates for this version, choose a new Effective Start* date using the drop-down list.
The new period must be after the effective start period of the version before it.
5. Click Save > Save to modify the version information for the assignment.
Delete a Version
1. Select an assignment from the list in the Quotas Search Results area.
2. Click the Edit Assignment button.
3. Select a version in the list.
4. Click the Delete Version button. A dialog appears enabling you to add a comment describing the reason. Note that you cannot delete the first (master) version unless the Rate Table is deleted. Deleting a version updates the effective end date of the version preceding it.
5. Enter a comment and click Delete.
Audit a Version
1. Select an assignment from the list in the Quotas Search Results area.
2. Click the Edit Assignment button.
3. Select a version in the list.
4. Click the Audit Version button. A dialog appears displaying the audit trail for the version.
5. Click Download to save the audit to a text file. A dialog appears enabling you to save the file to disk. Click OK, choose a location, and click Save. The audit is downloaded to the selected file.
6. Click the OK button to dismiss the audit dialog.
Upload and Download Quotas
This section describes how to upload and download quotas.
note: After downloading Quota data, you cannot upload the same file without modification.
Upload Quotas
You can upload Quotas based on assignments. This means that you can update Quota assignments across multiple Quotas using a single upload.
note: Uploads cannot contain single-quotes, double-quotes, or semicolons, as the symbols will cause an error in the uploading of the file.
1. Click the Upload Quotas button. The Upload Quota dialog appears.
2. In the File field, click the Browse (or equivalent) button, and select the appropriate file.
3. Select the update option, from among the following:
• Allow creation of new versions
• Allow updates to existing versions
• Allow updates and new creation
Select the check box to allow mid-period dates and align to the period start date, as appropriate. This allows the effective start date in the upload template to be any date in the period with Incent determining the correct period when saving the record.
4. Click the Upload button to upload the quota file. A confirmation message appears.
5. Click the OK button.
Important Points for Uploading Quotas
• You cannot create Quotas using the Quota Upload template. You must first create Quotas using the Create & Edit page before uploading Quota assignments using the Quota Upload template.
• Formulas and expressions are not supported in cells.
• Set the rounding precision in Microsoft Excel (by selecting the “Set precision as displayed” check box in the Excel Options) to ensure that the data uploaded is identical to what you see in the template file. For more information, consult the Microsoft Excel documentation about setting the rounding precision.
• To cancel the upload operation, click the Cancel button.
Upload Unsuccessful Message
If the upload is unsuccessful, an error message will appear. The following is one error message that may appear:
• Quota (quota name) already exists. Please select the update flag if the existing quota needs to be updated.
note: If an error message appears, correct the error and upload the file again.
Download Assignments to a Text File
You can download assignments for a selected Quota year as either a Comma Separated Values (CSV) or text (.TXT) file.
note: The quotas text file has all the text running together, as one row of text. For this reason, the file needs to be opened in Excel as a Delimited, Semicolon file. By opening the file as Delimited, Semicolon, the text will be imported into separate rows and columns in Excel.
1. Click the Download Assignments button. The Select download format for Quota Assignments dialog appears.
2. Select to download either the latest versions or all versions.
3. Choose the Download Format*, either Comma Separated Values (CSV) or Text, and click Download. A dialog appears enabling you to save the file to disk.
4. Choose the Quota Year* using the drop-down list.
5. Select the Show Person Detail check box to include person details in the downloaded file.
6. Click OK, choose a location, and click Save. The versions are downloaded to the selected file.
7. Use Excel to open the saved quotas file. The file now appears in Excel.
Create an Upload Template
You can create an upload template based on Quota assignments. The generated template includes all combinations of Quotas and assignments, sorted by Quota name.
To create an upload template:
1. Click the Create Upload Template button.
Step 1 of 4: Define Quota Period
2. Select a Quota Period* from the drop-down list. This is the incentive year for which the quota is valid.
Step 2 of 4: Define Quotas
3. Select a Quota from the Available Quotas area.
4. Click the Single Left Arrow to move the Quota from the Available Quotas area to the Selected Quotas area.
Alternatively, double-click a Quota to move it from one list to the other.
Step 3 of 4: Define Quota Position Assignments
Quota Position Assignments is a list of Positions that were created in the Organization > Hierarchy area.
5. Select a Position from the Available Positions area.
When selecting Quota assignments (Positions and Titles), the following actions are available:
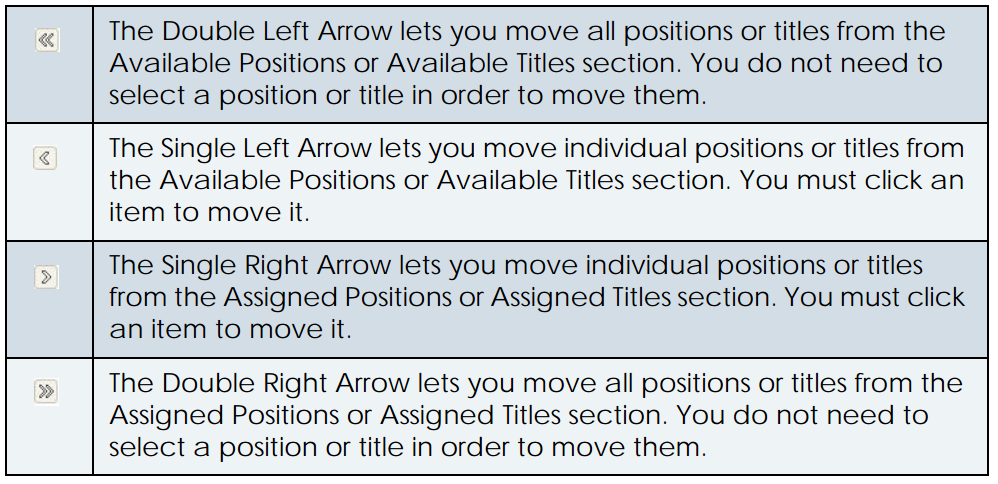
6. Click the Single Left Arrow (or Double Left Arrow) to move the Position(s) from the Available Positions area to the Selected Positions area. Alternatively, double-click a Position to move it from one list to the other.
Step 4 of 4: Define Quota Title Assignments
Quota Title Assignments is a list of Titles that were created in the Organization > Titles.
7. Select a Title from the Available Titles area.
8. Click the Single Left Arrow (or Double Left Arrow) to move the Title(s) from the Available Titles area to the Selected Titles area.
Alternatively, double-click a Title to move it from one list to the other
9. Click the Generate button.
note: After the Generate button is clicked, only the Quota value and Description fields can be edited.
10. Click the OK button. The File Download screen appears.
11. Click the Save button to save the template file. The Save As screen appears.
12. Enter the name of the Quota template in the Filename field.
13. Click the Save button.
