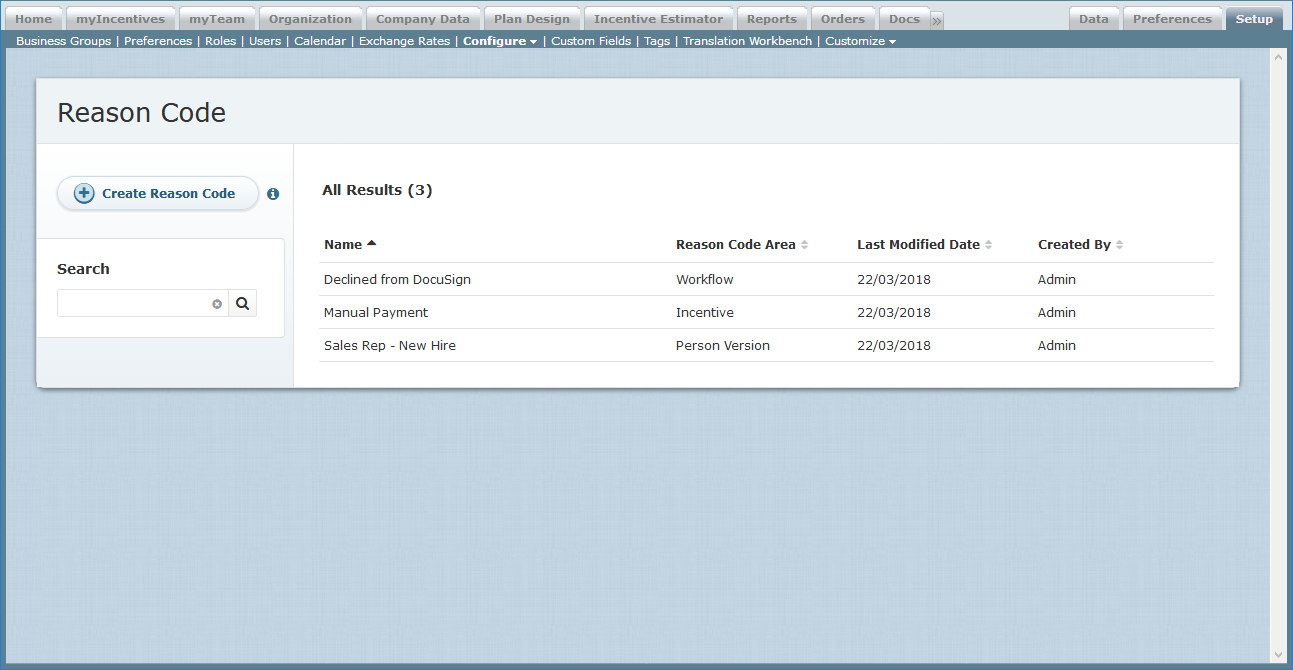
Configure > Reason Code
Reason codes define codes for specific business reasons. After defining a set of reason codes, administrators and users can then use these codes to document the reason for a hold, a manual payment, a person version, or why a plan document is declined or recalled.
Screen
 Reason Code Screen
Summary of Fields
| Field | Description |
|---|---|
| Name | The name of the reason code. |
| Description | A description of the reason code. |
| Reason Code Area | The area of Incent where the reason code can be applied. |
| Reason Type | The type of the reason code. |
| Tags | The tags associated with the reason code (as defined in the Setup > Tags area). |
How to…
This section describes how to manage reason codes.
Display All Reason Codes
Click the Setup tab, then click Configure > Reason Code in the secondary menu. The Reason Codes screen appears.
- To find specific reason codes, type part of the name in the Search text box, and click the
 button. The search results appear. Click the
  button to clear the Search text box and reset the search results.
 - Use the page navigation buttons to navigate between the pages of reason code results.
Note – If you’ve enabled the DocuSign integration, you will see two seed reason codes that will be applied when a document is either declined or voided from within the DocuSign interface: Declined from DocuSign and Recalled from DocuSign. These codes cannot be selected or applied manually.
Create a Reason Code
1. Click the Setup tab, then click Configure > Reason Code in the secondary menu. The Reason Codes screen appears.
2. Click the ![]() button. The Create Reason Code screen appears.
button. The Create Reason Code screen appears.
3. In the Name field, type the name of the reason code.
4. (Optional) In the Description field, type a description for the reason code.
For example, you might enter New Hire as a reason code when adding new people records to Incent.
5. In the Reason Code Area field, choose the area to which the reason code belongs using the drop-down list.
You can choose from among the following groups:
• Incentive
• Person Version
• Workflow
6. In the Reason Code Type field, choose a reason code type.
Alternatively, click the ![]() button to create a custom reason code type. Type a name for the new reason code and click the
button to create a custom reason code type. Type a name for the new reason code and click the ![]() button.
button.
7. (Optional) In the Tags field, specify the tags to associate with the reason code.
8. Click the ![]() button to save the reason code. Alternatively, click the Cancel button to dismiss the screen without creating the reason code.
button to save the reason code. Alternatively, click the Cancel button to dismiss the screen without creating the reason code.
Edit a Reason Code
1. Click the Setup tab, then click Configure > Reason Code in the secondary menu. The Reason Codes screen appears.
2. Hover over a reason code in the list, and click the Edit button that appears. The Edit Reason Code dialog appears.
3. Modify the fields, as required.
4. Click the ![]() button to save the reason code. Alternatively, click the Cancel button to dismiss the screen without saving your changes.
button to save the reason code. Alternatively, click the Cancel button to dismiss the screen without saving your changes.
Copy a Reason Code
1. Click the Setup tab, then click Configure > Reason Code in the secondary menu. The Reason Codes screen appears.
2. Hover over a reason code in the list, and click the Copy button that appears. The Edit Reason Code dialog appears.
3. In the Name field, modify the name of the copied reason code.
4. Modify any other fields, as required.
5. Click the ![]() button to save the reason code. Alternatively, click the Cancel button to dismiss the screen without creating the new reason code.
button to save the reason code. Alternatively, click the Cancel button to dismiss the screen without creating the new reason code.
Delete a Reason Group
note: You cannot delete a reason code that is being used as a person version reason, a rule reason, or as part of a workflow in the application.
1. Click the Setup tab, then click Configure > Reason Code in the secondary menu. The Reason Codes screen appears.
2. Hover over a reason code in the list, and click the Delete button that appears. A confirmation dialog appears.
3. Click the OK button to delete the reason code.
Alternatively, click the Cancel button to dismiss the dialog without deleting the reason code.
