Credit Assignment > Territory Management > Dimension Hierarchies
You can use the Dimension Hierarchies area to define the levels available in a dimension
(such as Country, State, Zip Code, and so on), to help structure data associated
with a dimension.
Using this area you can manage dimension hierarchies by adding new dimension hierarchies,
editing existing dimension hierarchies, and deleting dimension hierarchies, as
required.
Screen
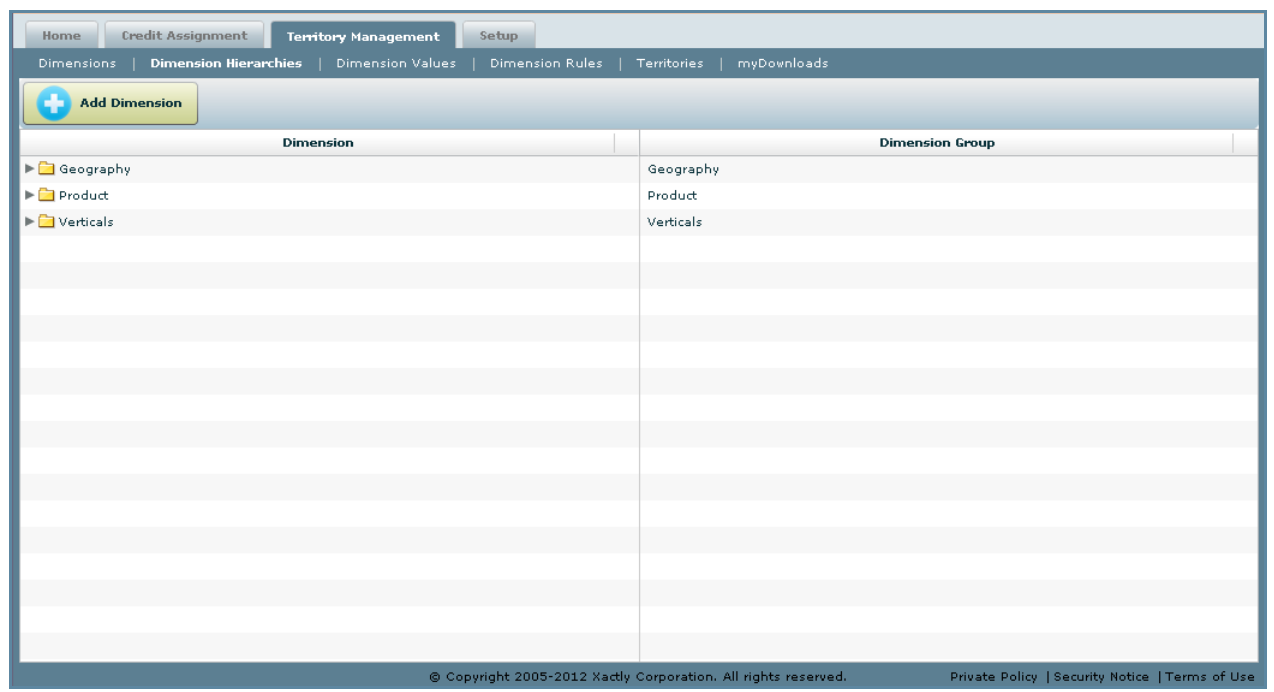
Dimension Hierarchies Screen
All Fields
The following table describes the information you can specify when managing dimension
hierarchies:
| Field | Description |
|---|---|
| Dimension | The name of the dimension. |
| Hide | Indicates whether to hide the dimension. |
| Description | A description of the dimension. |
How to…
This section describes how to manage dimension hierarchies:
Display All Dimension Hierarchies
1. Click the Territory Management tab, then click Dimension Hierarchies in the secondary
menu. The Dimension Hierarchies screen appears displaying all hierarchies
in the results area.
2. Click the ![]() icon to expand an item; click the
icon to expand an item; click the![]() icon to collapse the corresponding
icon to collapse the corresponding
item.
Add a Dimension
1. Click the ![]() button to display the New Dimension dialog.
button to display the New Dimension dialog.

New Dimension Dialog
2. Type the name of the dimension in the Dimension* field.
3. Select the Hide checkbox to hide the dimension.
4. (Optional) Type a description of the dimension in the Description* field.
5. Click the ![]() button. The Attribute Mappings, Dimension Rules, Dimension
button. The Attribute Mappings, Dimension Rules, Dimension
Values, and Dimension Hierarchy tabs appear.
6. Click the Attribute Mappings tab, and click the![]() button to
button to
add a new attribute mapping. The New Attribute dialog appears.
a. Type the attribute name in the Dimension Attribute* field.
b. Choose the data type using the Type* drop-down list.
c. Click the![]() button.
button.
d. Click the![]() button next to the Mapped Order Attribute field, select a
button next to the Mapped Order Attribute field, select a
field, and click the ![]() button.
button.
e. Click the![]() button.
button.
f. Click the![]() button to close the Attribute Details dialog.
button to close the Attribute Details dialog.
7. Click the Dimension Rules tab, and click the![]() button to add a
button to add a
new dimension rule. The New Dimension Rule dialog appears.
a. Type the name of the rule in the Name* field.
b. (Optional) Type a description of the dimension rule in the Description field.
c. Click the ![]() button. The Detailed Info tab appears.
button. The Detailed Info tab appears.
d. Specify the rule conditions.
To add a condition or condition group to the dimension rule, select the item
after which you want to add the condition or condition group and click the![]() button or button
button or button![]() respectively.
respectively.
To modify a condition or condition group, double-click the item and update
the settings, as appropriate.
To rearrange conditions or condition groups, including moving a condition into
a condition group, drag and drop the items to the new location.
To remove a condition or condition group, the select the item and click the
![]() button.
button.
e. Click the![]() button.
button.
f. Click the![]() button to close the New Dimension Rule dialog.
button to close the New Dimension Rule dialog.
8. Click the Dimension Values tab, and click the ![]() button to add a
button to add a
new dimension value. A dialog appears.
a. Type the dimension value in the corresponding field.
b. (Optional) Select the Hide checkbox to hide the dimension value.
c. (Optional) Click the![]() button next to the Start Date field, and choose a date
button next to the Start Date field, and choose a date
from the pop-up calendar.
d. (Optional) Click the![]() button next to the End Date field, and choose a date
button next to the End Date field, and choose a date
from the pop-up calendar.
e. (Optional) Type a description of the dimension value in the Description* field.
f. Click the button. The Custom Attributes tab appears.
g. Click the Custom Attributes tab, click the button, specify
the custom attributes, and click the![]() button. Click the
button. Click the ![]() button.
button.
h. Click the ![]() button.
button.
9. Click the Dimension Hierarchy tab, and click the ![]() button to
button to
specify the dimension hierarchy. A dialog appears.
a. Type the name of the dimension in the Dimension* field.
b. (Optional) Type a description of the dimension in the Description* field.
c. Click the button. The Attribute Mappings, Dimension Values, and
Dimension Hierarchy tabs appears.
d. Specify information using these tabs, as appropriate, and click the ![]()
button.
e. Click the ![]() button to close the New Dimension dialog.
button to close the New Dimension dialog.
10. Click the ![]() button to close the Dimension dialog.
button to close the Dimension dialog.
Edit an Existing Dimension
1. Select an existing dimension from the list in the results area. The Dimension dialog
appears.
2. Click the Description, Attribute Mappings, Dimension Rules, Dimension Values, or
Dimension Hierarchy tab and modify the information, as required.
3. Click the![]() button to update the dimension.
button to update the dimension.
You can undo changes before saving by clicking the ![]() button,
button,
and choosing Undo from the drop-down menu.
4. Click the![]() button to close the Dimension dialog.
button to close the Dimension dialog.
Delete a Dimension
1. Select an existing dimension from the list in the results area. The Dimension dialog
appears.
2. Click the![]() button, and choose Delete from the drop-down menu.
button, and choose Delete from the drop-down menu.
A confirmation dialog appears.
3. Click![]() to confirm the deletion; click the
to confirm the deletion; click the![]() button to cancel the action.
button to cancel the action.
The system asks for confirmation if records exist related to the dimension you are
trying to delete. Click![]() again to confirm the deletion; click the
again to confirm the deletion; click the![]() button
button
to cancel the action.
4. Click the![]() button to close the Dimension dialog.
button to close the Dimension dialog.