Process Status
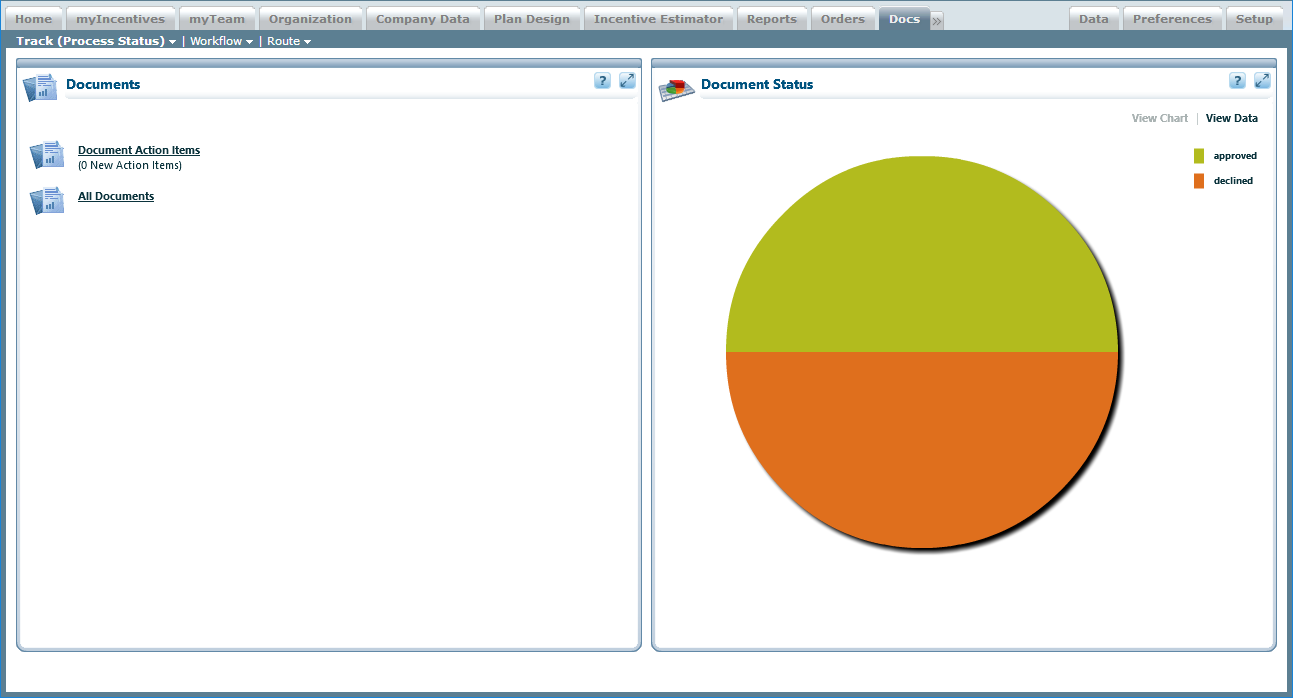
The Process Status area provides a dashboard that enables you to display the status of all Xactly documents either as a chart or as tabular data. You can also use the Process Status area to display details about all documents or only those documents for which you have an associated action item.
Screen
 Process Status Screen
All Fields
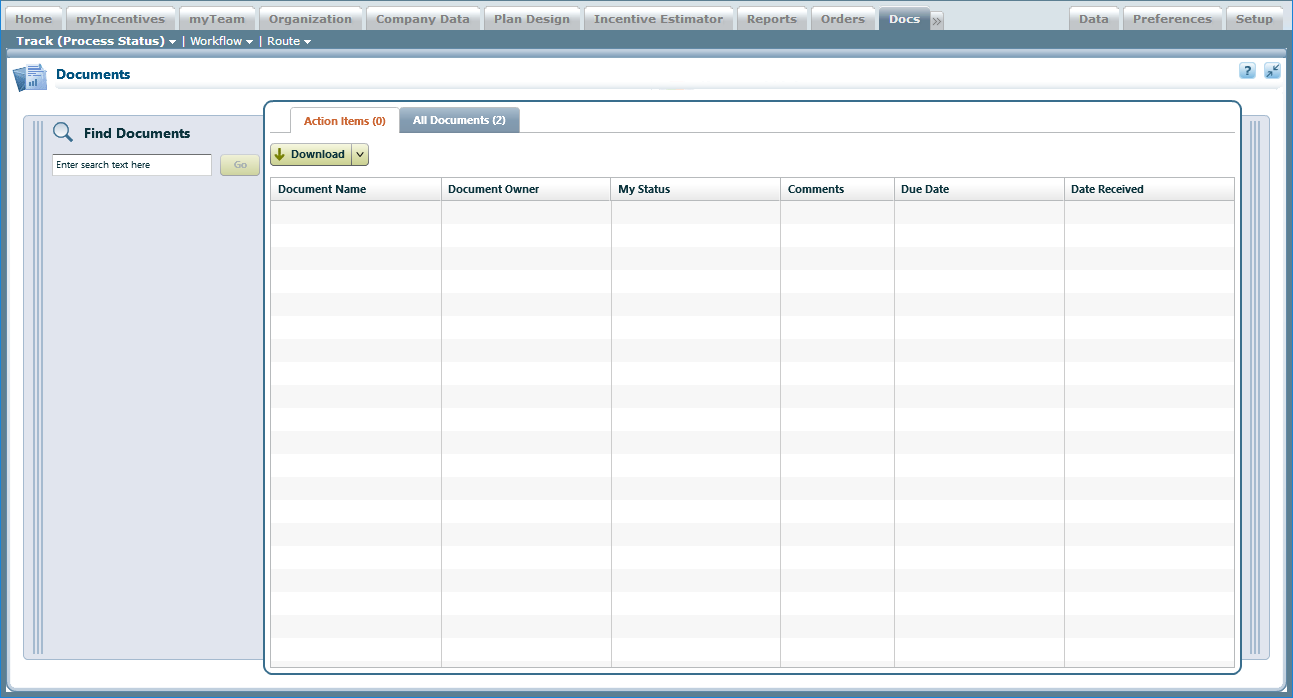
The following table describes the information displayed for action items (accessible through the Documents pod):
| Field | Description |
|---|---|
| Document Name | The name of the document. |
| Document Owner | The person within Incent that is the subject of the document being routed. |
| My Status | The status of the document. |
| Comments | The number of comments associated with the document. |
| Due Date | The due date for the action item. |
| Date Received | The date on which the action was received. |
The following table describes the information displayed for all documents (accessible through the Documents pod):
| Field | Description |
|---|---|
| Document Name | The name of the document. |
| Workflow Status | The status of the document. |
| Document Owner | The person within Incent that is the subject of the document being routed. |
| Comments | The number of comments associated with the document. |
| Initiator | The user that started the workflow. |
| Date Received | The date on which the action was received. |
| Completion Date | The date on which the workflow was completed. |
How to…
This section describes how to monitor the process status.
Display All Action Items
1. Click the Docs tab, then click Track (Process Status) > Process Status in the secondary menu. The Process Status screen appears.
2. Click Document Action Items in the Documents pod. The Action Items tab appears.
 Document Action Items Screen
3. Hover over an entry in the My Status or Comments column (for one second) to display a pop-up window showing the status and comments respectively for the corresponding document.
Display All Documents
1. Click the Docs tab, then click Track (Process Status) > Process Status in the secondary menu. The Process Status screen appears.
2. Click All Documents in the Documents pod. The All Documents tab appears.
 All Documents Screen
3. Hover over an entry in the Workflow Status or Comments column (for one second) to display a pop-up window showing the status and comments respectively for the corresponding document.
Find Specific Documents
1. Click the Docs tab, then click Track (Process Status) > Process Status in the secondary menu. The Process Status screen appears.
2. Click Document Action Items or All Documents in the Documents pod. The Action Items tab or All Documents tab appears (respectively).
3. Click the ![]() button on the left to open the Find Documents pane, if necessary.
button on the left to open the Find Documents pane, if necessary.
4. Type part of the document name in the Find Documents field.
note: The Find Documents field does not recognize regular expressions using characters such as * or ?.
5. Click the Go button.
The search results appear as a separate tab in the results area (with the number of documents found in parentheses).
Narrow Results by Workflow Process Status
• Select the corresponding radio button in the Narrow Results By section of the Find Documents pane.
The search results appear as a separate tab in the results area (with the number of documents found in parentheses).
Manage Documents
1. Click the Docs tab, then click Track (Process Status) > Process Status in the secondary menu. The Process Status screen appears.
2. Click Document Action Items or All Documents in the Documents pod. The Action Items tab or All Documents tab appears (respectively).
3. Select a document in the results area. The Document Information panel appears showing Step 1: View Document.
The pane displays the subject, workflow type, document name, document type, status, document owner, and date received.
Click the Attachments link or the Comments link to display the attachments and comments associated with the document (respectively).
4. Click the Step 1a: View Attachments tab to display the associated document.
Note that only approved documents display the Work Status Information, such as the time stamp, when you print the document.
Do the following:
• Click the ![]() button to upload an attachment. The upload dialog appears. Click the Browse button, select a file, and click the Submit button. Note that you can upload the following types of attachments:
button to upload an attachment. The upload dialog appears. Click the Browse button, select a file, and click the Submit button. Note that you can upload the following types of attachments:
PDF, CSV, TXT, ZIP, Excel, Word, and PowerPoint format files. The system scans the uploaded files for viruses, and performs MIME validation. Documents are limited to 1MB.
note: Each workflow approver can upload a single attachment and, if necessary, delete an existing attachment and upload a new attachment while the document is still pending. After the document has been approved or declined, administrators and approvers can only download the document.
• To display attachment information, hover over the ![]() button (for one second).
button (for one second).
• To download an attachment, click the![]() button. A dialog appears allowing
button. A dialog appears allowing
you to specify the download location.
• To delete an attachment, click the ![]() button. Enter a reason for deleting the
button. Enter a reason for deleting the
attachment in the Delete Attachment dialog that appears, and click OK.
5. Click the Step 2: View or Enter Comments tab to open the corresponding pane.
The pane displays comments associated with the document. To post a comment
to a document, type the comment in the text field, and click the![]()
button. You can add a comment (up to 1024 characters), as required.
To delete a comment, click the![]() button next to the corresponding comment.
button next to the corresponding comment.
Enter a reason for deleting the comment in the Delete Comment dialog that
appears, and click OK.
6. Click the Step 3: Track Status of Process tab to open the corresponding pane.
The pane displays the status, step number, user name, and related information.
• To mark a document in review as unread, click the ![]() button
button
and choose Mark as Unread from the drop-down menu.
• To mark a document as reviewed, select the “I certify that I have read the
attached document” checkbox, and click the ![]() button.
button.
• To recall a document with a workflow status of Pending or Pending Admin,
click the![]() button and choose Recall from the drop-down
button and choose Recall from the drop-down
menu.
• To terminate a workflow with a status of Pending Admin, click the![]()
button and choose Terminate Workflow from the dropdown
menu.
The workflow terminates, the workflow status changes to the last approver
action (Declined), and decline notifications are issued.
• To send the document back to the last approver, click the ![]()
button and choose Send Back to Last Approver from the drop-down menu.
This action is only available when the workflow status is either Pending Admin.
This resets the document status to Pending without issuing decline notifications.
The workflow approver can then accept or decline the document again, as appropriate.
Download Status and Comments
1. Click the Docs tab, then click Track (Process Status) > Process Status in the secondary menu. The Process Status screen appears.
2. Click Document Action Items or All Documents in the Documents pod. The Action Items tab or All Documents tab appears (respectively).
3. Click the ![]() button and choose from among the following options using the drop-down menu:
button and choose from among the following options using the drop-down menu:
• Status (CSV format)
• Status (TXT format)
• Comments (CSV format)
• Comments (TXT format)
A dialog appears allowing you to open or save the download file on your local machine.
4. Open or save the file, as required.
Display Document Status
1. Click the Docs tab, then click Track (Process Status) > Process Status in the secondary menu. The Process Status screen appears, and a chart appears in the Document Status pod.
 Document Status Chart
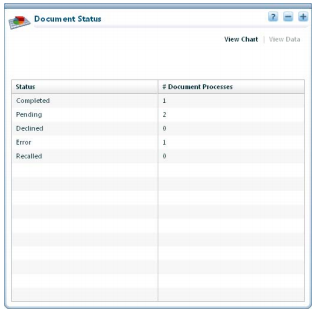
2. Click View Data in the Document Status pod. The data appears as a table.
 Document Status Data
