Workflow Definitions
The Workflow Definitions area enables you to manage document workflow definitions within Incent. Within the Workflow Definitions area, you can create new workflows (optionally based on existing workflows), modify workflows, and delete workflows that are no longer being used, as required.
Screen
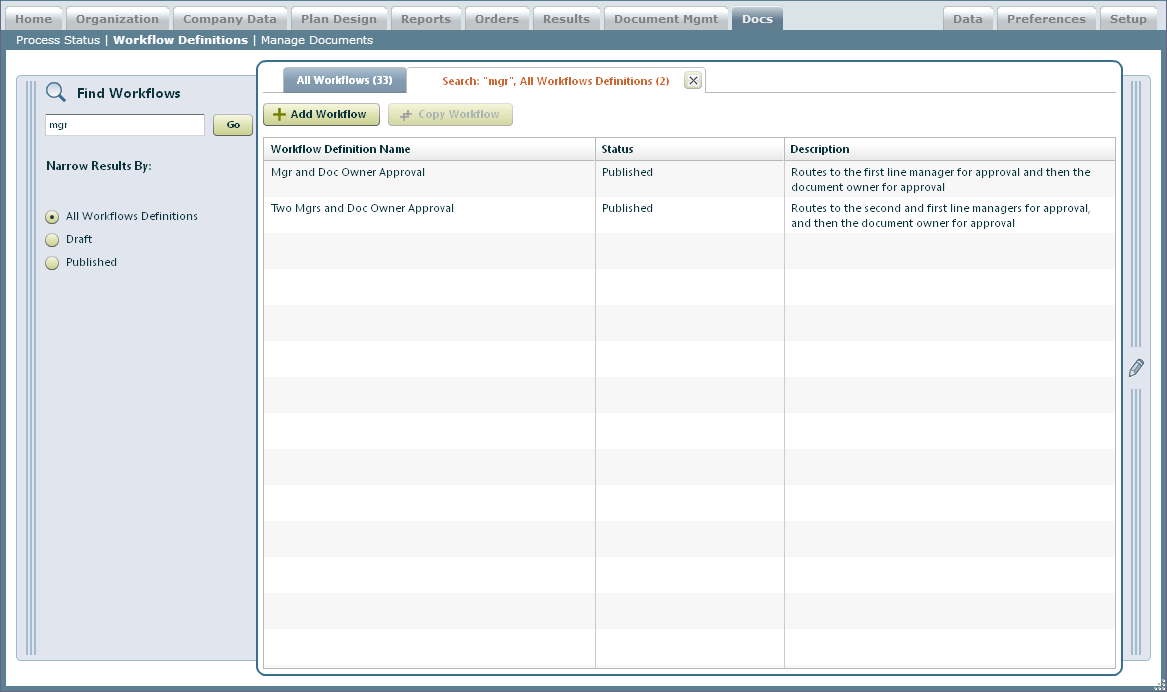
Workflow Definitions Screen
All Fields
The following table describes the information you can specify when managing workflow definitions:
| Field | Description |
|---|---|
| Name | The name of the workflow definition. |
| Status | (Display Only) The status of the workflow definition, from among the following: • Draft • Published |
| Type of Workflow | The type of workflow, from among the following: • Based on Organizational Hierarchy • Based on Users Only |
| Description | (Optional) A description of the workflow definition. |
How to…
This section describes how to manage workflow definitions.
Display All Workflow Definitions
• Click the Docs tab, then click Workflow Definitions in the secondary menu. The
Workflow Definitions screen appears.
Find Specific Workflow Definitions
1. Click the Docs tab, then click Workflow Definitions in the secondary menu. The Workflow Definitions screen appears.
2. Click the ![]() button on the left to open the Find Workflows pane, if necessary.
button on the left to open the Find Workflows pane, if necessary.
3. Type part of the Workflow Definition Name in the Find Workflows field.
note: The Find Workflows field does not recognize regular expressions using characters such as * or ?.
4. Click the Go button.
The search results appear as a separate tab in the Results area (with the number
of workflow definitions found in parentheses).
Filter Workflow Definitions Based on Status
• Select the corresponding radio button in the Status of Definition section of the Find Workflows pane.
The search results appear as a separate tab in the Results area (with the number
of workflow definitions found in parentheses).
Create a Workflow Definition
1. Click the Docs tab, then click Workflow Definitions in the secondary menu. The Workflow Definitions screen appears.
2. Click the ![]() button to open the New Workflow pane.
button to open the New Workflow pane.
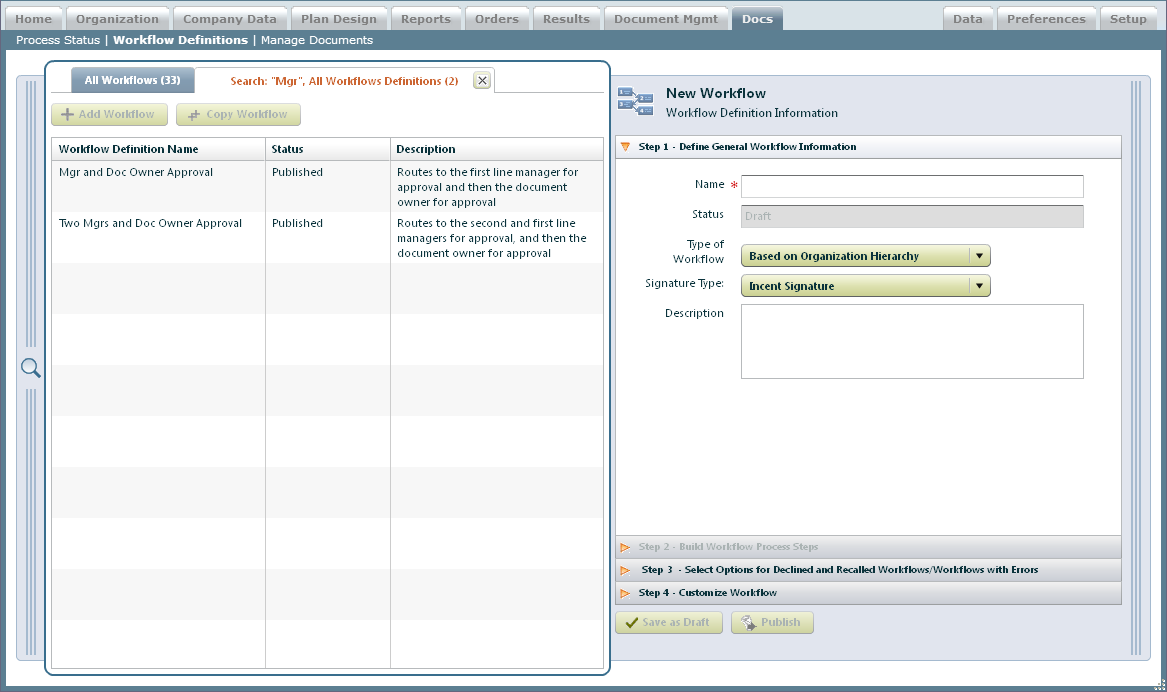
New Workflow Panel
3. Type the name of the workflow in the Name* field.
4. Choose the Type of Workflow using the drop-down list.
You can choose from among the following:
• Based on Organizational Hierarchy
• Based on Users Only
5. (Optional) Choose the Signature Type, using the drop-down list.
You can choose from among the following:
• Incent Signature
• DocuSign E-Signature
6. (Optional) Type a description of the workflow in the Description field.
7. Click the Step 2: Build Workflow Process Steps tab to open the corresponding
pane.
The Workflow Process Definition screen appears.
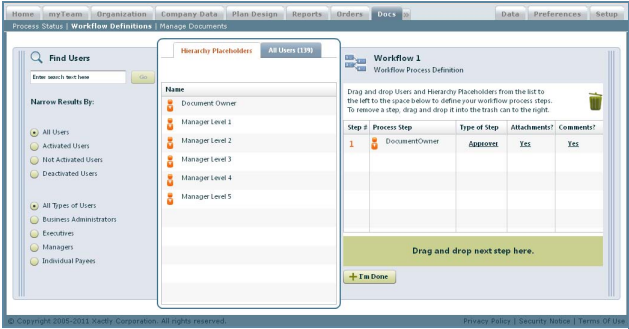
Workflow Process Definition Panel
Drag and drop Users and Hierarchy Placeholders from the list (on the left) to the process definition.
a. Click the All Users tab, and drag and drop a user to the Workflow Process Definition pane.
b. Click the Hierarchy Placeholders tab, and drag and drop a hierarchy placeholder to the Workflow Process Definition pane.
c. Click the Type of Step link for the corresponding entry to toggle between Approver and Reviewer.
d. Click the Attachments link to toggle the setting between Yes and No. This
specifies whether the user associated with the step is allowed to uploadattachments.
e. Click the Comments link to toggle the setting between Yes and No. This specifies
whether the user associated with the step is allowed to post comments when using the Xactly Docs pod.
Note that users who have access to Xactly eDocs & Approvals will be able to post comments in the Process Status area.
f. To find specific users, type part of the user name in the Find Users field and click the Go button.
note: The Find Users field does not recognize regular expressions using characters
such as * or ?.
The search results appear as a separate tab in the Results area (with the number
of users found in parentheses).
Select the corresponding radio button in the Narrow Results By section of the
Find Users pane. The search results appear as a separate tab in the Results
area (with the number of users found in parentheses).
g. Rearrange users and hierarchy placeholders by dragging and dropping the entries in the Workflow Process Definition pane.
h. To remove a step, drag the corresponding entry to the trash can.
You can remove the Document Owner, for instance, if required.
i. Check the![]() button when the workflow definition is complete.
button when the workflow definition is complete.
8. Click the Step 3: Select Options for Declined and Recalled Workflows/Workflows
with Errors tab to open the corresponding pane.
a. Select the action to perform and whom to notify if a workflow step is declined.
Using the Process action menu, choose one of the following:
• Terminate Workflow—Results in the workflow terminating in cases when the
document is declined.
• Re-route to Admin—Results in the document being rerouted (and a notification
sent) to document administrators if the document is declined. In this
case, the document status changes to “Pending Admin” without decline
notifications being issued.
Using the Notification menu, choose whom to notify from among the following:
• Workflow Initiator
• Users who already completed the workflow
• Both
b. In the Workflow Recalled section, select whom to notify if the workflow is
recalled.
You can choose from among the following:
• Workflow Initiator
• Completed and pending workflow users
• Both
c. In the Workflow Error section, select whom to notify if there is an error in a workflow
step.
You can choose from among the following:
• Workflow Initiator
• All Administrators
• Both
9. Click the Step 4: Customize Workflow tab to open the corresponding pane.
You can use this pane to customize the workflow user interface labels to match
your business requirements.
a. Specify the labels for the following workflow statuses: Approve, Decline, and
Pending.
b. Specify the labels for the following workflow action buttons: Approve, Decline,
and Review.
c. Specify the certification text (up to 125 characters) for the workflow. The
default text is “I certify that I have read the attached Document.”
10. Click the ![]() button to update the workflow definition.
button to update the workflow definition.
You can also click the ![]() button to publish the workflow definition.
button to publish the workflow definition.
Edit an Existing Workflow Definition
You can modify an existing workflow definition that has a status of Draft.
1. Select an existing Workflow Definition from the list. The Workflow Definition Information
pane opens to the right.
2. Click the Step 1: Define General Workflow Information tab and edit the available
fields, as required.
3. Click the Step 2: Build Workflow Process Steps tab and click the ![]()
button to edit the workflow definition.
4. Click the Step 3: Select Options for Declined and Recalled Workflows/Workflows
with Errors tab and edit the available fields, as required.
5. Click the![]() button to update the workflow definition.
button to update the workflow definition.
You can also click the![]() button to publish the workflow definition.
button to publish the workflow definition.
Delete a Workflow Definition
You can delete an existing workflow definition that has a status of Draft.
1. Select a Workflow Definition from the list. The Workflow Definition Information pane
opens to the right.
2. Click the ![]() button, and choose Delete from the drop-down menu.
button, and choose Delete from the drop-down menu.
A confirmation dialog appears.
3. Click Yes to confirm the deletion; click the No button to cancel the action.
Create a Workflow by Copying an Existing Definition
You can create a new workflow definition by copying an existing definition.
1. Select an existing Workflow Definition from the list. The Workflow Definition Information
pane opens to the right.
2. Click the ![]() button to copy the workflow definition.
button to copy the workflow definition.
3. Click the Step 1: Define General Workflow Information tab.
4. Type the name of the workflow in the Name* field.
5. Choose the Type of Workflow using the drop-down list.
You can choose from among the following:
• Based on Organizational Hierarchy
• Based on Users Only
6. (Optional) Type a description of the workflow in the Description field.
7. Click the Step 2: Build Workflow Process Steps tab and click ![]() the
the
button to edit the workflow definition.
8. Click the Step 3: Select Options for Declined and Recalled Workflows/Workflows
with Errors tab and edit the available fields, as required.
9. Click the![]() button.
button.
You can also click the ![]() button to publish the workflow definition.
button to publish the workflow definition.