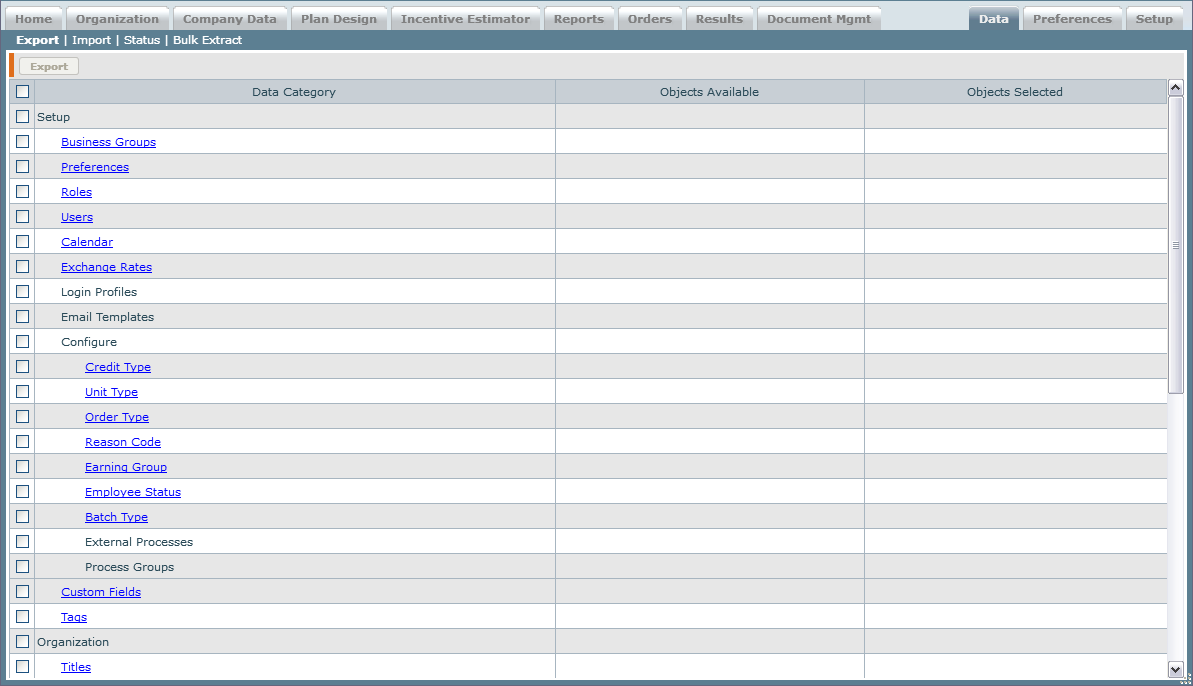
Data > Export
The Export area enables you to copy data and system settings between Xactly Incent, Xactly Sandbox, and Xactly Modeling. You might want to do this after making changes to one environment that you want reflected in the other environment. Exported Data tab content can also be imported between distinct Xactly Incent instances, with the exception of User and Person data (both User and Person files contain the user email which must be unique across the SaaS tenant).
note: Export and Import are supported based on the same version of Incent.
Screen
 Export Screen
Displayed Columns
The following table describes the columns displayed when exporting data:
| Column | Description |
|---|---|
| Data Category | The category of data object. |
| Objects Available | The number of objects available for export in the data category. |
| Objects Selected | The number of objects selected fro export in the data category. |
How to…
This section describes how to export your data.
Export Data
- Click the Data tab, then click Export in the secondary menu. The Export screen appears.
- Select the checkboxes corresponding to the data categories you want to export.
Optionally, click the check box next to a heading (such as Organization) to select the related data categories. Checking the check box directly under the Export button at the top of the page selects all data categories available for export.
The application displays the number of available objects in each selected category after the associated check box. - (Optional) Click a category hyperlink (such as Titles). A dialog appears letting you select specific objects within the category. Type values in the search fields and click the Search button. The matching objects are displayed in the dialog. Select the check boxes corresponding to the objects you want to export, and click the OK button.
- Click the Export button. A confirmation dialog appears.
- (Optional) Deselect the checkbox if you do not want the application to notify you by email when the export process has completed.
- Click the OK button.
The selected data is exported to a file in XML format. The application sends an email notification when the process has completed if you selected the option. To download the files, navigate to Data > Status.
Export a Large Number of Records
When you export a large number of records, the application breaks the data into multiple XML files, zips the files, and sends the data. A properties file that lists the object types included in the export is generated with each zipped export file.
The following export objects currently support this functionality:
– Customer
– People
