Organization > Hierarchy
The Hierarchy area is used to define the company’s reporting hierarchy. The Hierarchy
defines relationships that can be used for the following:
• Rolling indirect credits (for example, a manager receives credit for a sale by an
account manager that reports to him/her).
• The information a user can see in team-created reports (for example, an individual
only sees information about him/herself and a manager sees him/herself plus all
people under them).
note: While business group administrators can view the entire hierarchy, business
group administrators can only edit relationships for positions in their business group.
Also, only business administrators can create and delete hierarchy versions.
important: Each position can be (though is not required to be) assigned to each version
of the Hierarchy.
Access Control
The Hierarchy privilege is needed for access to the Hierarchy area.
Screen

Hierarchy Home Screen
All Fields
The following table describes the information you can specify when managing relationships:

How to…
This section describes how to manage hierarchies.
Search Hierarchy Versions
- Click the Organization tab, then click Hierarchy in the secondary menu. The Hierarchy Home screen appears.Hierarchy Home ScreenFrom the Hierarchy Search Results or Hierarchy Create & Edit screens, you can start a new search by clicking the New Search button.
Step 1: Select the versions to search
- Select whether to search all versions or just the latest version.
Step 2a: Define basic search criteria
- Type a value in the Position Name field.
Step 2b: (Optional) Define advanced search criteria
- Click the
 button next to the Field, select a field for the search criteria, and click OK.
 - Choose an Operator from the drop-down list.
- Type or choose a value in the Value field.
- Click Add Row to add to the search criteria; click Delete Row to remove the last row in the search criteria list.
- Click Search. Alternatively, click Clear to clear the search form.note: The search matches substrings and is not case sensitive. This means that searching for “tech” using the Position Name field matches Director of Technical Support and VP of Technical Support, for example.
- (Optional) Click the All Hierarchy Relationships button. All hierarchy relationships appear in the Hierarchy Search Results area.note: Refer to the Xactly Concepts Guide for examples of how to perform advanced searches
Manage Hierarchy Versions
You can add, edit, delete, and audit hierarchy versions.
Add a Hierarchy Version
- Select a Hierarchy from the list in the Hierarchy Search Results area.
- Click the Edit Hierarchy button.
- Click the Add Version button. A dialog appears enabling you to specify details about the version.
- Enter a name in the Version Name field.
- Click the calendar next to the Effective Start field and choose a date. The latest version’s effective end date will be updated to the day before the effective start date you select here.
- Enter a description in the Description field.
- Click the Save button. The application copies all relationships from the latest version to the new version.
Edit a Hierarchy Version
- Click the Edit Hierarchy button from the Hierarchy Home area. Alternatively, you can select a Hierarchy from the list in the Hierarchy Search Results area and click the Edit Hierarchy button.
- Select a version from the list.
- Click the Edit Version button.
- (Optional) Edit the name in the Version Name field.
- (Optional) Click the calendar next to the Effective Start field and choose a date.
- (Optional) Enter a description in the Description field.
- Click the Save button.
- (Optional) Create, edit, or delete relationships in the hierarchy, as required.
Delete a Hierarchy Version
- Click the Edit Hierarchy button from the Hierarchy Home area. Alternatively, you can select a Hierarchy from the list in the Hierarchy Search Results area and click the Edit Hierarchy button.
- Select a version from the list.
- Click the Delete Version button. A message appears asking “All relationships under this hierarchy version will be deleted. Do you wish to continue?”.
- Click OK to delete the version
Audit a Hierarchy Version
- Click the Edit Hierarchy button from the Hierarchy Home area. Alternatively, you can select a Hierarchy from the list in the Hierarchy Search Results area and click the Edit Hierarchy button.
- Select a version from the list.
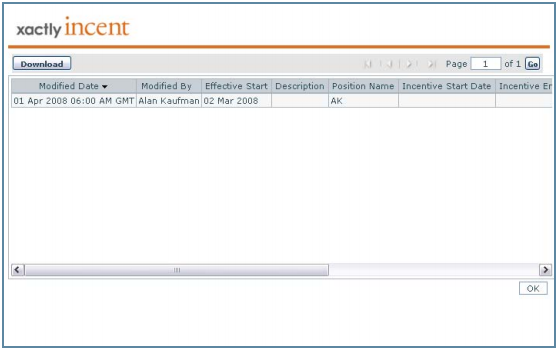
- Click the Audit Version button. A dialog appears displaying the audit trail for the hierarchy.
- Click Download to save the audit to a text file. A dialog appears enabling you to save the file to disk. Click OK, choose a location, and click Save. The audit is downloaded to the selected file.
- Click the OK button to dismiss the audit dialog.
Manage Relationships
You can manage relationships in a hierarchy including creating and editing relationships, downloading relationships, and deleting relationships.
Create a Relationship
- Select a Hierarchy version from the list in the Hierarchy Create & Edit area.
- Click the Edit Hierarchy button.
- Select a version from the list.
- Click the Create Relationship button. A dialog appears enabling you to define the relationship.
Create Relationship Screen - Select a position and click the Select Parent button. The position appears in the Parent Position Name field.
- Select a position and click the Select Position button. The position appears in the Position Name field.
- Click Save.
Edit a Relationship
- Select a Hierarchy from the list in the Hierarchy Search Results or the Create & Edit area.
- Click the Edit Relationship button. A dialog appears enabling you to define the relationship.
- Select a position and click the Select Parent button. The position appears in the Parent Position Name field.
- Click Save.
Delete Relationship
- Select a Hierarchy from the list in the Hierarchy Search Results area.
- Click the Edit Hierarchy button.
- Select a version from the list.
- Click the Delete Relationship button. A dialog appears enabling you to add a comment describing the reason.
- Enter a comment and click Delete.
Upload Hierarchy Versions
This section describes how to upload organization hierarchy versions. You can create a new default hierarchy if you do not have an existing hierarchy defined. Otherwise, you can create a new hierarchy version if a hierarchy already exists for your organization.
note: You cannot update or delete existing hierarchies using a CSV-format file.
Upload a Hierarchy
- Click the Upload Hierarchy button. The Upload Hierarchy dialog appears.
- Click the Click here link to download the CSV template file, which contains a list of fields you need to complete to create hierarchies. Depending on your browser, a dialog might appear allowing you to specify where to save the file. The CSV-format file contains the following fields:• Position Name*
• (Optional) Parent Position - Add the hierarchy data to the file and save the CSV-format file.
- In the File field, click the Browse (or equivalent) button, and select the CSV-format file that you just saved.
- In the Version Name* field, type the name of the version you are uploading.
- If you are creating a new default hierarchy, select the Override Default Hierarchy checkbox to specify an effective start date (in the next field). By default, Incent automatically assigns Start of Time as the effective start date when creating a new default hierarchy. Selecting this checkbox allows you to specify a custom effective start date when creating a new default hierarchy.
- In the Effective Start Date* field, click the
 button and select the effective start date using the pop-up calendar. The effective start date must be later than the most recent hierarchy version. You can only specify the effective start date when creating a new hierarchy version, or if you select the Override Default Hierarchy checkbox (when creating a new default hierarchy).
 - Click the Upload button to upload the file. A confirmation message appears. For larger uploads, the process continues in the background. You can check the Organization > myUploads area to monitor the status of the upload. You can also choose to have Incent send you an email when the upload has completed.
Important Points When Uploading Hierarchies
Note the following:
• No Position Name* column entry can be blank.
• One Parent Position* column entry must be blank (this is the root of the hierarchy).
• Any particular Position Name* column entry can only appear once in an upload file.
• You cannot change the column headers (Position Name and Parent Position).
• Circular references are not allowed.
Upload Error Messages If the upload is unsuccessful, one of the following messages can appear:
• Invalid header names. The Position Name* and Parent Position column headers have been changed. The headers must appear as in the template file.
• A root position has not been defined. One Parent Position* column entry must be blank (this is the root of the hierarchy).
• ‘To Position’ {Position Name} appears multiple times. A ‘To Position’ can only have one parent. Remove the duplicate entry.
• Relationship {Parent Position} to {Position Name} appears multiple times. A relationship can only be defined once. Remove the duplicate entry.
• Position {Position Name} cannot be found. Check the spelling and confirm that the position is defined. Ensure that the position already exists in Incent.
• ‘From Position’ {Parent Position} and ‘To Position’ {Position Name} are the same. Correct the entry.
• Root position {Position Name} appears multiple times. One Parent Position* column entry must be blank (this is the root of the hierarchy).
• Warning: Root position {Position Name} already defined on row {x}. Same as above.
• A ‘To Position’ has not been defined. Every relationship must include a ‘To Position’. Specify the appropriate position name.
Download Relationships to a Text File
You can download relationships to a text file from either the Hierarchy Search Results area or the Create & Edit area. When downloading relationships from the Search Results area, you can choose to download all versions of each hierarchy relationship or the latest of each hierarchy relationship.
When downloading relationships from the Create & Edit area, the application downloads all relationships for the selected version and stores the results in a tree structure.
note: The relationships text file has all the text running together, as one row of text. For this reason, the file needs to be opened in Excel, as a Delimited, Semicolon file. By opening the file as Delimited, Semicolon, the text will be imported into separate rows and columns in Excel.
Download Relationships From the Hierarchy Search Results Area
- Click the Download Relationships button. The Select Hierarchy Relationship versions to download screen appears.
- Select to download the latest versions or all versions.
- Choose the download format, either Comma Separated Values (CSV) or Text, and click Download. A dialog appears enabling you to save the file to disk.
- Click OK, choose a location, and click Save. The versions are downloaded to the selected file.
- To view the downloaded file, do one of the following:
For text files, do the following:
a. Launch Excel, and open the downloaded file. The Test Import Wizard appears.
b. In step 1 of the Text Import Wizard, choose “65001 : Unicode (UTF-8)” using the File origin drop-down list, and complete the rest of the Text Import Wizard.For CSV files, do the following:a. Launch Excel and create a new workbook.
b. Click Data > Get External Data > From Text, select the CSV file using Import Text File dialog, and click Import.
c. In step 1 of the Text Import Wizard, choose “65001 : Unicode (UTF-8)” using the File origin drop-down list, and complete the rest of the Text Import Wizard.For either text or CSV files, you can also do the following:a. Open the downloaded file using the Notepad application, and save the file without making any changes using the UTF-8 encoding (this saves any Unicode-encoded information).
b. Open the newly-saved file in Excel.
Download Relationships From the Hierarchy Create & Edit Area
- Select a version in the Hierarchy Versions section of the Hierarchy Create & Edit area.
- Click the Download Relationships button. The Select Hierarchy Relationship versions to download screen appears.
- Choose the download format, either Comma Separated Values (CSV) or Text, and click Download. A dialog appears enabling you to save the file to disk.
- Click OK, choose a location, and click Save. The versions are downloaded to the selected file.
- To view the downloaded file, do one of the following:For text files, do the following:a. Launch Excel, and open the downloaded file. The Test Import Wizard appears.
b. In step 1 of the Text Import Wizard, choose “65001 : Unicode (UTF-8)” using the File origin drop-down list, and complete the rest of the Text Import Wizard.For CSV files, do the following:a. Launch Excel and create a new workbook.
b. Click Data > Get External Data > From Text, select the CSV file using Import Text File dialog, and click Import.
c. In step 1 of the Text Import Wizard, choose “65001 : Unicode (UTF-8)” using the File origin drop-down list, and complete the rest of the Text Import Wizard.For either text or CSV files, you can also do the following:
a. Open the downloaded file using the Notepad application, and save the file without making any changes using the UTF-8 encoding (this saves any Unicode-encoded information).
b. Open the newly-saved file in Excel.