Organization > People
The People area is used to define and maintain information about people who will receive incentive compensation and to associate Users (that were created in Setup > Users) with them. People information can be entered in the application or uploaded from a Microsoft XLSX-format file. (Before creating or uploading people, you must create users.)
note: Business group administrators can only search, view, create, modify, upload, download, audit, and delete Person records (and versions of Person records) that are assigned to business groups to which the administrators themselves are assigned. important: You can upload Custom Field values into Incent using the People CSV-format file upload. People custom fields are used for reporting and writing rules.
Screen
People Home Screen
Required Fields
The following table describes the required information you need to specify when managing people:
| Section | Field | Description |
|---|---|---|
| Step 1 | Effective Start | The effective start date of the person. |
| Step 2 | User | The User associated with this person. The User setting applies to all versions unlike most other fields that can vary between versions. |
| First Name | The first name of the person. The maximum length is 64 characters. | |
| Last Name | The last name of the person. The maximum length is 64 characters. | |
| Employee ID | The employee id of the person. The maximum length is 64 characters. | |
| Step 3 | Personal Target | The personal target of the person. |
| Personal Currency | The currency to use with the person. | |
| Payment Currency | The payment currency to use with the person. | |
| Business Group | The business group to which the person belongs. This field is only available when business group security is enabled in the Setup > Preferences area. |
Optional Fields
The following table describes the optional information you can specify when managing people:
| Section | Field | Description |
|---|---|---|
| Step 1 | Effective End | The effective end date of the person. You cannot manually enter a value in this field; the system sets this value as one day before the effective start of the next version. |
| Description | A description of the person. | |
| Step 2 | Middle Name | The middle name of the person. |
| Prefix | The prefix that appears before the person’s name, such as Mr. or Mrs. | |
| Employee Status | The status of the employee. The employee status applies to all versions unlike most other fields that can vary between versions. | |
| Region | The region with which the person is associated. | |
| Hire Date | The date that the person was hired. | |
| Termination Date | The date that the person was terminated. | |
| Step 3 | Prorated Personal Target | The prorated personal target of the person. Currently, this is the same value as the personal target. |
| Salary | The salary of the person. | |
| Prorated Salary | The prorated salary of the person. Currently, this is the same value as the salary. | |
| Salary Currency | The currency of the person’s salary. |
All Fields
The following table describes the information you can specify when managing people:
| Section | Field | Description |
|---|---|---|
| Step 1 | Effective Start | The effective start date of the person. |
| Effective End | The effective end date of the person. You cannot manually enter a value in this field; the system sets this value as one day before the effective start of the next version. | |
| Description | A description of the person. | |
| Step 2 | User | The User associated with this person. The User setting applies to all versions unlike most other fields that can vary between versions. |
| First Name | The first name of the person. The maximum length is 64 characters. | |
| Middle Name | The middle name of the person. | |
| Last Name | The last name of the person. The maximum length is 64 characters. | |
| Prefix | The prefix that appears before the person’s name, such as Mr. or Mrs. | |
| Employee ID | The employee id of the person. The maximum length is 64 characters. | |
| Employee Status | The status of the employee. The employee status applies to all versions unlike most other fields that can vary between versions. | |
| Region | The region with which the person is associated. | |
| Hire Date | The date that the person was hired. | |
| Termination Date | The date that the person was terminated. | |
| Step 3 | Personal Target | The personal target of the person. |
| Prorated Personal Target | The prorated personal target of the person. Currently, this is the same value as the personal target. | |
| Personal Currency | The currency to use with the person. | |
| Payment Currency | The payment currency to use with the person. | |
| Salary | The salary of the person. | |
| Prorated Salary | The prorated salary of the person. Currently, this is the same value as the salary. | |
| Salary Currency | The currency of the person’s salary. | |
| Business Group | The business group to which the person belongs. This field is only available when business group security is enabled in the Setup > Preferences area. |
How to…
This section describes how to manage people.
Search People
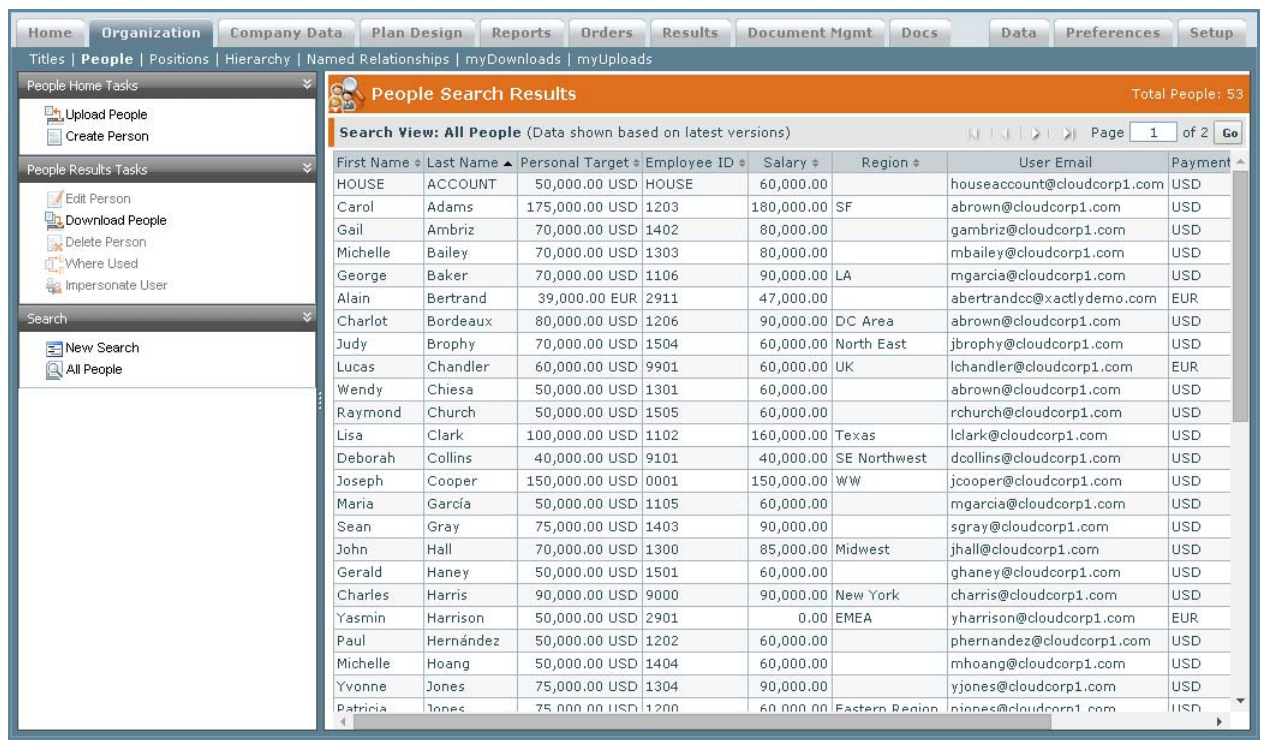
1. Click the Organization tab, then click People in the secondary menu. The People Home screen appears.
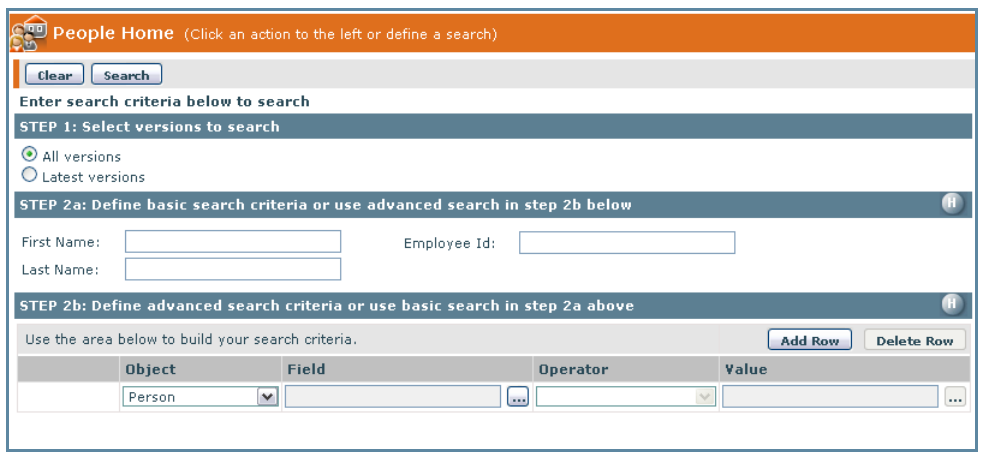
People Home Screen
From the People Search Results or People Create & Edit screens, you can start a new search by clicking the New Search button.
Step 1: Select the versions to search
2. Select whether to search all versions or just the latest version.
Step 2a: Define basic search criteria
3. Type the value in First Name, Last Name, or Employee Id fields.
Step 2b: (Optional) Define advanced search criteria
4. Click the ![]() button next to the Field, select a field for the search criteria, and click OK.
button next to the Field, select a field for the search criteria, and click OK.
5. Choose an Operator from the drop-down list.
6. Type or choose a value in the Value field.
7. Click Add Row to add to the search criteria; click Delete Row to remove the last row in the search criteria list.
8. Click Search. Alternatively, click Clear to clear the search form.
note: The search matches substrings and is not case sensitive. This means that searching for “la” using the Last Name field matches Tricia Clark, John Lancaster, and April Laraby, for example.
9. (Optional) Click the All People button. All people appear in the People Search Results area.
note: Refer to the Xactly Concepts Guide for examples of how to perform advanced searches.
Create a Person
1. Click the Create Person button. The People Create & Edit screen appears.

People Create & Edit Screen
Step 1: Enter effective dates for this version
2. Enter the effective start date for the version in the Effective Start* field.
note: This field is read-only when creating a person for the first time. You can, however, edit this field when adding versions.
3. (Optional) Enter a description of the version in the Description field.
Step 2: Enter person information
4. Click the![]() button next to the User* field. A dialog appears showing the list of Users that were created in the Setup > Users area.
button next to the User* field. A dialog appears showing the list of Users that were created in the Setup > Users area.
Select a User and click the OK button. The User appears in the User* field.
note: The User setting applies to all versions unlike most other fields that can vary between versions.
5. Enter the person’s first name in the First Name* field.
6. (Optional) Enter the person’s middle name in the Middle Name field.
7. Enter the person’s last name in the Last Name* field.
8. (Optional) Select a Prefix from the drop-down list. The prefix will go before the person’s name, such as Mr. or Mrs.
9. Enter an ID for the person in the Employee ID* field. This ID is a unique person identifier and is used for assigning order items to a person. The Employee ID can be a string or a number.
10. (Optional) Choose a status in the Employee Status field. Employee Statuses are created in Setup > Type Codes > Employee Status.
note: The employee status applies to all versions unlike most other fields that can vary between versions.
11. (Optional) Enter a region in the Region field. This is the region with which the person is associated. This field accepts alpha-numeric characters.
note: The maximum character length is 128.
12. (Optional) Click the calendar next to the Hire Date field. This is the person’s hire date. Click ![]() to clear the field.
to clear the field.
13. (Optional) Click the calendar next to the Termination Date field. This is the person’s termination date. Click ![]() to clear the field.
to clear the field.
Step 3: Enter compensation information
14. Enter the person’s personal target in the Personal Target* field. This represents the annual incentive target for the person and is used in the Standard Reports.
The prorated personal target is automatically set to the same value as the personal target.
15. Select a Personal Currency* from the drop-down list. This is the currency type of the personal target field.
16. (Optional) Enter the person’s salary in the Salary field. This is the salary that is paid to a person. If entered, the salary will appear on the Standard Reports.
The prorated salary is automatically set to the same value as the salary.
note: The Salary field can be left blank, as long as there isn’t a Salary Currency selected.
17. (Optional) Choose a Salary Currency from the drop-down list. This is the currency type of the salary field.
note: If an amount is entered in the Salary field the Salary Currency becomes a required * field.
18. Select a Payment Currency* from the drop-down list. This is the currency that the incentive payments, for the person, are converted to in the payment stage if the appropriate Exchange Rates are defined in Setup > Exchange Rates.
19. Choose a Business Group* from the drop-down list. This is the business group to which the person belongs.
note: This field is required when business group security is enabled in the Setup > Preferences area.
Step 4: Enter custom fields information
20. Enter the custom fields information. The maximum length of each field is 512 characters.
21. Click the Save > Save version button.
Alternatively, you can click the Save > Save and add new version button to copy the content from the latest version of the person and begin creating a new effective version. You can also click the Save > Save and add new person button to save the person and display the form to add a new person.
22. (Optional) Click All People to display the list of people, including the newly-created person.
Manage Versions
You can add, edit, or delete versions, determine where a version is being used, and display the audit trail for versions.
Add a Version
1. Select a Person from the list in the People Search Results area.
2. Click the Edit Person button.
3. Click the Add Version button. A dialog appears enabling you to select the effective start date. Note that the effective start must be after the effective start date of the latest existing version of the person.
The calendar prevents you from choosing a date that does not meet this criteria.
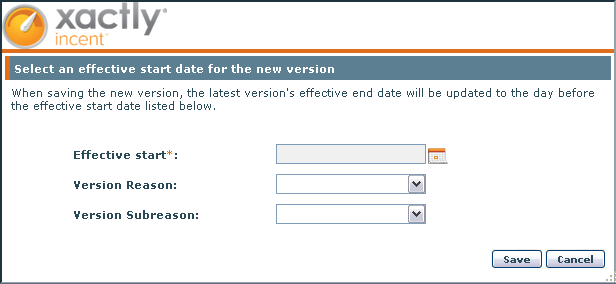
Select an Effective Start Date Dialog
4. Choose the effective start date and click Save.
5. Choose a reason and subreason for the new version, and click Save.
The reason codes are configured in the Setup > Configure > Reason Code area.
6. Modify the editable fields, as required.
7. Click Save > Save version to add the new version. The application copies the information from the latest version and saves it using the new effective start. You can then edit and save any changes, as required.
Delete a Version
1. Select a Person from the list in the People Search Results area.
2. Click the Edit Person button.
3. Select a version in the list.
4. Click the Delete Version button. A dialog appears enabling you to add a comment describing the reason. Note that you cannot delete the first (master) version unless the Person is deleted. Deleting a version updates the effective end date of the version preceding it.
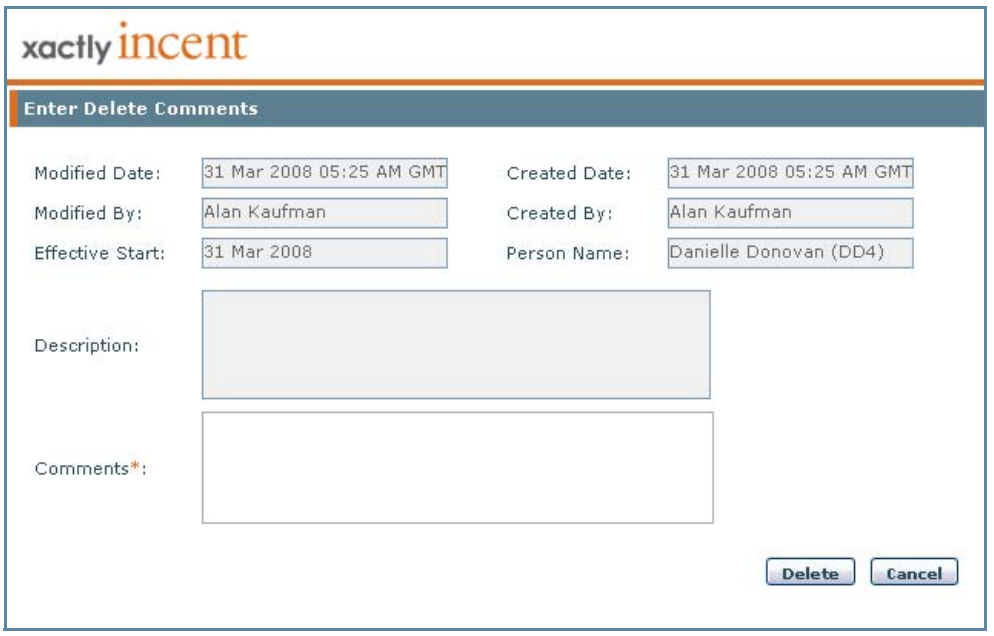
Enter Delete Comments Dialog
5. Enter a comment and click Delete.
Determine Where a Version is Being Used
1. Select a Person from the list in the People Search Results area.
2. Click the Edit Person button.
3. Select a version in the list.
4. Click the Where Used button. A dialog appears displaying where the version is used.
5. Click Download to save the information to a text file. A dialog appears enabling you to save the file to disk. Click OK, choose a location, and click Save. The information is downloaded to the selected file.
6. Click Close.
Audit a Version
1. Select a Person from the list in the People Search Results area.
2. Click the Edit Person button.
3. Select a version in the list.
4. Click the Audit Version button. A dialog appears displaying the audit trail for the person version.
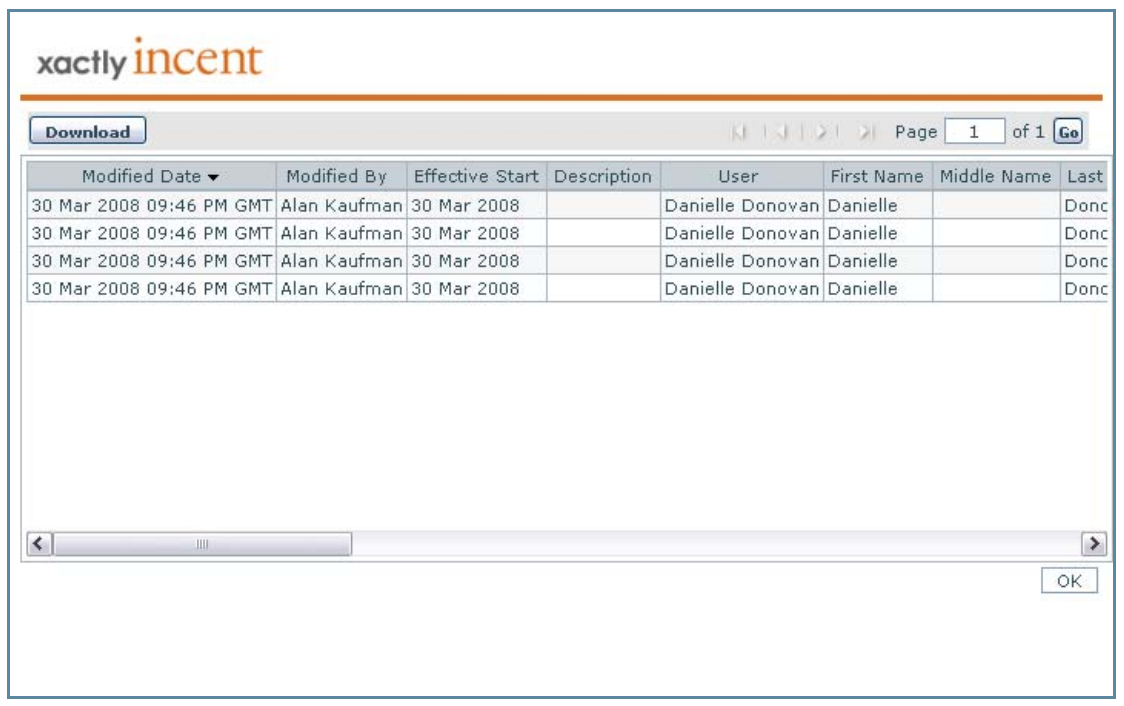
Audit Trail
5. Click Download to save the audit to a text file. A dialog appears enabling you to save the file to disk. Click OK, choose a location, and click Save. The audit is downloaded to the selected file.
6. Click the OK button to dismiss the audit dialog.
Edit a Person
note: The Employee ID field cannot be modified once the Person information is saved.
1. Select a Person from the list in the Person Search Results area.
2. Click the Edit Person button.
Alternatively, you can double-click a Person in the People Search Results area.
3. Select a version from the list. Alternatively, you can create a new version by clicking the Add Version button.
4. Edit the fields that require changes.
You cannot edit the effective start of the first version. You can, however, edit the effective start of any other version, but it must fall after the effective start of the version before it and before the effective start of the version after it.
note: The User and Employee Status settings apply to all versions unlike most other fields that can vary between versions.
5. Click the Save > Save version button. Click All People to display the list of people, including the edited person.
note: In certain cases when a person changes position, business group, and payment currency in a single period, payment balances from the earlier position/business group/payment currency might take an additional period to reconcile against new payments in the new payment currency.
Upload and Download People
This section describes how to upload and download people.
Upload People
1. Click the Upload People button. The Upload People dialog appears.
2. Click the Click here link to download an Microsoft XLSX template file, which contains a list of fields you need to complete to create people. Depending on your browser, a dialog might appear allowing you to specify where to save the file.
note: You can optionally upload a CSV (Comma Separated Value) format file instead of an XLSX format file.
The XLSX-format file contains the following fields:
note: The Employee ID* cannot be changed after it is saved. Also, Incent currently sets the prorated personal target and prorated salary to match the respective personal target and salary for the person.
• Employee ID*
• (Optional) Effective Start Date
• (Optional) Description
• (Optional) Prefix
• First Name*
• (Optional) Middle Name
• Last Name*
• (Optional) Region
• (Optional) Employee Status
• (Optional) Hire Date
• (Optional) Termination Date
• Personal Target*
• (Optional) Prorated Personal Target
• Personal Currency*
• (Optional) Salary
• (Optional) Prorated Salary
• (Optional) Salary Currency
• Payment Currency*
• User*
• (Optional) Business Group
note: When uploading people:
– In cases when the Employee ID is a number (integer or decimal), format the Employee ID cell as Text before entering the value in the cell.
– People and versions can be created and edited through upload but not deleted.
– Leaving the Effective Start field blank is equal to the effective start being “Start of Time.”
– Matching an existing effective start allows for you to edit the version. Also, a new version can be added if the effective start is after the latest start date.
– Only one change or addition per employee ID is allowed in an upload file.
– The Business Group field is required when business group security is enabled in the Setup > Preferences area.
– You must include headers for any custom fields, if present, otherwise Incent removes the existing custom field data for the record.
3. Add the people data to the file and save the file.
4. In the File field, click the Browse (or equivalent) button, and select the file that you just saved.
5. Select the update option, from among the following:
• Allow creation of new People versions
• Allow updates to existing People versions
• Allow updates and new People creation
6. Click the Upload button to upload the file. A confirmation message appears.
7. Click the OK button.
Important Points for Uploading People
Note the following when uploading people:
• Users are created in Xactly Incent matching those listed in the upload.
• Custom Fields are created in Xactly Incent and column headers are labeled to match.
• Formulas and expressions are not supported in cells.
• All required fields are marked with an asterisk (*).
• All rows without errors are uploaded.
• If a Person already exists, the data is modified. If the person does not exist, the new data is uploaded.
• Use only the following strings for the Prefix field: “Mr.”, “Mrs.”, “Ms.”, or “Dr.”. The application displays the field as blank if you upload any other values.
• To cancel the upload operation, click the Cancel button.
Upload Error Messages
If the upload is unsuccessful, a fail message will appear. The following are some of the fail messages you might see:
• Required field. Enter a value. Required field data missing.
• Invalid date found in column . Enter a valid date. An invalid date was found.
• Non numeric value found in column . Enter a valid number. An invalid number was found.
• Invalid unit type, , in column . Enter an existing unit type. An invalid currency type was found.
• Invalid Employee Status, . Enter an existing Employee Status. An invalid employee status was found.
• More than one record for Employee ID exists. Only one record per Employee ID can be uploaded at once. A duplicate employee ID was found.
• Invalid User Email, . Enter an existing User Email. An invalid user email was found.
• Select Update existing records to edit an existing version. The Update flag was not selected.
• Select Create new to add new records and versions. The Create flag was not selected.
• Effective Start must be after the latest version effective start. An invalid effective start date was found.
note: If any of the failed messages appear, correct the error and upload the file again.
Download People to a Text File
note: The people text file has all the text running together, as one row of text. For this reason, the file needs to be opened in Excel, as a Delimited, Semicolon file. By opening the file as Delimited, Semicolon, the text will be imported into separate rows and columns in Excel.
1. Click the Download People button. The Select People versions to download screen appears.
2. Choose the download format, either Comma Separated Values (CSV) or Text, and click Download. A dialog appears enabling you to save the file to disk.
3. Click OK, choose a location, and click Save. The versions are downloaded to the selected file.
4. To view the downloaded file, do one of the following:
For text files, do the following:
a. Launch Excel, and open the downloaded file. The Test Import Wizard appears.
b. In step 1 of the Text Import Wizard, choose “65001 : Unicode (UTF-8)” using the File origin drop-down list, and complete the rest of the Text Import Wizard.
For CSV files, do the following:
a. Launch Excel and create a new workbook.
b. Click Data > Get External Data > From Text, select the CSV file using Import Text File dialog, and click Import.
c. In step 1 of the Text Import Wizard, choose “65001 : Unicode (UTF-8)” using the File origin drop-down list, and complete the rest of the Text Import Wizard.
For either text or CSV files, you can also do the following:
a. Open the downloaded file using the Notepad application, and save the file without making any changes using the UTF-8 encoding (this saves any Unicode-encoded information).
b. Open the newly-saved file in Excel.
Delete a Person
note: A person cannot be deleted if assigned to a Position, or associated with Results in the application.
1. Select a Person from the list in the People Search Results area.
2. Click the Delete Person button. A message appears asking “All versions of this person will be deleted. Do you wish to continue?”.
3. Click the OK button to confirm the deletion, or click the Cancel button to cancel the action.
Impersonate a User (Incent Only)
You can impersonate users of the following type (to perform actions as the user would perform them):
• Executive
• Business Group Executive
• Manager
• Individual Payee.
1. Select a person from the list in the People Search Results area.
2. Click the Impersonate User button. A dialog appears asking you to enter a reason why you are impersonating the user.
3. Type the reason, and click the Continue button. You can enter up to 256 characters. Incent displays a header similar to the following to indicate that you are impersonating a user: Welcome as
4. Click the Welcome <name> link and choose the person version using the dropdown menu.
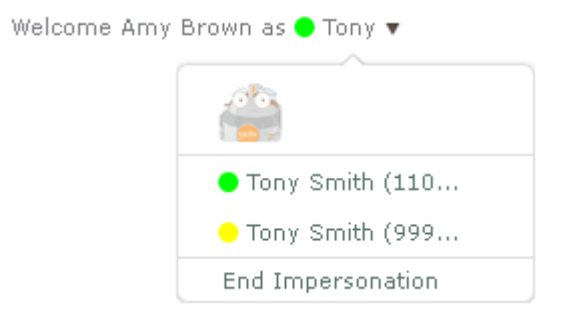
Selecting Person Versions When Impersonating
5. When you are ready to stop impersonating the user, click the Welcome <name> link and choose End Impersonation using the drop-down menu.
note: You cannot access Xactly Modeling or Xactly Analytics when impersonating a user.
Also, in certain circumstances, business group administrators are able impersonate users that were once in their business group (but are no longer members).