Results > Payments
You can use the Payments area to manage regular and manual payments within Xactly Incent and Modeling. Regular payments depend on the credits, commissions, and bonuses calculated when an order item is created in Xactly Incent.
Using the Payments page of the area, you can complete the following:
• Search and display payments
• Calculate balances for a period
• Finalize and close periods by business group
• Release payments
• Download payments
Using the Manual Payments page, you can do the following:
• Search and display manual payments
• Add a manual payment
• Delete payments
• View and add comments
• Upload manual payments
• Download manual payments
note: Business group administrators can only search, view, calculate balances, finalize, release, and download payments that are associated with business groups to which the administrators themselves are assigned. Similarly, business group administrators can only search, view, upload, add, and download manual payments that are associated with business groups to which the administrators themselves are assigned.
Customizing and Saving Searches
The Payments and Manual Payments pages offer you the ability to customize your standard searches. By configuring and saving the search fields and columns, you can tailor the search experience to your needs and save time finding precisely the information you need. Customized searches are defined by the following information:
• Search fields—The specific data fields used in the search. The search fields you specify appear in the Filters pane of the sidebar after running a search, allowing you to fine-tune your search iteratively.
• Columns—The columns of data that appear as part of the search results. Specifying the columns and their order allows you to prioritize important information on the search results page.
You can also create saved searches that define specific search fields and search criteria.
You can then access not only your previously-saved searches, but also searches saved by other administrators. You can further mark certain saved searches as favorites for quick and easy access.
For more information, see “Customizing and Saving Searches”.
Screen
 Payments Screen
Payments
The following table describes the information displayed when searching payments on the Payments page:
| Field | Description |
|---|---|
| Bonus Result Name | The name of the bonus result. |
| Business FX Rate | The exchange rate for the business. |
| Business Group | The business group associated with the payment. |
| Business Group FX Rate | The exchange rate for the business group. |
| Business Group Payment | The payment amount in the business group currency. |
| Business Payment | The payment amount in the business currency. |
| Commissions Result Name | The name of the commissions result. |
| Credit Result Name | A descriptive name for the customer. |
| Draw | The draw associated with the payment. |
| Draw Balance | The draw balance associated with the payment. |
| Draw Name | The name of the draw associated with the payment. |
| Finalized | Indicates whether the payment has been finalized (Yes or No). |
| Geography Name | A descriptive name for the geography. |
| Incentive Date | The date that the calculated incentive is given to a person for an order item. |
| Item Code | The date that the calculated incentive is given to a person for an order item. |
| Item Payment | The payment amount for the item in the calculated currency. |
| Item Payment FX Rate | The exchange rate for the item payment. |
| Negative Payment Amount | The negative payment amount, if any. |
| Order Code | The order code associated with the payment. |
| Payment | The payment amount for the position or person in their payment currency. |
| Payment Balance | The payment balance. |
| Payment Type | The type of payment, such as commission. |
| Person Name | The person associated with the payment. |
| Position Name | The name of the person’s position in the business. |
| Product Name | A descriptive name of the product. |
| Status | The status of the payment. |
Manual Payments
The following table describes the information displayed when searching payments on the Manual Payments page:
| Field | Description |
|---|---|
| Business Group | The business group associated with the manual payment. |
| Earning Group | The earning group associated with the manual payment. |
| Incentive Date | The date that the manual payment is given to a person. |
| Item Amount | The item amount for the payment. |
| Person Name | The person associated with the manual payment. |
| Position Name | The name of the person's position in the business. |
| Reason Code | The reason code, as defined in the Setup > Configure > Reason Code area. |
note: You can configure the search fields that appear in the Filters pane of the sidebar when defining the search settings.
How to …
This section describes how to manage payment results.
Manage Payments
Click the Results tab, then click Payments in the secondary menu. The Payments screen appears.
• To manage regular payments, click the Payments button. The Payments screen appears.
For more information about managing payments, see “Manage Payments”.
• To manage manual payments, click the Manual Payments button. The Manual Payments screen appears.
For more information about managing manual payments, see “Manage Manual
Payments”.
You can use the Payments page to manage calculated payments. Using the Payments page, you can complete the following tasks:
• Search and display payments
• Calculate balances for a period
• Finalize and close periods by business group
• Release payments
• Download payments
note: Access to the Payments page is set in the Setup > Roles area (by setting the Payments privilege to Read-Only or Read-Write). The Read-Only privilege permits you to display information but does not allow you to make changes.
Search Payments
1. Click the Results tab, then click Payments in the secondary menu. The Payments screen appears allowing you to specify the search criteria.
2. In the Period field (on the left), choose a period using the drop-down list.
 Basic Search Screen
3. Specify the basic search criteria.
Do the following:
• In text fields, type an appropriate value in the field.
• In drop-down list fields, choose the appropriate value.
• In fields that allow you to search for a value, click the ![]() button and select the appropriate value using the dialog that appears.
button and select the appropriate value using the dialog that appears.
• In date fields, click the ![]() button and select the appropriate date using the dialog that appears.
button and select the appropriate date using the dialog that appears.
• To clear a field, click the ![]() button for the corresponding field.
button for the corresponding field.
4. Define a search using more fields, if required.
Do the following:
a. Click the More Search Options button (near the bottom).
b. In the Basic Search section, modify the basic search criteria.
c. In the Order Information and Payment Information sections, specify or modify the additional search criteria.
5. Click the ![]() button. The search results appear.
button. The search results appear.
The search criteria appear above the results, as shown below:
![]() Search Criteria
Search Criteria
To remove a field from the search criteria, click the button for the corresponding field.
6. Refine the search results, as required.
Do the following:
• In the Period field (on the left), choose a period using the drop-down list. The results update immediately.
• In the Filters pane (on the left), specify additional search criteria to further filter the search results and click the![]() button. The updated results appear.
button. The updated results appear.
• Click the ![]() button to save the current search. The Create Saved Search dialog appears. Type a name for the search and click the
button to save the current search. The Create Saved Search dialog appears. Type a name for the search and click the ![]() button.
button.
7. To display payment details, click a payment. A Details pane appears displaying general result, payment, and standard order information.
Calculate Balances
You can calculate draw and balance carry forward balances for payments in a period for one or more business groups.
1. Click the Results tab, then click Payments in the secondary menu. The Payments screen appears allowing you to specify the search criteria.
2. Click the ![]() button. The Calculate Balances dialog appears.
button. The Calculate Balances dialog appears.
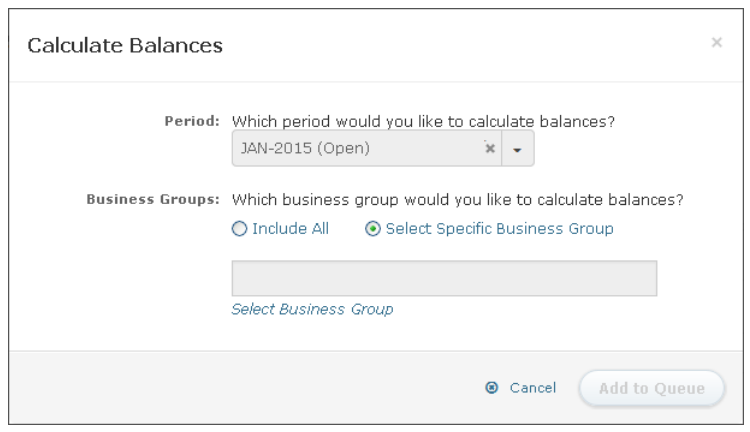 Calculate Balances Dialog
3. In the Period field, choose the period for which you would like to calculate balances.
4. In the Business Groups field, specify the business groups for which you would like to calculate balances.
You can select specific business groups or choose to include all business groups.
5. Click the![]() button. The calculate balance process is added to the process queue.
button. The calculate balance process is added to the process queue.
Finalize Payments
You can finalize payments for a period for one or more business groups.
1. Click the Results tab, then click Payments in the secondary menu. The Payments screen appears allowing you to specify the search criteria.
2. Click the ![]() button. The Finalize dialog appears.
button. The Finalize dialog appears.
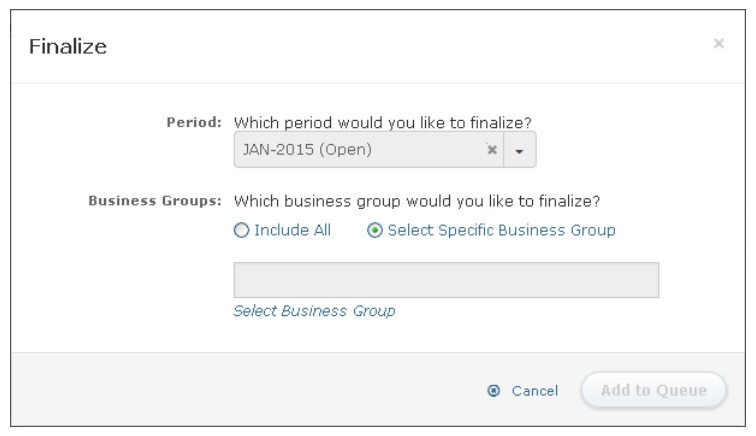 Finalize Dialog
3. In the Period field, choose the period for which you would like to finalize payments.
4. In the Business Groups field, specify the business groups for which you would like to finalize payments.
You can select specific business groups or choose to include all business groups.
5. Click the ![]() button. The finalize process is added to the process queue.
button. The finalize process is added to the process queue.
note: The period will not close until all business groups are finalized.
Release Payments
You can release selected payments, all payments in a period, or payments by business group.
1. Click the Results tab, then click Payments in the secondary menu. The Payments screen appears allowing you to specify the search criteria.
2. To release selected payments, do the following:
a. Search for the appropriate payments.
b. Select the payments to release by clicking the corresponding check boxes.
c. Hover over the![]() button, and choose Selected Payments using the drop-down menu that appears. A confirmation dialog appears.
button, and choose Selected Payments using the drop-down menu that appears. A confirmation dialog appears.
d. Click the![]() button. The release process is added to the process queue.
button. The release process is added to the process queue.
3. To release all payments in a period, choose the period using the drop-down list, hover over the![]() button, and choose All Payments in <period> using the drop-down menu that appears. A confirmation dialog appears.
button, and choose All Payments in <period> using the drop-down menu that appears. A confirmation dialog appears.
Click the button. The release process is added to the process queue.
4. To release all payments by business group, hover over the ![]() button, and choose By Business Groups using the drop-down menu that appears. The Release By Business Group dialog appears.
button, and choose By Business Groups using the drop-down menu that appears. The Release By Business Group dialog appears.
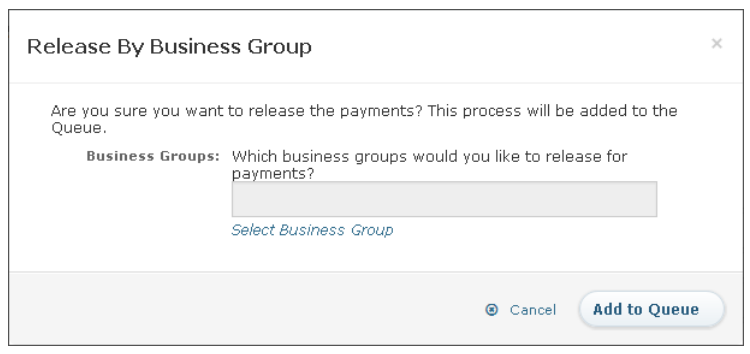 Release By Business Group Dialog
5. In the Business Groups field, specify the business groups for which you would like to finalize payments.
6. Click the ![]() button. The release process is added to the process queue.
button. The release process is added to the process queue.
Download Payments
You can download payments to either a Comma Separated Values (CSV) or text (TXT) file.
1. Click the Results tab, then click Payments in the secondary menu. The Payments screen appears allowing you to specify the search criteria.
2. Select the appropriate period.
3. To download all payments for the selected period, click the ![]() button. The Download dialog appears.
button. The Download dialog appears.
a. In the Download Name field, type the name of the download.
b. (Optional) In the Payroll Template field, choose a template from the drop-down list.
note: Downloading using a template produces a gzip (.gz) file while downloading with no template produces a ZIP (.zip) file.
To download an aggregated payroll, you need to define a payroll template in the Results > Templates > Payments area.
c. In the Download Format field, select the download format (either CSV or TXT).
4. To download specific payments, search for the appropriate payments. The search results appear.
a. Click the ![]() button. The Download dialog appears.
button. The Download dialog appears.
b. In the Download Name field, type the name of the download.
c. (Optional) In the Payroll Template field, choose a template from the drop-down list.
d. In the Download Format field, select the download format (either CSV or TXT).
5. Click the![]() button.
button.
The download starts processing. You can check the status by clicking the![]() button in the main menu (top right of the screen). Click OK again.
button in the main menu (top right of the screen). Click OK again.
Manage Manual Payments
You can use the Manual Payments page to manage manual payments. Using the page, you can complete the following tasks:
• Search and display manual payments
• Add and delete a manual payment
• View and add comments
• Upload manual payments
• Download manual payments
note: Access to the Manual Payments page is set in the Setup > Roles area (by setting the Manual Payments privilege to Read-Write). The Read-Only privilege permits you to display information but does not allow you to make changes.
Search Manual Payments
1. Click the Results tab, then click Payments in the secondary menu. The Payments screen appears. Click the Manual Payments button.
2. In the Period field (on the left), choose a period using the drop-down list.
 Basic Search Screen
3. Specify the basic search criteria.
Do the following:
• In text fields, type an appropriate value in the field.
• In drop-down list fields, choose the appropriate value.
• In fields that allow you to search for a value, click the ![]() button and select the appropriate value using the dialog that appears.
button and select the appropriate value using the dialog that appears.
• In date fields, click the ![]() button and select the appropriate date using the dialog that appears.
button and select the appropriate date using the dialog that appears.
• To clear a field, click the ![]() button for the corresponding field.
button for the corresponding field.
4. Define a search using more fields, if required.
Do the following:
a. Click the More Search Options button (near the bottom).
b. In the Basic Search section, modify the basic search criteria.
c. In the Manual Payment Information section, specify or modify the additional search criteria.
5. Click the ![]() button. The search results appear.
button. The search results appear.
The search criteria appear above the results, as shown below:
![]() Search Criteria
Search Criteria
To remove a field from the search criteria, click the![]() button for the corresponding field.
button for the corresponding field.
6. Refine the search results, as required.
Do the following:
• In the Period field (on the left), choose a period using the drop-down list. The results update immediately.
• In the Filters pane (on the left), specify additional search criteria to further filter the search results and click the ![]() button. The updated results appear.
button. The updated results appear.
• Click the ![]() button to save the current search. The Create Saved Search dialog appears. Type a name for the search and click the
button to save the current search. The Create Saved Search dialog appears. Type a name for the search and click the ![]() button.
button.
7. To display payment details, click a payment. A Details pane appears displaying the standard and optional manual payment information.
Click the Audit tab to display audit details related to the manual payment.
Add a Manual Payment
1. Click the Results tab, then click Payments in the secondary menu. The Payments screen appears. Click the Manual Payments button.
2. Click the ![]() button. The Add Manual Payment dialog appears.
button. The Add Manual Payment dialog appears.
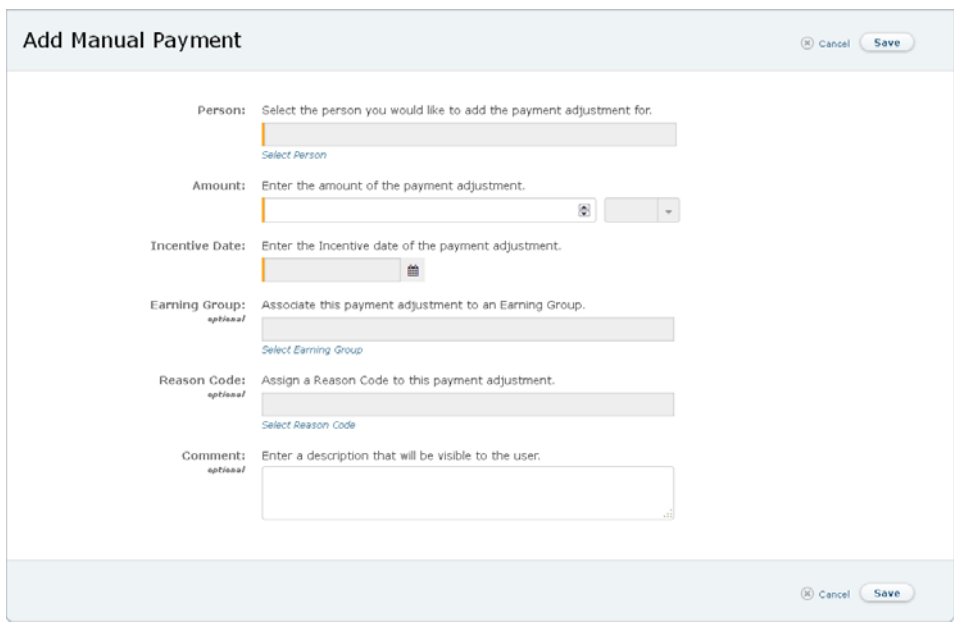 Add Manual Payment Dialog
3. In the Person field, specify the person for whom you need to add the payment adjustment.
Click the Select Person link and select the person using the dialog that appears.
4. In the Amount field, type the amount of the payment adjustment and select the corresponding unit type using the drop-down list.
5. In the Incentive Date field, click the ![]() button and select the incentive date (in an open period) of the payment adjustment.
button and select the incentive date (in an open period) of the payment adjustment.
6. (Optional) In the Earning Group field, specify the earning group with which to associate the payment adjustment.
Click the Select Earning Group link and select the group using the dialog that appears.
7. (Optional) In the Reason Code field, specify the reason code to assign with the payment adjustment.
Click the Select Reason Code link and select the appropriate setting using the dialog that appears.
8. (Optional) In the Comment field, type a description for the manual payment.
These comments are only available to administrators. The comments are not visible to end-users.
9. Click the ![]() button.
button.
Manual payments created for a person that is not in the person’s payment currency are converted into their payment currency using the exchange rate table in Incent.
note: The manual payment is created immediately, however the creation of the payment is a process that is added to the process queue.
Display and Add Comments
You can add comments to manual payments, and display existing comments, as appropriate.
1. Click the Results tab, then click Payments in the secondary menu. The Payments screen appears. Click the Manual Payments button.
2. To display existing comments, click the ![]() button that appears to the left of manual payments (in the results list). The Comments dialog appears showing the current comments.
button that appears to the left of manual payments (in the results list). The Comments dialog appears showing the current comments.
3. To add a comment, do any of the following:
• Click the ![]() button to the left of a manual payment and type the comment in the text box.
button to the left of a manual payment and type the comment in the text box.
• Select one or more check boxes next to manual payments, click the![]() button, and type the comment in the text box.
button, and type the comment in the text box.
• When viewing existing comments, type the comment in the text box.
Click the ![]() button.
button.
Delete a Manual Payment
1. Click the Results tab, then click Payments in the secondary menu. The Payments screen appears. Click the Manual Payments button.
2. Select one or more check boxes next to manual payments.
3. Click the![]() button. A confirmation dialog appears. Click the
button. A confirmation dialog appears. Click the ![]() button to delete the manual payments.
button to delete the manual payments.
Upload Manual Payments
You can upload manual payments to Incent using a CSV template file as the basis.
note: You can upload manual payments across periods (payments can have multiple incentive dates in the upload file). There is a limit of 2000 records for an upload.
Manual payments cannot be added to, or deleted from, a closed period or a finalized business group.
1. Click the Results tab, then click Payments in the secondary menu. The Payments screen appears. Click the Manual Payments button.
2. Click the ![]() button or the
button or the![]() button. The Upload Manual Payments dialog appears.
button. The Upload Manual Payments dialog appears.
3. Click the Click here link to download the CSV template file.
Depending on your browser, a dialog might appear allowing you to specify where to save the file.
4. Add the payments to the file and save the CSV-format file.
5. In the File field, click the![]() button, and select the CSV-format file that you saved.
button, and select the CSV-format file that you saved.
6. (Optional) Select the Auto Create Reason Codes check box to have reason codes automatically created during the upload.
7. Click the![]() button to upload the payments file. A message indicating a successful file upload appears.
button to upload the payments file. A message indicating a successful file upload appears.
Download Manual Payments
You can download manual payments to either a Comma Separated Values (CSV) or text (TXT) file.
1. Click the Results tab, then click Payments in the secondary menu. The Payments screen appears. Click the Manual Payments button.
2. Select the appropriate period.
3. To download all manual payments for the selected period, click the ![]() button. The Download dialog appears.
button. The Download dialog appears.
a. In the Download Name field, type the name of the download.
b. In the Download Format field, select the download format (either CSV or TXT).
4. To download specific manual payments, search for the appropriate manual payments. The search results appear.
a. Click the![]() button. The Download dialog appears.
button. The Download dialog appears.
b. In the Download Name field, type the name of the download.
c. In the Download Format field, select the download format (either CSV or TXT).
5. Click the ![]() button.
button.
The download starts processing. You can check the status by clicking the ![]() button in the main menu (top right of the screen). Click OK again.
button in the main menu (top right of the screen). Click OK again.