Results > Payments Balances
You can use the Payment Balances area to track payment balances in the current period that have been carried over from a previous period, and that can be accurately recovered against future earnings.
Using the Payment Balances area, you can:
- Search for payment balance information
- Download payment balance information to a CSV or text file
note: Business group administrators can only search and view payment balances that are associated with business groups to which the administrators themselves are assigned.
Changes to the Payment Currency
In cases when the payment currency changes for a person, as might happen when the person is transferred to a new business group, the payment balance is updated with payments in the new currency one month after the payment currency change.
For example, if a person has a negative balance in July, and then changes payment currency in August with a subsequent payment in the new currency, the negative balance is updated with payments based on the new currency in September (assuming that a corresponding exchange rate is defined in Incent).
Customizing Searches
The Payment Balances area offers you the ability to customize your standard searches. By configuring and saving the search fields and columns, you can tailor the search experience to your needs and save time finding precisely the information you need. Customized searches are defined by the following information:
- Search fields—The specific data fields used in the search. The search fields you specify appear in the Filters pane of the sidebar after running a search, allowing you to fine-tune your search in an iterative fashion.
- Columns—The columns of data that appear as part of the search results. Specifying the columns and their order allows you to prioritize important information on the search results page.
You can also create saved searches that define specific search fields and search criteria. You can then access not only your previously-saved searches, but also searches saved by other administrators. You can further mark certain saved searches as favorites for quick and easy access. For more information, see “Customizing and Saving Searches”.
Screen
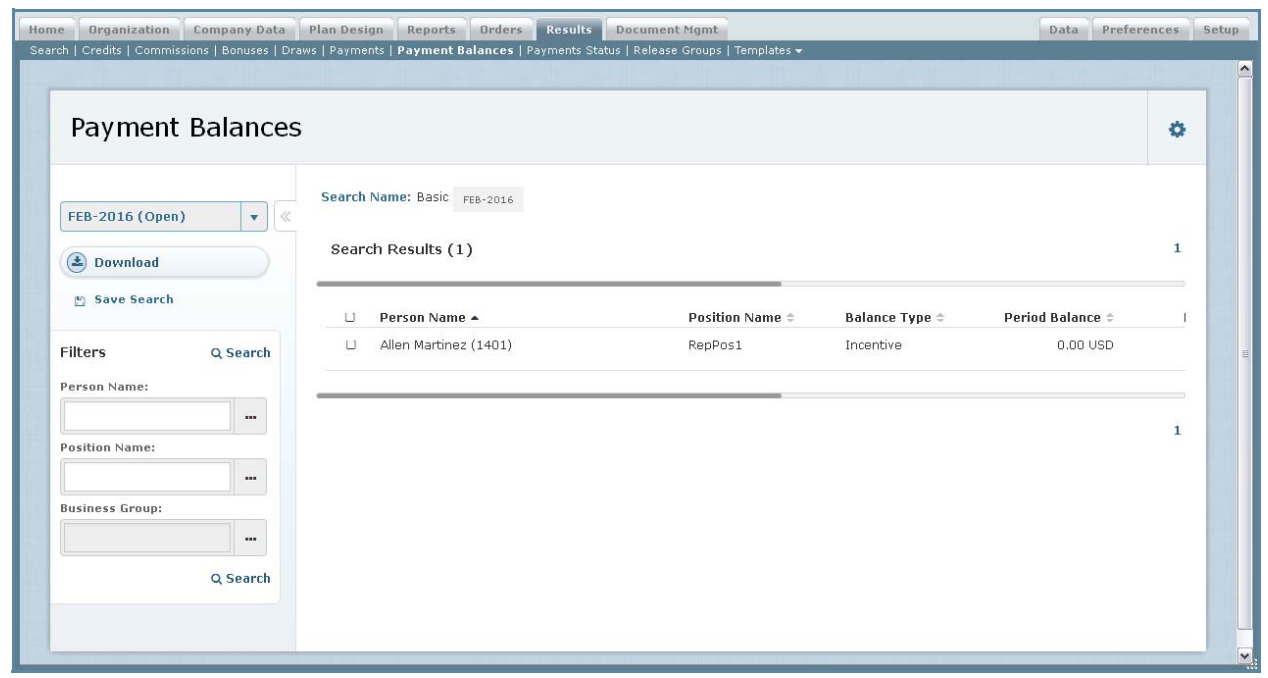 Payment Balances Screen
Payment Balances
The following table describes the information displayed when searching payment balances:
| Field | Description |
|---|---|
| Balance Owed to Employee | The balance owed to the employee. Note that is field is only available when prior period processing (PPP) is enabled. |
| Balance Type | The type of balance. |
| Business Group | The business group associated with the payment balance. |
| Created Date | The date and time on which the payment balance was created. |
| Period Balance | The payment balance for the selected period. |
| Person Name | The name of the person associated with the payment balance. |
| Position Name | The name of the position associated with the payment balance. |
| Previous Balance | The balance carried over from the previous period |
| Recovered Balance to Company | The payment amount recovered from the previous period. |
| Remaining Balance | The remaining balance. |
note: You can configure the search fields that appear in the Filters pane of the sidebar when defining the search settings.
How to …
This section describes how to manage payment balance results.
Search Payment Balances
1. Click the Results tab, then click Payment Balances in the secondary menu. The Payment Balances screen appears allowing you to specify the search criteria.
2. In the Period field (on the left), choose a period using the drop-down list.
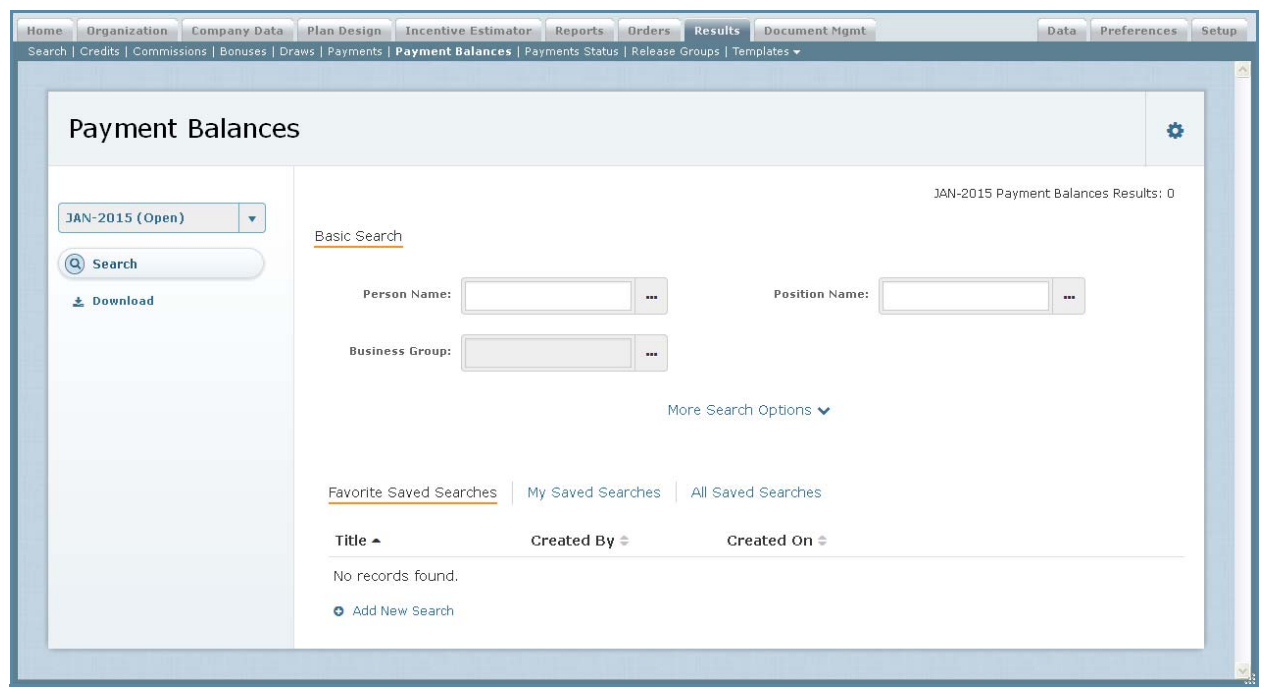 Basic Search Screen
3. Specify the basic search criteria.
Do the following:
• In text fields, type an appropriate value in the field.
• In drop-down list fields, choose the appropriate value.
• In fields that allow you to search for a value, click the ![]() button and select the appropriate value using the dialog that appears.
button and select the appropriate value using the dialog that appears.
• In date fields, click the![]() button and select the appropriate date using the dialog that appears.
button and select the appropriate date using the dialog that appears.
• To clear a field, click the ![]() button for the corresponding field.
button for the corresponding field.
4. Define a search using more fields, if required.
Do the following:
a. Click the More Search Options button (near the bottom).
b. In the Basic Search section, modify the basic search criteria.
c. In the Balance Information section, specify or modify the additional search criteria.
5. Click the![]() button. The search results appear.
button. The search results appear.
The search criteria appear above the results, as shown below:
![]()
Search Criteria
To remove a field from the search criteria, click the ![]() button for the corresponding field.
button for the corresponding field.
6. Refine the search results, as required.
Do the following:
• In the Period field (on the left), choose a period using the drop-down list. The results update immediately.
• In the Filters pane (on the left), specify additional search criteria to further filter the search results and click the ![]() button. The updated results appear.
button. The updated results appear.
• Click the![]() button to save the current search. The Create Saved Search dialog appears. Type a name for the search and click the
button to save the current search. The Create Saved Search dialog appears. Type a name for the search and click the![]() button.
button.
Download Payment Balances
You can download payment balances to either a Comma Separated Values (CSV) or text (.TXT) file.
1. Click the Results tab, then click Payment Balances in the secondary menu. The Payment Balances screen appears allowing you to specify the search criteria.
2. Select the appropriate period.
3. To download all balances for the selected period, click the ![]() button.
button.
The Download dialog appears.
a. In the Download Name field, type the name of the download.
b. In the Download Format field, select the download format (either CSV or TXT).
4. To download specific balances, search for the appropriate balances. The search results appear.
a. Click the ![]() button. The Download dialog appears.
button. The Download dialog appears.
b. In the Download Name field, type the name of the download.
c. In the Download Format field, select the download format (either CSV or TXT).
5. Click the![]() button.
button.
The download starts processing. You can check the status by clicking the ![]() button in the main menu (top right of the screen). Click OK again
button in the main menu (top right of the screen). Click OK again