Plan Design > Plan Templates
You can use the Plans area to create and manage plan templates, add company objectives to plans, optionally add specific weightings to objectives, and then assign plans to individuals, as appropriate.
This allows administrators to associate specific company objectives with plans, optionally locking in objective weightings, guaranteeing that specified minimum portions of plans are devoted to company goals.
Administrators can also optionally associate a discretionary objective with a plan, thereby allowing managers to distribute bonuses drawn from a calculated bonus pool.
note: Plans created by administrators are recorded as having been completed by the administrator; they are not a proxy for manager actions.
note: Plan templates created by administrators are not automatically assigned to individuals. Instead, these plan templates are considered as drafts, visible only to administrators. This allows administrators to create and modify plan templates before managers can gain visibility and access to the plans.
Screen
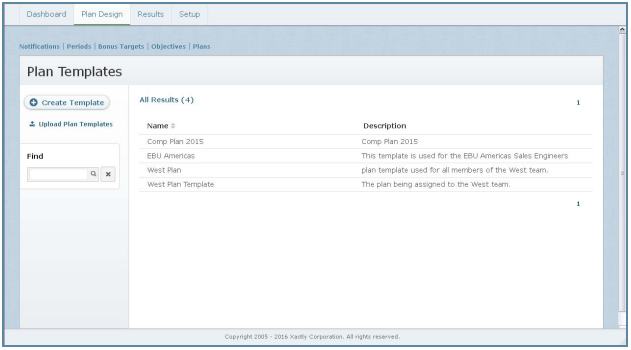
Plan Templates Screen
Displayed Columns
The following table describes the information displayed when managing plan templates:

How to…
This section describes how to manage plan templates.
Display All Plan Templates
Click the Plan Design tab, then click Plans in the secondary menu. The Plan Templates screen appears displaying the plan templates for the organization.
- To find specific plan templates, type part of the title or description in the Find text box, and click the
 button. The search results appear.
Click the button to clear the Find text box and reset the search results.
 - Use the page navigation buttons to navigate between the pages of plan templates.
Create a Plan Template
1. Click the Plan Design tab, then click Plans in the secondary menu. The Plan Templates screen appears displaying the plan templates for the organization.
2. Click the ![]() button. The Create Plan Template screen appears.
button. The Create Plan Template screen appears.
3. In the Name field, type a name for the plan template.
4. In the Description field, type a description of the plan template.
5. Click the ![]() button. Alternatively, click the
button. Alternatively, click the ![]() button to dismiss the screen without creating the plan template.
button to dismiss the screen without creating the plan template.
The lower pane becomes enabled, allowing you to add objectives to the plan template, as required. You can also add a single discretionary objective.
6. Click the ![]() button. The Add Objective screen appears showing the available company, individual, and discretionary objectives.
button. The Add Objective screen appears showing the available company, individual, and discretionary objectives.
When adding a discretionary objective, you need to add at least one other type of objective to the plan.
7. (Optional) Click the![]() button to create a new objective. Specify the details and save the new objective.
button to create a new objective. Specify the details and save the new objective.
8. Select the objectives that you want to add to the plan template, and click the ![]() button. The Create Plan screen appears showing the objectives in the plan template, along with the weight for each objective.
button. The Create Plan screen appears showing the objectives in the plan template, along with the weight for each objective.
To add additional objectives to the plan template, click the ![]() button and select the appropriate objectives.
button and select the appropriate objectives.
To remove an objective from the plan template, hover over the objective (in the list) and click the Delete button that appears. Confirm the action in the dialog that appears.
note: You do not need to add an objective; you can assign plans without objectives to allow managers to populate the plan.
9. To assign objective weightings, click the ![]() button in the Objective Weightings section.
button in the Objective Weightings section.
note: There is no weighting for discretionary objectives.
Do the following:
• To enter specific weightings, type the values in the corresponding fields.
• To distribute the weightings evenly between the objectives, click the ![]() button.
button.
• To lock a minimum weighting, click the ![]() button for the corresponding objective. To unlock a minimum weighting, click the
button for the corresponding objective. To unlock a minimum weighting, click the ![]() button for the corresponding objective. To lock all minimum weightings, click the
button for the corresponding objective. To lock all minimum weightings, click the ![]() button.
button.
• To save your settings, click the ![]() button.
button.
note: In cases when there are multiple categories on the plan, there is a category
weighting bar and a weighting bar for each set of objectives in a category.
10, To define the plan flow, click the ![]() button. The Define Plan Flow screen appears that shows the flow the plan will take from start to finish, along with the owners of various steps in the flow.
button. The Define Plan Flow screen appears that shows the flow the plan will take from start to finish, along with the owners of various steps in the flow.
Do the following:
a. Customize the owner of plan creation, plan approval, and plan evaluation steps, as needed. Note that setting the owner to “No One” effectively disables that step in the flow.
b. Click the ![]() button. Alternatively, click the
button. Alternatively, click the ![]() button to dismiss the screen without saving the plan flow.
button to dismiss the screen without saving the plan flow.
note: You cannot assign plans without objectives in cases when the first step of the plan flow (Plan Creation) is set to “No One.”
You can edit a plan flow until the plan is assigned, at which point the plan flow (or content) is no longer changeable.
11. To save and assign the plan, click the ![]() button, The Set Plan Period screen appears.
button, The Set Plan Period screen appears.
Select a period from the list and choose whether to assign the plan to a team or to individuals.
12. To assign the plan to individuals that are part of a team in your organization, click the ![]() button, The Assign Plan to Team screen appears.
button, The Assign Plan to Team screen appears.
note: Plans are assigned to individual members of a team, not to teams themselves.
Do the following:
a. To find specific teams, type part of the team name in the Find text box, and click the ![]() button. The search results appear.
button. The search results appear.
Click the ![]() button to clear the Find text box and reset the search results. Use the page navigation buttons to navigate between the pages of teams.
button to clear the Find text box and reset the search results. Use the page navigation buttons to navigate between the pages of teams.
b. Select the appropriate teams using the corresponding checkboxes. Use the Select drop-down list to select all teams or to reset your selection.
c. Click the ![]() button.
button.
Plan creation can take some time to complete in the background. When all plans have been created, you receive a notification email.
d. Click the ![]() button.
button.
13. To assign the plan to individuals in your organization, click the ![]() button. The Assign Plan to Individuals screen appears.
button. The Assign Plan to Individuals screen appears.
Do the following:
a. To find specific people, type part of the person’s name in the Find text box,
and click the ![]() button. The search results appear.
button. The search results appear.
Click the ![]() button to clear the Find text box and reset the search results.
button to clear the Find text box and reset the search results.
To display people reporting to a specific manager, choose the manager using
the drop-down list in the Manager section. Use the page navigation buttons to navigate between the pages of individuals.
b. Select the appropriate individuals using the corresponding checkboxes.
c. Click the ![]() button. The plan template is assigned to the selected individuals and the status is set. You can review the plan assignments in the Results > Plans area.
button. The plan template is assigned to the selected individuals and the status is set. You can review the plan assignments in the Results > Plans area.
d. Click the ![]() button.
button.
Edit a Plan Template
note: You cannot edit the objectives or plan flow in plan templates that have been assigned.
1. Click the Plan Design tab, then click Plans in the secondary menu. The Plan Templates screen appears displaying the plan templates for the organization.
2. Hover over the plan template, and click the Edit button that appears. The Create Plan Template screen appears.
3. To edit the objective weightings, click the ![]() button in the Objective Weightings section, and modify the settings as required.
button in the Objective Weightings section, and modify the settings as required.
4. To add additional objectives to the plan template, click the ![]() button and select the appropriate objectives.
button and select the appropriate objectives.
To remove an objective from the plan template, hover over the objective (in the
list) and click the Delete button that appears. Confirm the action in the dialog that
appears.
5. To edit the plan flow, click the ![]() button in the Plan Flow section, and modify the settings as required.
button in the Plan Flow section, and modify the settings as required.
6. To save and assign the plan, click the ![]() button. The Set Plan Period screen appears.
button. The Set Plan Period screen appears.
Select a period from the list and continue assigning the plan to a team or to individuals, as described in the earlier section on creating a plan template.
Copy a Plan Template
You can copy a plan template either when creating a new plan template or directly from the Plan Templates screen. The copy includes all objectives, weightings, and the plan flow. Copying a plan template can save you a lot of time if you are making slight modifications to one or more plan templates.
To copy a plan template directly from the Plan Templates screen, do the following:
1. Click the Plan Design tab, then click Plans in the secondary menu. The Plan Templates screen appears displaying the plan templates for the organization.
2. Hover over the plan template, and click the Copy button that appears as a pop-up. The Create Plan Template screen appears with the settings already populated from the plan template you are copying.
3. In the Name field, type a name for the new plan template.
4. In the Description field, type a description of the plan template.
5. Click the ![]() button. Alternatively, click the
button. Alternatively, click the ![]() button to dismiss the screen without creating the plan template.
button to dismiss the screen without creating the plan template.
The lower pane becomes enabled, allowing you to modify the plan template settings.
6. Modify the plan, as required.
You can edit the objective weightings, remove existing objectives, add other objectives, modify the plan flow, and assign the plan.’
To copy a plan template when creating a plan template, do the following:
1. Click the Plan Design tab, then click Plans in the secondary menu. The Plan Templates screen appears displaying the plan templates for the organization.
2. Click the ![]() button. The Create Plan Template screen appears.
button. The Create Plan Template screen appears.
3. In the Name field, type a name for the plan template.
4. In the Description field, type a description of the plan template.
5. Click the ![]() button. Alternatively, click the
button. Alternatively, click the ![]() button to dismiss the screen without creating the plan template.
button to dismiss the screen without creating the plan template.
The lower pane becomes enabled, allowing you to modify the plan template settings.
6. Click the Copy Another Plan button. The Copy Plan from dialog appears.
7. Click the plan template that you want to copy. The plan details appear in the Create Plan pane.
8. Modify the plan, as required.
You can edit the objective weightings, remove existing objectives, add other objectives, and assign the plan to individuals.
Download Plan Templates
1. Click the Plan Design tab, then click Plans in the secondary menu. The Plan Templates screen appears displaying the plan templates for the organization.
2. Click the Download Plan Templates button. The plan templates download to your local machine as a Comma Separated Values (CSV) file.
Download Plan Assignments
1. Click the Plan Design tab, then click Plans in the secondary menu. The Plan Templates screen appears displaying the plan templates for the organization.
2. Click the Download Template button. The plan assignments download to your local machine as a Microsoft Excel (XLS) file.
Upload Plan Templates
You can update plan assignments and set the plan status by uploading a plan assignment template file.
1. Click the Plan Design tab, then click Plans in the secondary menu. The Plan Templates screen appears displaying the plan templates for the organization.
2. Click the![]() button. The Upload Plan Templates dialog appears.
button. The Upload Plan Templates dialog appears.
3. In Step 1 of the dialog, click the Click here button to download the upload template. The file downloads to your local machine as a Microsoft Excel (XLS) file.
4. In Step 2 of the dialog, click the Click here button to download the existing plan templates. The file downloads to your local machine as a Comma Separated Value (CSV) file.
5. Using Microsoft Excel, copy the appropriate plan template rows to the upload template and save the file.
6. Assign one employee ID per row, set the plan status, and add comments as needed in the upload template. Save the file.
You need to create a separate row for each individual or team assignment, including a separate row for each period. Each row needs to have the plan ID, the employee ID, the plan status, and any comments.
7. Click the ![]() button. and select the file you modified in the previous step in the dialog that appears.
button. and select the file you modified in the previous step in the dialog that appears.
8. Click the ![]() button. The plan templates file is uploaded to the system. Correct any reported errors and resubmit the file, if necessary.
button. The plan templates file is uploaded to the system. Correct any reported errors and resubmit the file, if necessary.
Delete a Plan Template
note: You cannot delete a plan template that has been assigned.
1. Click the Plan Design tab, then click Plans in the secondary menu. The Plan Templates screen appears displaying the plan templates for the organization.
2. Hover over the plan template, and click the Delete button that appears as a popup. A confirmation dialog appears.
3. Click the ![]() button to delete the plan template. Alternatively, click the
button to delete the plan template. Alternatively, click the ![]() button to dismiss the dialog without deleting the plan template.
button to dismiss the dialog without deleting the plan template.