Setting Up Objectives
You can use the Setup area to manage roles and user access in the Objectives application.
All users defined in Incent automatically appear on the User Access page of
the Setup area.
You can also use the Setup area to manage teams, and set payment caps and
enable bonus proration.
note: Roles defined in Xactly Incent do not apply to the Objectives application. You
need to define roles for the Objectives application using this area. Assigning a role in
Objectives automatically gives the user access to the Objectives application in the
Xactly menu.
Screen
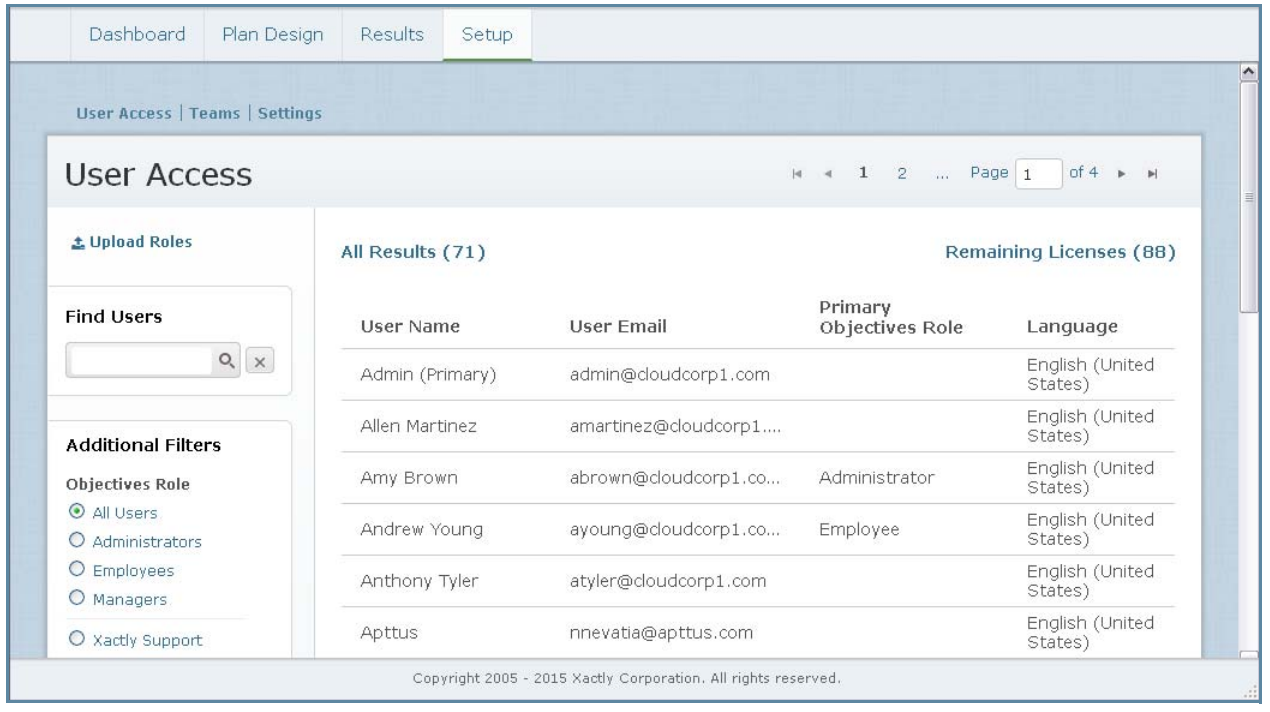
User Access Screen
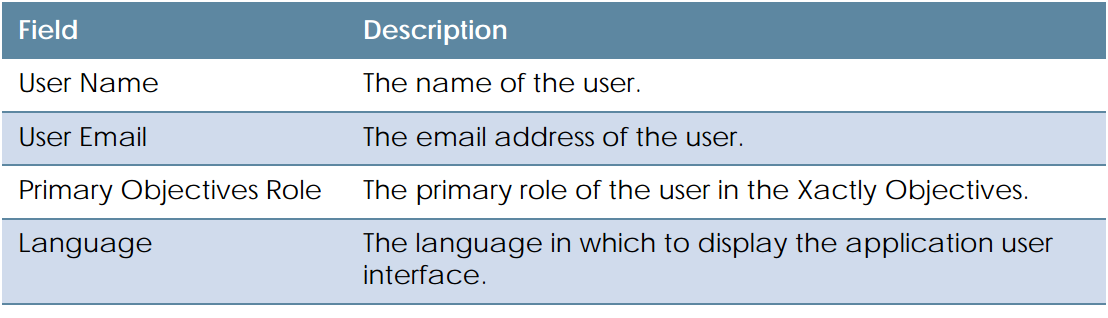
Displayed Fields
The following table describes the information displayed when managing roles and
user access:
How to…
This section describes how to set up Xactly Objectives and manage user access.
Display All Users
Click the Setup tab. The User Access screen appears displaying all users and corresponding
roles in the results area.
• To find specific users, type part of the user name or user email in the Find Users text
box, and click the ![]() button. The search results appear.
button. The search results appear.
Click the ![]() button to clear the Find Users text box and reset the search results.
button to clear the Find Users text box and reset the search results.
• To filter users based on role, select the appropriate radio button in the Additional
Filters section.
You can filter users based on the following Objectives roles:
• All Users
• Administrators
• Employees
• Managers
You can also filter and display Xactly Support users.
note: The Xactly Support users are provided for your convenience. By default, they
have no role assigned and hence no access to your data. However, when working
with Xactly Support, you might want to provide access to your data to help
troubleshoot or solve an issue. You can ignore these users unless directed to use
them by Xactly Support.
• To filter users based on language, select the appropriate radio button in the Additional
Filters section.
You can filter users based on the following languages:
• All Languages
• English (United States)
• Spanish (Spain)
• French (France)
• German (Germany)
• Dutch (Netherlands)
• Swedish
• Norwegian
• Use the page navigation buttons to navigate between the pages of user results.
Edit a User Role
1. Click the Setup tab. The User Access screen appears.
2. Select the user in the list. A panel appears allowing you to select the user role
within Objectives.
3. Select the appropriate user roles.
Setting a role enables the corresponding user to access Xactly Objectives. The
roles assigned to a user also determines the areas (application tabs) the user can
see after launching Objectives.
You can choose from among the following options:
• Administrator—Responsible for administering the application and creating
new company objectives. Selecting this role enables access to all administrative
functions and all user information.
• Employee—Enables users to define and manage their own objectives (only)
• Manager— Responsible for creating, approving, and scoring the objectives of
the employees on their teams.
note: You can assign more than one role to each user. For example, the Human
Resources administrator might also be a manager and an employee.
Assigning an Objectives role requires a license. You cannot assign roles to additional
users when the Remaining Licenses count reaches 0 (zero). Deselecting all
roles for a user and saving allows you to reclaim a license.
4. Choose the language in which to display Xactly Objectives to the user using the
drop-down list.
You can choose from among the following languages:
• English (United States)
• Spanish (Spain)
• French (France)
• German (Germany)
• Dutch (Netherlands)
• Swedish
• Norwegian
The drop-down list highlights the default language (of Objectives) for the business.
note: Contact Xactly Support to enable this feature (localization). Otherwise,
English (United States) appears as the only option.
This setting does not affect the language used in Xactly Incent.
Incent administrators can set the available languages using the
BUSINESS_LANGUAGES_ACTIVE preference in the Setup > Preferences area of
Incent. Similarly, administrators can set the default language for a business using
the BUSINESS_LOCALE preference.
5. Click the ![]() button. The user role is saved and the Remaining Licenses
button. The user role is saved and the Remaining Licenses
count is updated accordingly.
Objectives sends an email notification to users in the following cases:
• An Objectives role is assigned to a new user (without Incent access). In this
case, the user needs to activate their account using a link in the email message.
• An Objectives role is added or removed for a user.
• An Objectives role is assigned to a user who already has Incent access. In this
case, the user is informed about how to access Objectives.
note: Note that Xactly Objectives does not send an email notification when you
remove all roles from a user. Also, removing all roles from a user does not modify or
remove their corresponding password. If you add a role again later, the user
retains the same password.
Reset a User Password
You can send an email to a user to have them reset their password.
1. Click the Setup tab. The User Access screen appears.
2. Select the user in the list. A panel appears allowing you to reset the password.
3. Click the ![]() button. An email is sent to the user.
button. An email is sent to the user.
Upload User Roles
1. Click the Setup tab. The User Access screen appears.
2. Click the Download Template link. A dialog appears allowing you to save the template.
Save the download template to your local machine.
3. Add the user and roles data to the template file, and save the file.
4. Click the Upload Roles link. A pane appears allow you to locate and submit the
upload file.
5. Click the ![]() button. A dialog appears allowing you to locate the
button. A dialog appears allowing you to locate the
upload file. Select the appropriate file.
The file name appears in the pane. Click the ![]() button to remove the
button to remove the
file.
6. Click the ![]() button. The roles are uploaded to Xactly Objectives.
button. The roles are uploaded to Xactly Objectives.
Alternatively, click the Cancel link to dismiss the pane without uploading the roles.
When uploading roles, assigning or removing roles can modify the license count. If
an upload requires more licenses than are available, Objectives displays an error.
note: When uploading roles, Xactly Objectives processes rows in order and continues
until the end of the file. This means that rows which only modify existing user
roles continue to be processed, even in cases when the license count is
exceeded.
Download User Roles
1. Click the Setup tab. The User Access screen appears.
2. Click the ![]() button. A dialog appears allowing you to
button. A dialog appears allowing you to
save the file.
3. Save the roles file to your local machine.
Display All Teams
Click the Setup tab, then click Teams in the secondary menu. The Teams screen
appears displaying all teams in the results area.
• To find specific teams, type part of the team name in the Find Teams text box, and
click the![]() button. The search results appear.
button. The search results appear.
Click the![]() button to clear the Find Teams text box and reset the search results.
button to clear the Find Teams text box and reset the search results.
• To view the members of a team, hover over the team and click the View Members
button that appears. The Bonus Targets screen appears showing the team members.
• Use the page navigation buttons to navigate between the pages of results.
Create a Team
You can create teams to help group and categorize people in your organization. You
can then use these team definitions to more easily assign plan templates to a group of
individuals.
1. Click the Setup tab, then click Teams in the secondary menu. The Teams screen
appears displaying all teams in the results area.
2. Click the ![]() button. The Create Team screen appears.
button. The Create Team screen appears.
3. In the Name field, type the name of the team.
4. (Optional) In the Description field, type a description of the team.
5. In the Formulas field, select the respective formulas to calculate the company and
individual objectives for the team.
If the formula references a lookup table, a new field appears allowing you to
choose the lookup table using a drop-down list.
6. Click the ![]() button.
button.
Edit a Team
1. Click the Setup tab, then click Teams in the secondary menu. The Teams screen
appears displaying all teams in the results area.
2. Hover over the team, and click the Edit button that appears. The Edit Team screen
appears.
3. Modify the fields, as required.
4. Click the button. Alternatively, click the ![]() button to dismiss the
button to dismiss the
screen without saving your changes.
Delete a Team
You can only delete teams that do not have any members.
1. Click the Setup tab, then click Teams in the secondary menu. The Teams screen
appears displaying all teams in the results area.
2. Hover over the team, and click the Delete button that appears as a pop-up. A
confirmation dialog appears.
3. Click the ![]() button to delete the team.
button to delete the team.
Alternatively, click the ![]() button to dismiss the dialog without
button to dismiss the dialog without
deleting the team.
Set Payment Caps
You can specify the maximum payout percentage for each type of objective and the
plan cap default (between 0 and 1000 percent).
1. Click the Setup tab, then click Settings in the secondary menu. The Settings screen
appears displaying the existing payment cap configuration.
2. In the Quantitative field, type the value to use to cap payment for objectives with
targets.
3. In the Qualitative field, type the value to use to cap payment for objectives with
no targets.
4. In the Plan Cap Default field, type the value to use as the default for each person’s
bonus target plan cap.
note: The default you specify applies only to users created after you save this setting.
5. Click the ![]() button.
button.
Plan cap settings apply immediately to all plans that are not final, and are
updated when a plan is estimated or saved, Changes to payment caps have no
effect on plans which have already been submitted for payout.
Enable Bonus Proration
You can enable (or disable) bonus proration for your organization. When enabled,
bonus values allocated to plans automatically adjust when there are multiple bonus
values for a person during a plan period.
note: Proration is calculated based on the number of total calendar days in the
period. In cases when proration is disabled, a plan uses the bonus value that is effective
on the last day of the period.
1. Click the Setup tab, then click Settings in the secondary menu. The Settings screen
appears.
2. In the Bonus Proration field, select either the Enabled or Disabled radio button, as
appropriate.
3. Click the![]() button.
button.