Setup > Calculations
You can use the Calculations area to define and manage the lookup tables and formulas used in Objectives. Formulas are applied to teams and impact the payment calculation of each company and individual objective on a plan.
Lookup tables, in contrast, provide a simple method to use accelerators in payment calculations. Formulas can consist of elements (referencing values from bonuses, weights, measurements, or calendars), constants, lookup tables, and arithmetic operators.
Screen
 Lookup Tables Screen
Lookup Table Fields
The following table describes the information displayed when managing lookup
tables:

Formula Fields
The following table describes the information displayed when managing formulas:

How to …
This section describes how to manage lookup tables and formulas.
Manage Lookup Tables
You can complete the following tasks when managing lookup tables:
• Display and search for lookup tables
• Create a new lookup table
• Edit an existing lookup table
• Copy an existing lookup table
• Delete a lookup table
note: Lookup tables in Objectives are similar to lookup tables in Incent, however,
Objectives lookup tables use a fixed row/column definition (objective measurement).
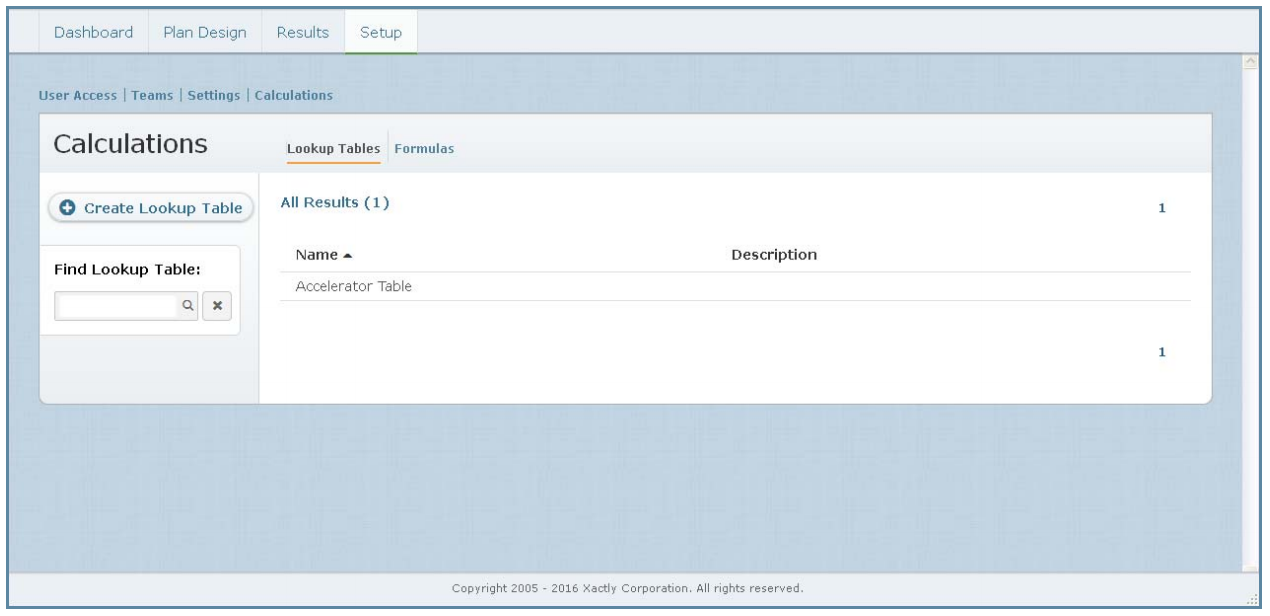
Display Lookup Tables
Click the Setup tab, then click Calculations in the secondary menu. The Lookup
Tables screen appears.
• To find specific lookup tables, type part of name in the Find Lookup Table text
box, and click the ![]() button. The search results appear.
button. The search results appear.
Click the ![]() button to clear the Find Lookup Table text box and reset the
button to clear the Find Lookup Table text box and reset the
search results.
• Use the page navigation buttons to navigate between the pages of lookup
tables.
Create a Lookup Table
1. Click the Setup tab, then click Calculations in the secondary menu. The
Lookup Tables screen appears.
2. Click the ![]() button. The Create Lookup Table
button. The Create Lookup Table
screen appears.
3. In the Name field, type the name of the lookup table.
4. (Optional) In the Description field, type a detailed description of the lookup
table.
Although the Description field is optional, the description is important to convey
the purpose of the lookup table.
5. In the Table field, click the ![]() button to add a new row to the lookup
button to add a new row to the lookup
table definition.
Three fields appear allowing you to specify the low and high measurement,
along with the measurement value. Continue adding as many rows as
needed to the lookup table.
6. Click the![]() button to save the new lookup table. Alternatively, click
button to save the new lookup table. Alternatively, click
the ![]() button to dismiss the screen without creating the lookup table.
button to dismiss the screen without creating the lookup table.
Lookup Table Example
When defining lookup tables, each row covers a range of measurements (from
low to high). The table returns the measurement value when the objective measurement
falls within the specified range.
For example, consider a lookup table with the following three rows:

In this case,
• A measurement of 90% returns 1 to the formula.
• A measurement of 110% returns 1 for the first 100% and 2 for the remaining 10%.
• A measurement of 130% returns 1 for the first 100%, 2 for the next 25%, and 1.5
for the remaining 5%.
note: The ranges must be contiguous. You cannot leave gaps between rows. Also,
if the measurement high setting is blank on the last row, it implicitly covers any
range above the low value. In the example above, for instance, a measure values
of 1.5 is returned for any measurement above 125%.
If the example did not include the third row, any measurement above 125% would
return a measurement value of 1 by default.
Edit a Lookup Table
1. Click the Setup tab, then click Calculations in the secondary menu. The
Lookup Tables screen appears.
2. Hover over the lookup table, and click the Edit button that appears. The Edit
Lookup Table screen appears.
3. Modify the fields, as required, including adding new rows to the table if
needed.
4. Click the![]() button. Alternatively, click the
button. Alternatively, click the![]() button to dismiss
button to dismiss
the screen without saving your changes.
Copy a Lookup Table
1. Click the Setup tab, then click Calculations in the secondary menu. The
Lookup Tables screen appears.
2. Hover over the lookup table, and click the Copy button that appears as a
pop-up. The Create Lookup Table screen appears with the fields already populated
using values from the lookup table you are copying.
3. In the Name field, type a new name for the lookup table.
4. Modify any other fields, as required.
5. Click the![]() button to save the new lookup table. Alternatively, click
button to save the new lookup table. Alternatively, click
the![]() button to dismiss the screen without creating the lookup table.
button to dismiss the screen without creating the lookup table.
Delete a Lookup Table
note: You cannot delete lookup tables that are assigned to a team.
1. Click the Setup tab, then click Calculations in the secondary menu. The
Lookup Tables screen appears.
2. Hover over the lookup table, and click the Delete button that appears as a
pop-up. A confirmation dialog appears.
3. Click the ![]() button to delete the lookup table.
button to delete the lookup table.
Alternatively, click the![]() button to dismiss the dialog
button to dismiss the dialog
without deleting the lookup table.
Manage Formulas
You can complete the following tasks when managing formulas:
• Display and search for formulas
• Create a new formula
• Edit an existing formula
• Copy an existing formula
• Delete a formula
note: Since lookup tables refer to an objective measurement, formulas which have
a lookup table multiplier should not also contain an objective measurement multiplier.
Display Formulas
Click the Setup tab, click Calculations in the secondary menu, and then click the
Formulas tab. The Formulas screen appears.
• To find specific formulas, type part of name in the Find Formula text box, and
click the button. The search results appear.
Click the button to clear the Find Formula text box and reset the search
results.
• Use the page navigation buttons to navigate between the pages of formulas.
Create a Formula
1. Click the Setup tab, click Calculations in the secondary menu, and then click
the Formulas tab. The Formulas screen appears.
2. Click the ![]() button. The Create Formula screen
button. The Create Formula screen
appears.
3. In the Name field, type the name of the formula.
4. (Optional) In the Description field, type a detailed description of the formula.
Although the Description field is optional, the description is important to convey
the purpose of the formula.
5. In the Type field, choose the type of formula using the drop-down list.
You can choose from among the following options:
• Company—Select to use the formula to calculate company objectives on
plans associated with this team
• Individual—Select to use the formula to calculate individual objectives on
plans associated with this team
• Bonus—Select to define the bonus value associated with a person’s plan.
Bonus formulas can consist of elements (referencing values from a bonus
or calendar), constants, and arithmetic operators. This allows you to create
unique plan bonus calculations per team, in addition to the default proration
formula.
6. In the Formula field, define the formula by specifying data elements, operators,
or constants.
Click in the lightly-contoured entry box and start typing. A drop-down list
appears (as shown below) with the context-sensitive options available. Type
the complete entry or choose an option from the list.
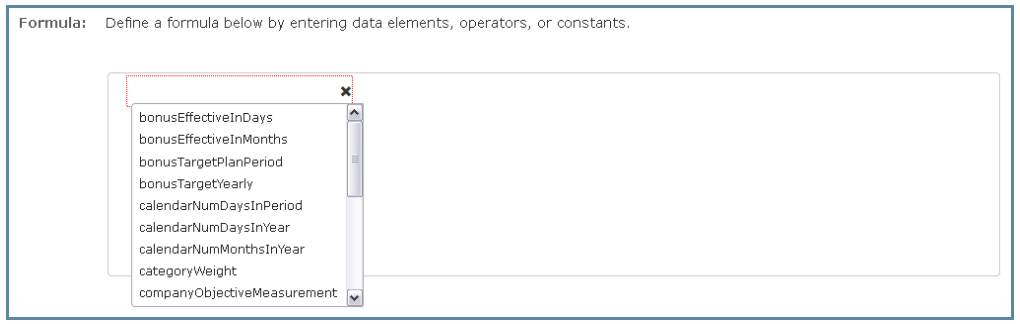
Formula Field
You can choose from among the following data elements:
Person
• bonusEffectiveinDays—The number of days a bonus value is effective in
the plan period. In cases when the bonus value does not change during
the period, the value is the same as calendarNumDaysinPeriod. However,
if the bonus value changes during the period, this is the number of days
effective for each bonus value.
• bonusEffectiveinMonths—The number of months the person has a non-zero
bonus in the fiscal year.
• bonusTargetPlanPeriod—The bonus value associated with the specific
plan. For example, if a person’s yearly target is 8000, the bonusTargetPlanPeriod
for a single quarter’s plan would be 2000.
• bonusTargetYearly—The yearly bonus target assigned to the person for the
fiscal year.
Calendar
• calendarNumDaysinPeriod—The number of days in the period for the specific
plan. For a yearly plan, this is the number of days in the fiscal year. For
a quarterly plan, this is the number of days in the quarter for the plan.
• calendarNumDaysinYear—The number of days in the fiscal year.
• calendarNumMonthsinYear—The number of months in the fiscal year.
Lookup Table
• lookupTable()—References the specified lookup table with the measurement
value of the specific objective on the plan.
Objective
• categoryWeight—The weight of the category associated with the specific
objective on the plan.
• companyObjectiveMeasurement—The measurement percentage value
for the highest weighted company objective on the plan.
• objectiveWeight—The weight associated with the specific objective on
the plan.
• individualObjectiveMeasurement—The measurement percentage value
for the specific individual objective on the plan.
Plan
• planPaymentYeartoDate—The sum of payments generated for the person
year-to-date.
You can also choose from a list of mathematical operators. Continue adding
data elements, operators, or constants to the formula, as needed.
To insert an entry between existing entries, click the ![]() button in the formula
button in the formula
and specify the value. To delete an entry, click the corresponding ![]() button.
button.
You can also use the tab key to move to the next entry in the formula.
7. Click the ![]() button to save the new formula. Alternatively, click the
button to save the new formula. Alternatively, click the ![]()
button to dismiss the screen without creating the formula.
Edit a Formula
Changes to formulas are reflected immediately on any plan that is not completed.
1. Click the Setup tab, click Calculations in the secondary menu, and then click
the Formulas tab. The Formulas screen appears.
2. Hover over the formula, and click the Edit button that appears. The Edit Formula
screen appears.
3. Modify the fields, as required, including Formula field if needed.
To modify the formula, do the following:
• To insert an entry between existing entries, click the ![]() button in the formula
button in the formula
and specify the value.
• To delete an entry, click the![]() corresponding button.
corresponding button.
• Press the tab key to move to the next entry in the formula.
4. Click the![]() button. Alternatively, click the
button. Alternatively, click the![]() button to dismiss
button to dismiss
the screen without saving your changes.
Copy a Formula
1. Click the Setup tab, then click Calculations in the secondary menu. The Formulas
screen appears.
2. Hover over the formula, and click the Copy button that appears as a pop-up.
The Create Formula screen appears with the fields already populated using
values from the formula you are copying.
3. In the Name field, type a new name for the formula.
4. Modify any other fields, as required.
5. Click the![]() button to save the new formula. Alternatively, click the
button to save the new formula. Alternatively, click the ![]()
button to dismiss the screen without creating the formula.
Delete a Formula
1. Click the Setup tab, click Calculations in the secondary menu, and then click
the Formulas tab. The Formulas screen appears.
2. Hover over the formula, and click the Delete button that appears as a pop-up.
A confirmation dialog appears.
3. Click the ![]() button to delete the formula.
button to delete the formula.
Alternatively, click the ![]() button to dismiss the dialog
button to dismiss the dialog
without deleting the formula.
Assign Formulas to a Team
You can assign the formulas to use to calculate company and individual objectives
when creating or editing a team.
note: Changes to team formulas are reflected immediately on any plan that is not
completed.
1. Click the Setup tab, then click Teams in the secondary menu. The Teams
screen appears displaying all teams in the results area.
2. Create a new team, or edit an existing team.
3. Specify or modify the Name and Description fields, as required.
4. In the Formulas field, select the respective formulas to calculate the company
and individual objectives for the team.
If the formula references a lookup table, a new field appears allowing you to
choose the lookup table using a drop-down list.
5. Click the ![]() button
button