Getting Started with Connect UI
Getting Started with Connect UI
Xactly Connect enables your organization and system integrators to easily and securely transform your data and ingest it into the Xactly product suite. You can also use Connect to export your Xactly data to a number of third-party systems. The Connect UI provides all the power and functionality of Connect services within an intuitive web-based user interface.
Logging into Connect UI
Use your Xactly username and password to log in to the Connect UI through the standard Xactly Login page.
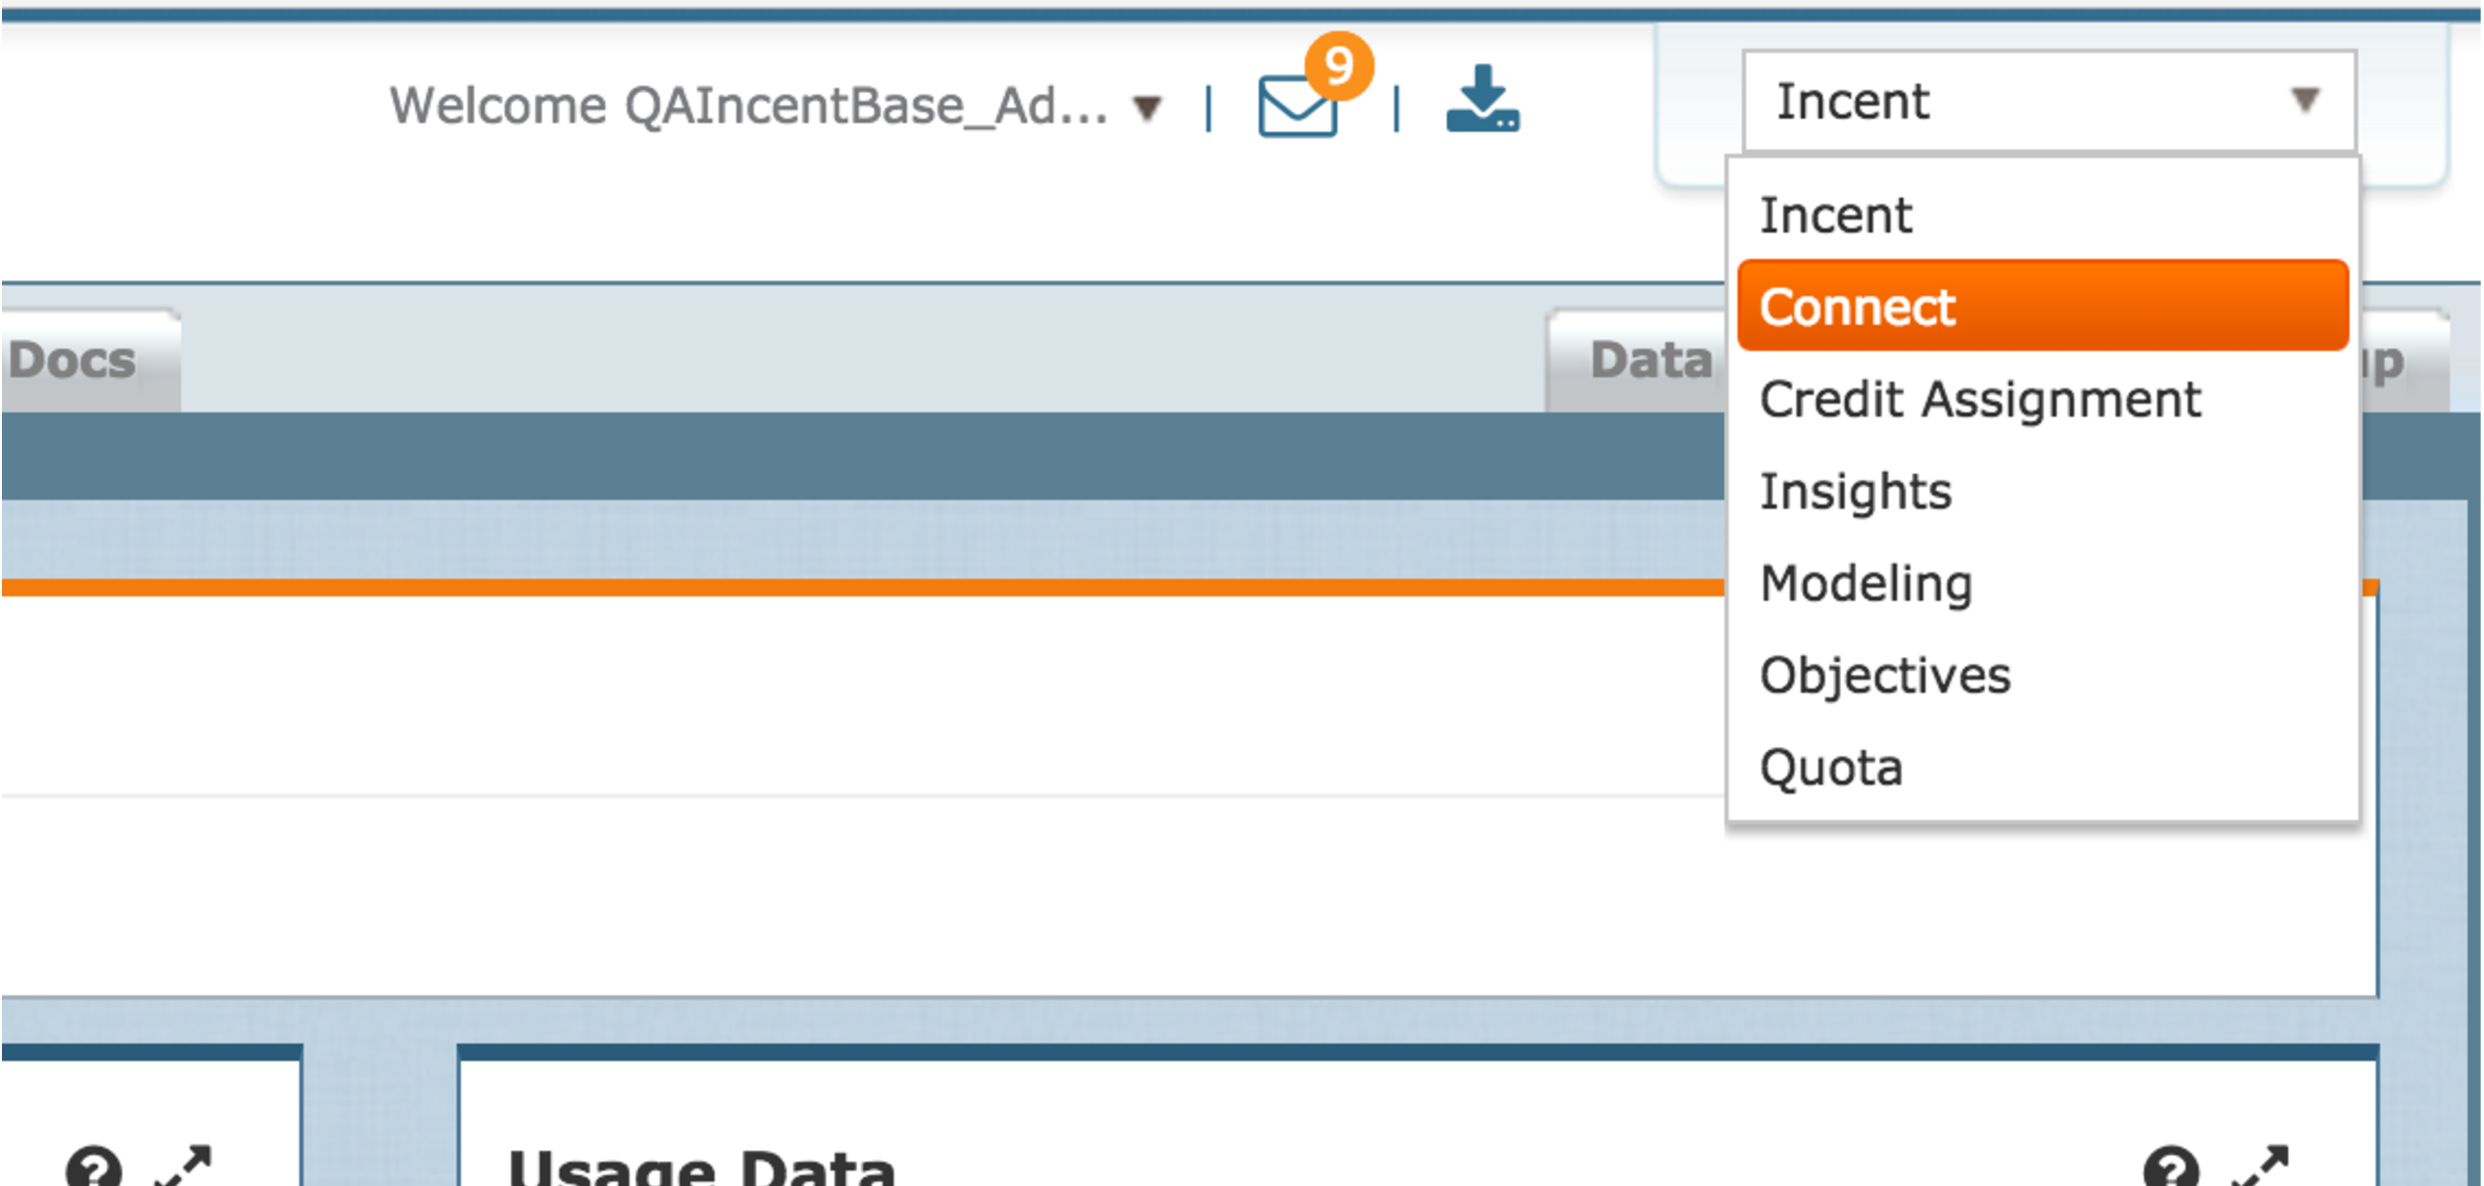
Note: If you are an Incent user and a Connect user, you can use the application menu to switch between apps.
The first time you log in, you have the option to view an interactive product tour that briefly describes the main features of the Connect UI. The following sections provide more details about each of these capabilities.
Dashboard
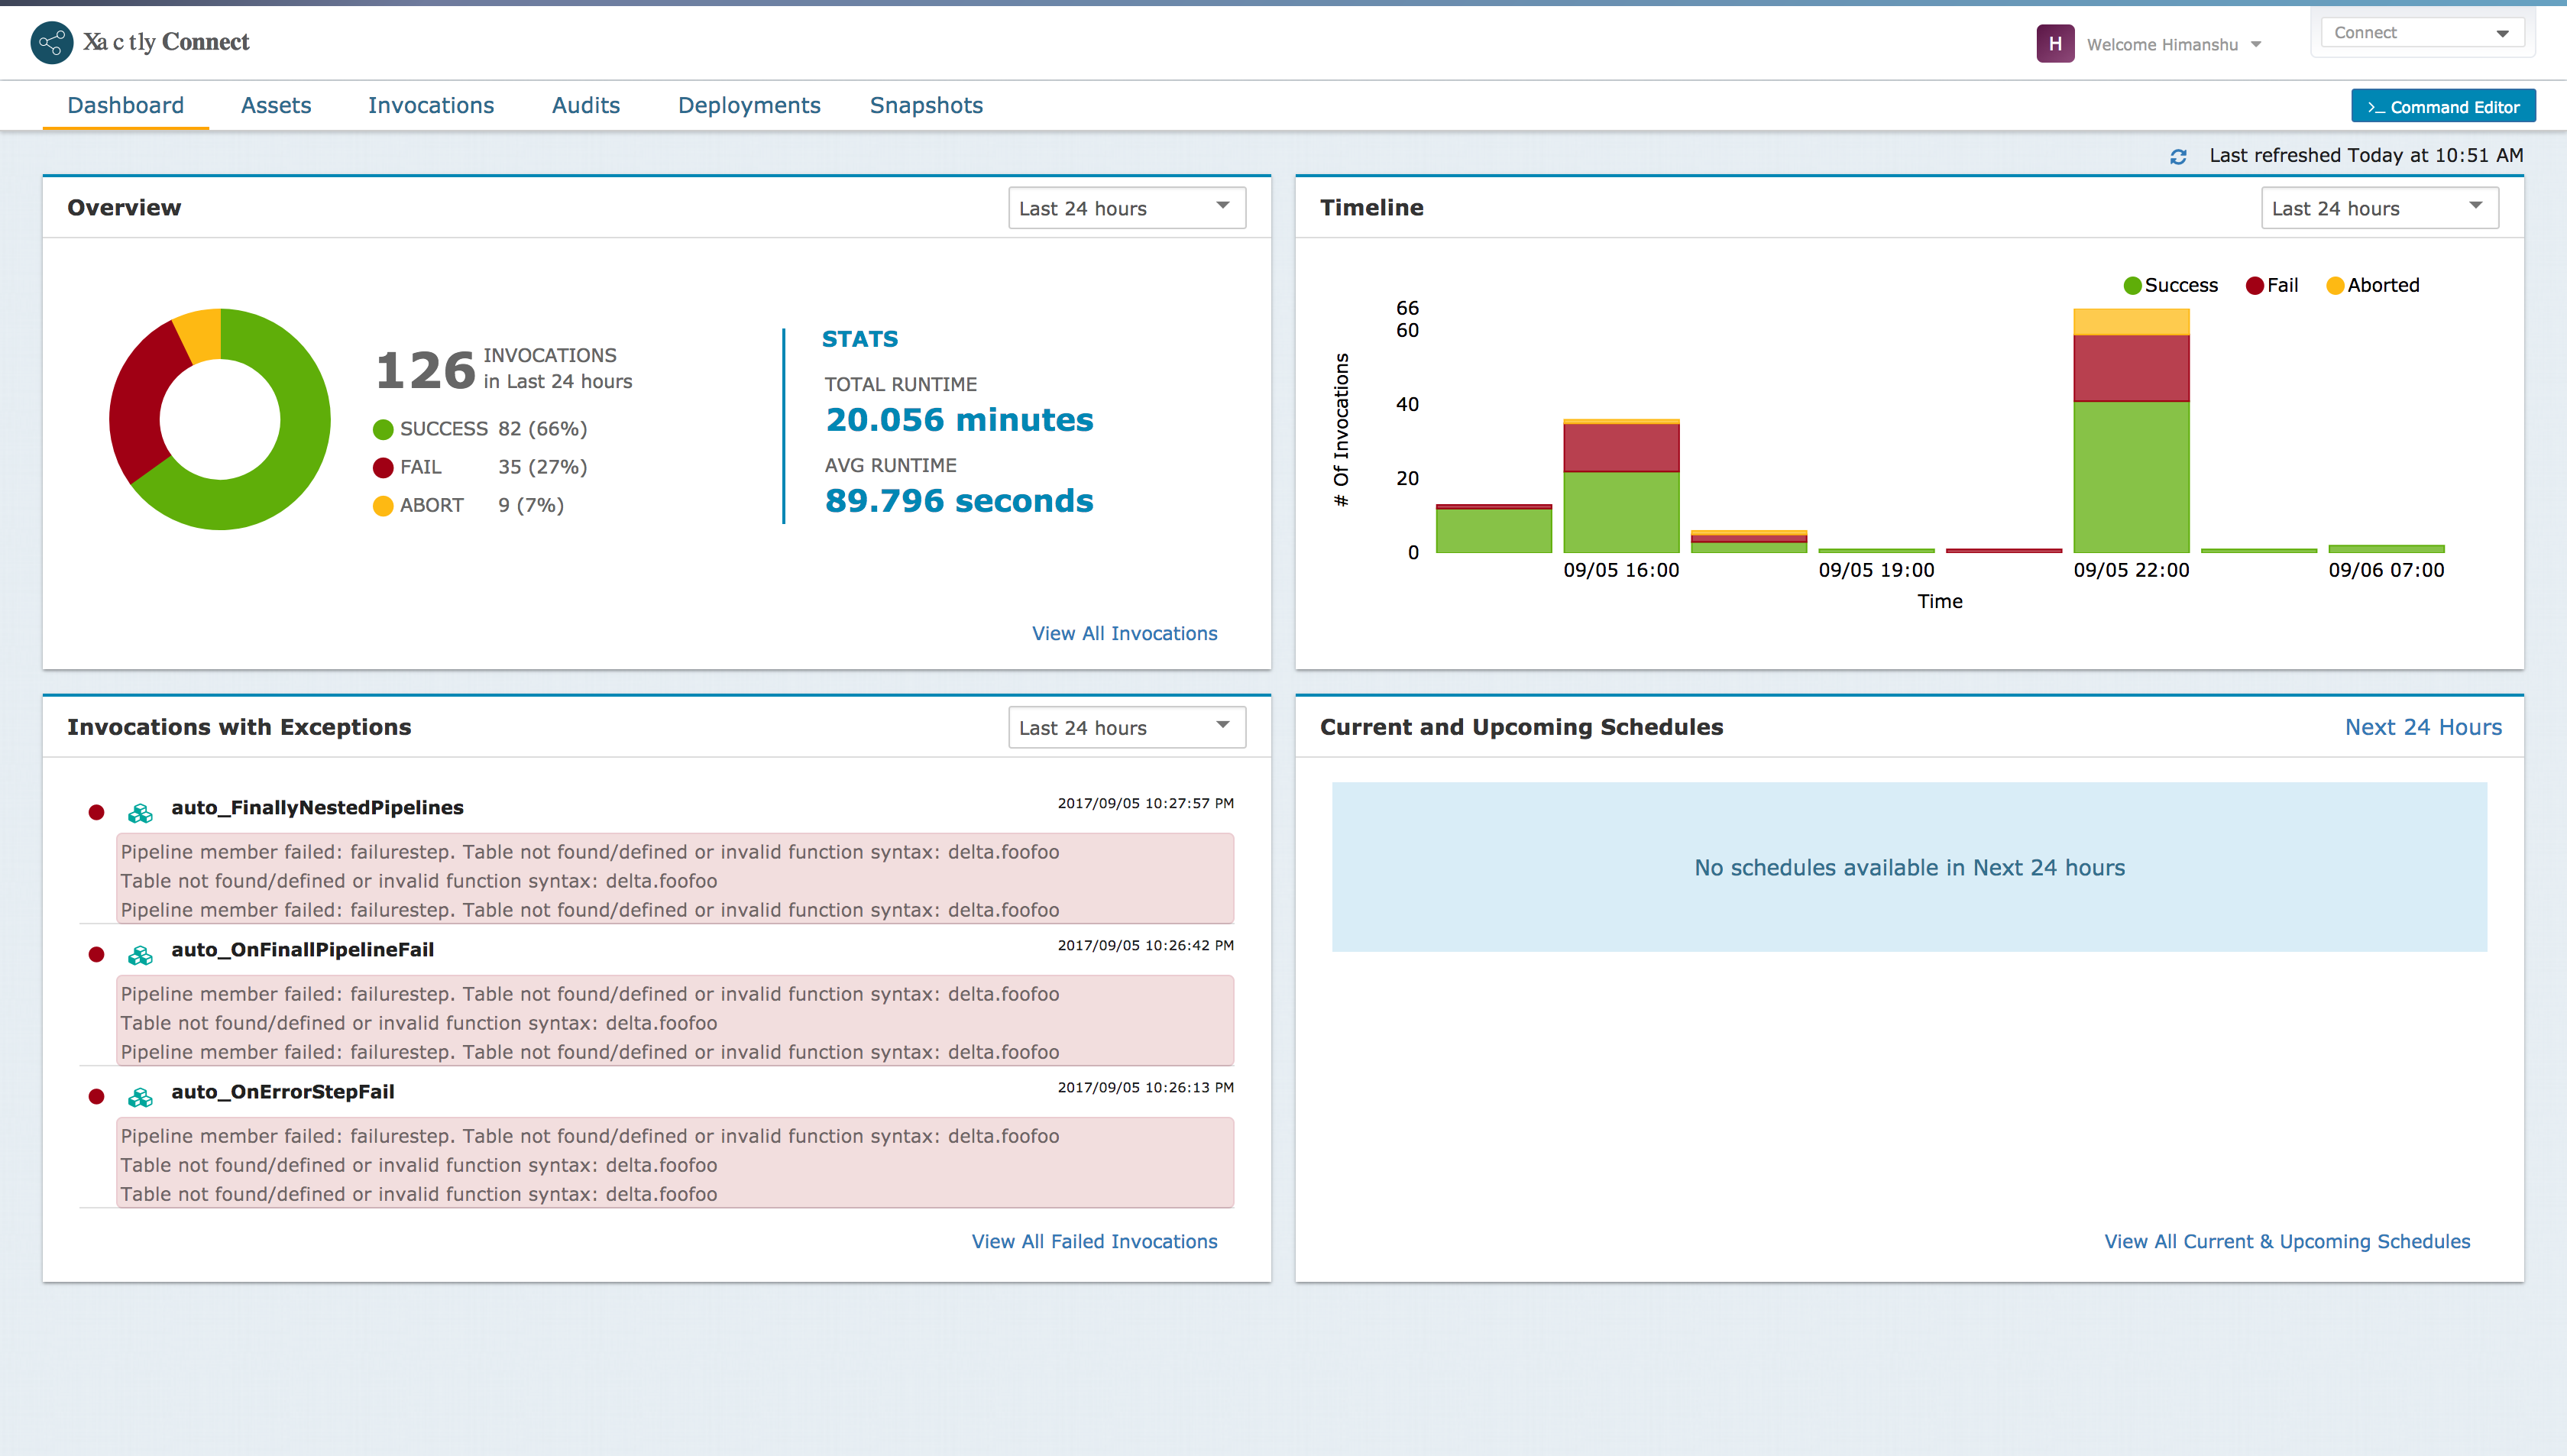
The Dashboard is a convenient way to display the status of your running Connect environment. The Dashboard displays clear metrics about the number of invocations (Connect sub-process runs), the duration of the invocations, along with details about invocations that have succeeded or failed. There is also a convenient list of recent scheduled jobs.
Assets
Assets are the principal way to encapsulate, group, and organize Connect commands so that they can be assembled, used, and reused in your Connect workflows. There are several sub-sections under the Assets tab corresponding to the types of assets that you can manage through Connect. Hovering over each icon gives you an indication of the type of asset.
![]()
From left to right: Schedules, Pipelines, Steps, Emails, Variables, Files, Iterators
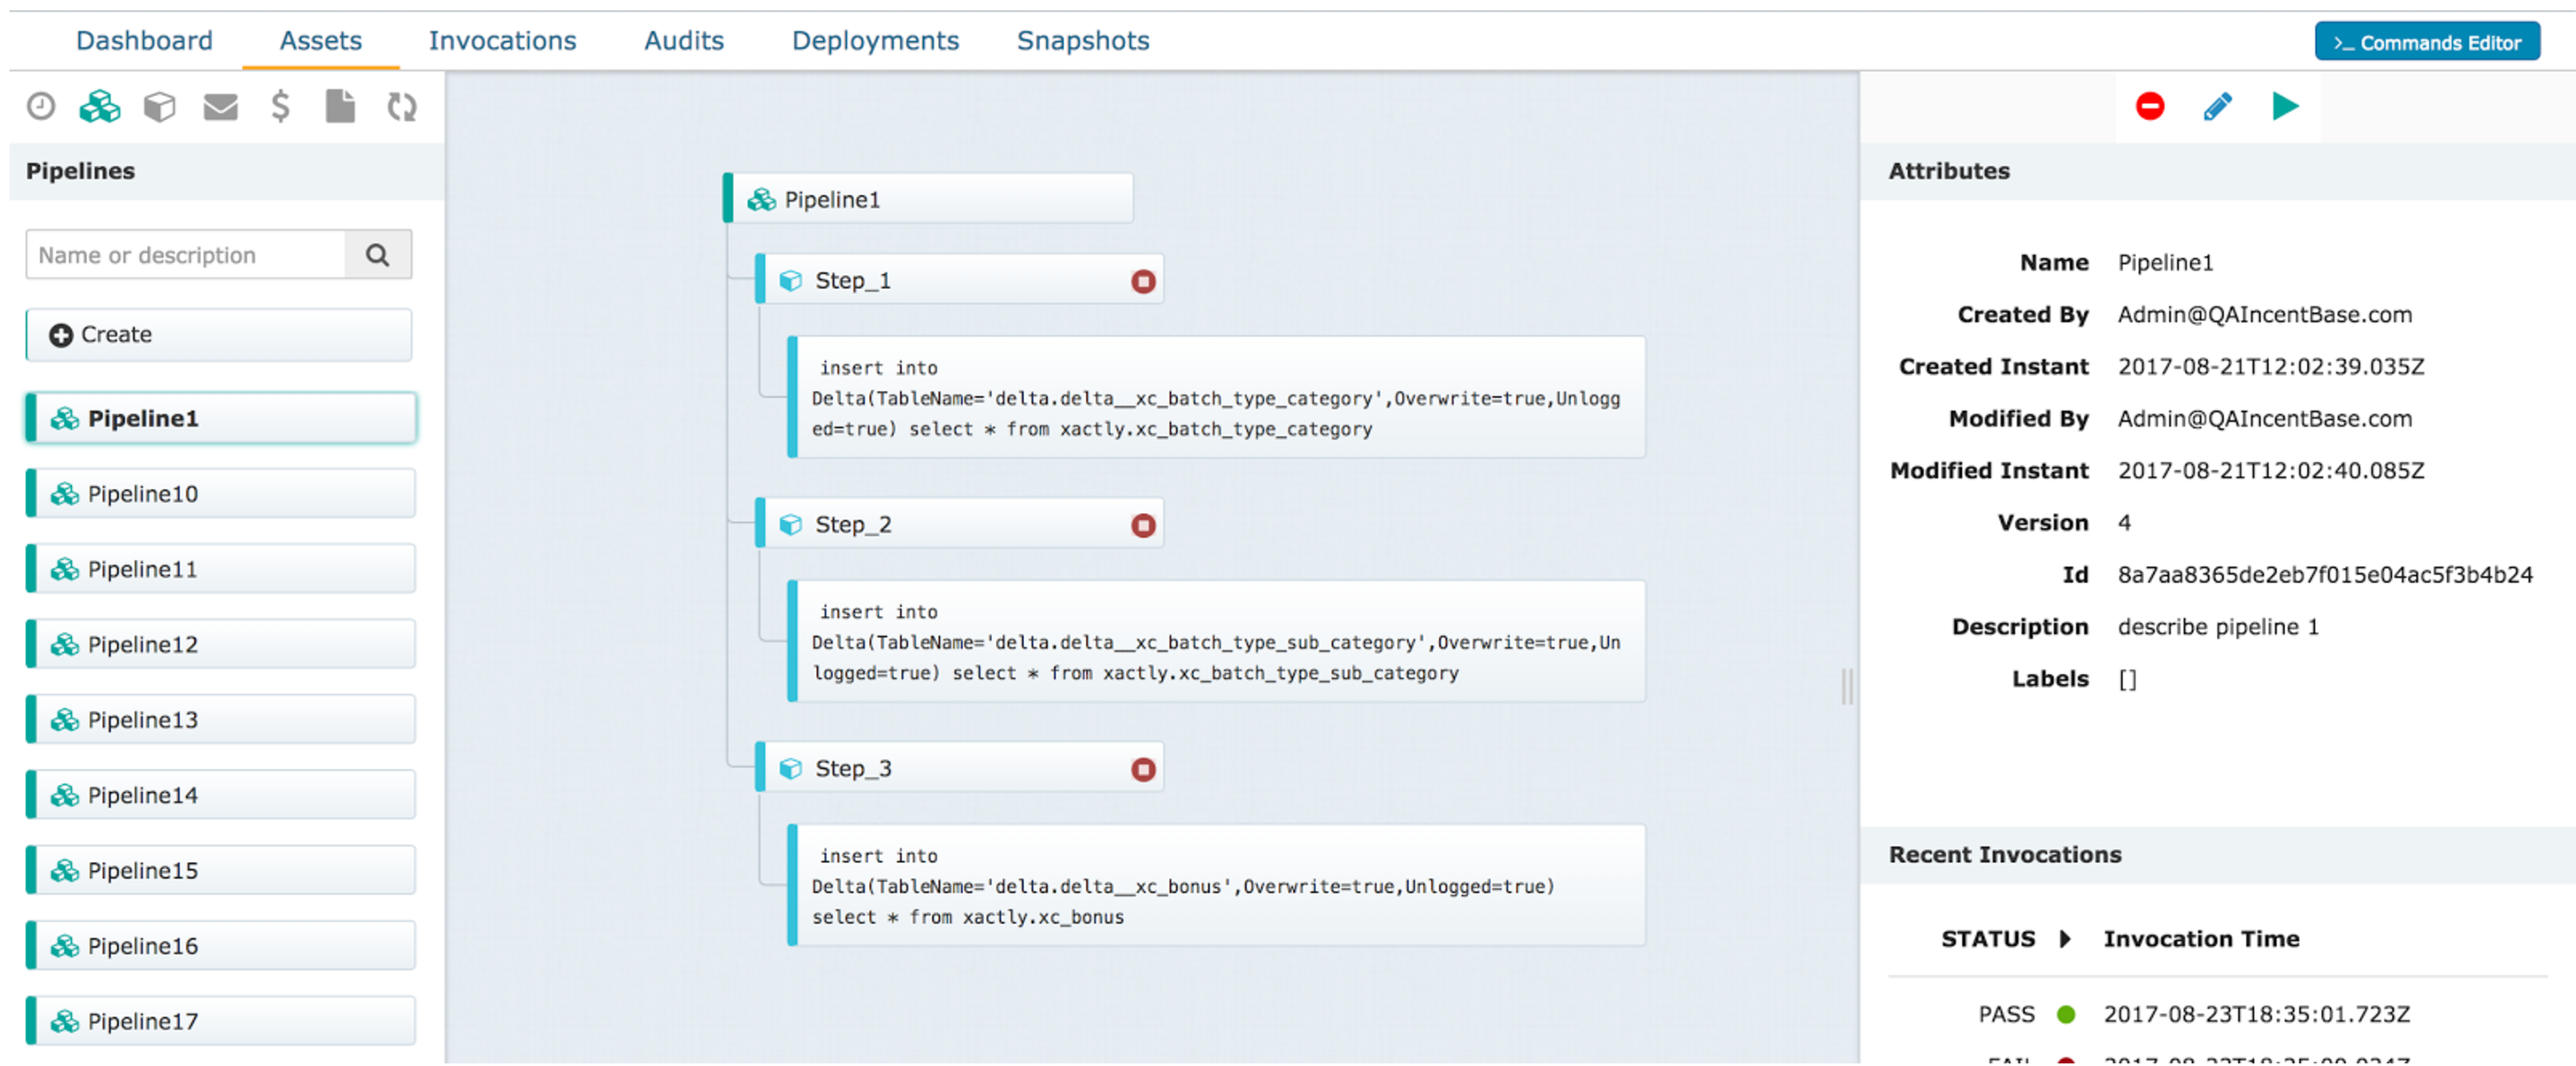
After selecting an asset type, you can create one or more assets, modify or delete existing assets, display asset details, and run any of those assets that can be invoked. Assets are versioned and, each time you modify an asset, Connect creates a new version while keeping the old version in a history list.
The asset Attributes pane (on the right side of the screen) displays current asset details together with a list of previous versions enabling you to see what has changed. In addition, if an asset has been invoked, a list of recent invocations appears in the bottom-right pane.
Read about Xactly Connect’s Domain Objects for more information about assets.
Command Editor

At the heart of any Connect workflow are a series of xCL commands and xSQL queries. These are the commands that import, manipulate, transform, and export data in your workflow.
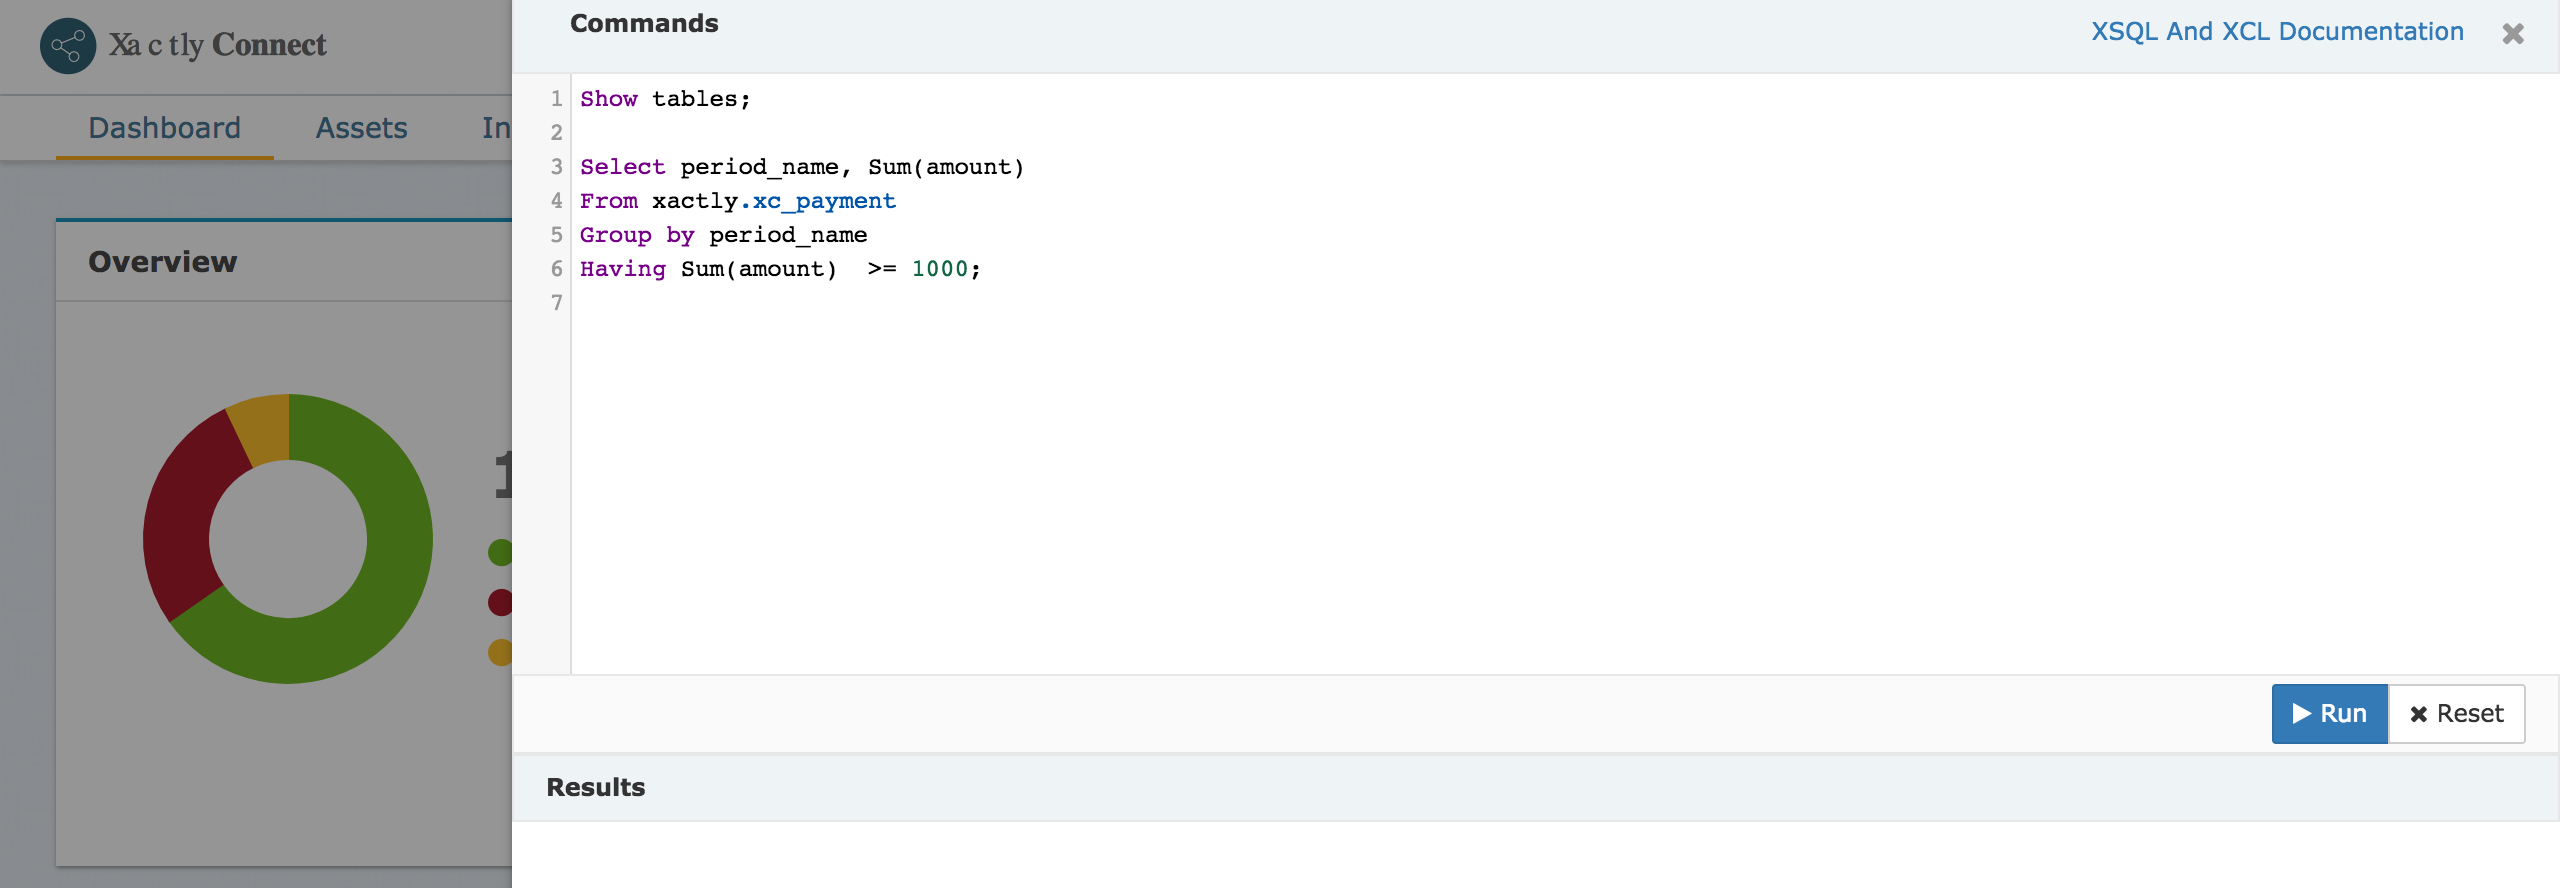
The Connect UI offers a Command Editor to allow you to try different commands, craft the right query, and review the results. After you have composed the right commands and queries for a given stage of your workflow, you can package them into a step and position the step in a pipeline.
Note that you type commands in the top pane of the Command window, and review results in the bottom pane. You can also run any previously-typed commands by highlighting the commands and clicking the Run button.
Invocations
The Invocation tab displays all recent invocations in your environment. Each row in the table shows basic information about the asset that was invoked, whether it is running or completed, and the identity of the invoker with the start and end time for the invocation.
Selecting a row displays more detailed information about an invocation. You can also search invocations using RSQL.

Audits
Whenever you interact with Connect, a REST API call is made to a Connect service. The Audits tab shows a list of these calls, essentially detailing every action taken in your environment. The page also shows who initiated the action, when it happened, and whether there was a success or error response from the service.
Note that the data displayed, including methods and status, follow REST conventions. Selecting a row in the table reveals further details about the item. You can also search audits using RSQL.

Deployments
It is best practice to develop and test your Connect workflows in a pre-production environment prior to running them in production. This is the best way to ensure your production environment stays free from data corruption caused by a faulty and untested process. After you have developed and perfected your Connect assets in one environment, you will use the Deployment feature to move those assets to another environment — for example from Sandbox to Production.
The Deployments tab reveals the “Deploy current” button which will initiate a deployment process. You can also view details about all recent deployments. Selecting a row in the table reveals further details about the item. You can also search the deployment history using RSQL.

Snapshots
A Snapshot is a complete set of all your Connect assets exactly as they were at some point in time. The Snapshots tab provides an easy way to create a new snapshot and display existing snapshots.
Selecting a snapshot reveals the list of contained assets, grouped by asset type. You can also search snapshots using RSQL.
